Black Friday/Cyber Monday Deals and Sales for Spotting Scopes 2020

Spotting scopes are the next step in long-range optics after binoculars. For the hardcore birder or hunter, a spotting scope is going to give you pristine images at a much longer range than even your quality binoculars. Check out our top picks for the best spotting scopes of 2020.

Most spotting scopes are large and will take up a sizable portion of your carrying weight should you choose to bring them to your next excursion. These high-quality optics will make the perfect gift for you or the outdoor enthusiast this upcoming holiday season. You can bet that a majority of them will be on sale even as hunting seasons conclude (and some areas, open up) around the country.

Click here to see all scopes on sale right now!

Current & Expired Sales

Gosky 20-60X 80 Porro Prism

Celestron TrailSeeker 100

Vortex 20-60 x 85 Razor HD


Spotting Scopes We’re Watching

Bushnell Trophy Xtreme

Emarth 20-60x60SE

Roxtant Blackbird High Definition Spotting Scope

Vortex Optics Diamondback Spotting Scope

Redfield Rampage 20-60x60mm


Importance of Spotting Scopes

You’re probably thinking that you’re high-quality sporting binoculars are enough to get you through the hunting or birding season. However, it really depends on the type of animal or object you’re tracking and how well you want to see it. Spotting scopes can zoom in at a much farther range than binoculars and deliver better quality.

If you’re tracking animals well camouflaged in the wild, a spotting scope is going to be one of your best bets at catching movement where other outdoorsmen/women might not see. These optics will usually cost a pretty penny, but Black Friday/Cyber Monday are some of the holidays where you can catch them a sizable portion off of their original price.

Celestron Skymaster Giant 15×70 Binoculars Review

celestron skymaster giant 15x70The Celestron Skymaster Giant 15×70 Binoculars include BaK-4 internal prisms and multicoated optics. These features produce improved vision with brighter resolution, which is of top importance for quality binoculars. Included with the Skymaster Giant 15×70 binoculars are a tripod attachment adapter and a soft carrier case. The imagery processing and visibility are top-notch. Celestron Skymaster Giant 15×70 Binoculars’ eyepieces are also excellent.

Key Specs

Let’s take a look at the overall power of these 70mm optics.

  • 15x magnification
  • Field of View (FOV)-4.4 degrees
    • FOV at 1000yds-230
  • Multi-coated lenses
  • Diopter range- -4 to 8
  • Close Focus Distance 52.5

70mm lens are some of the biggest lenses you can have on handheld binoculars. As a result, you have some of the greatest light gathering power on the market. The diopter settings range from -4 to +8, meaning you can adjust to low or high light situations.

Where some binoculars have trouble focusing and can have a tendency to shift, the Celestron Skymaster Giant 15×70 Binoculars have little to no wobble and are equipped with an amazing center-focus apparatus. In addition to this, the Celestron Skymaster Giant 15×70 Binoculars offer high quality eye relief at 18 millimeters, which is great news if you wear eyeglasses. You can adjust the eyepieces by taking the big cap off from the exit or objective lens and then looking through to adjust the focus of the center ring between the barrels until clear. You can do this for both the right and left separately to achieve optimum clarity.

These binoculars are lightweight but operate best when they are used with an attached tripod. The Celestron Skymaster Giant 15×70 Binoculars are optimal for a multitude of purposes, including stargazing at both the terrestrial and astronomical level and bird watching. They can be used during the day as well as during dusk. Although the size may make you rather noticeable, the Celestron Skymaster Giant 15×70 Binoculars can also be used at sporting events and concerts. The lightweight nature of the binoculars will allow you to utilize them almost anywhere with very low bounce rate.

The Celestron Skymaster Giant 15×70 Binoculars sport a 15x magnification and utilize very large 70 millimeter objective lenses. These lenses also assist in providing maximum brightness for both dimly lit and long-distance conditions. The Celestron Skymaster Giant 15×70 Binoculars have excellent across the field viewing with precise focus. Coated with a rubber protection layer, the Celestron Skymaster Giant 15×70 Binoculars are able to provide users with a no-slip firm grip.

Additional Features

In addition to these incredible features, Celestron Skymaster Giant 15×70 Binoculars also come with a no fault warranty which covers protection and support for the product. The warranty includes Celestron’s promise that all binoculars are free from defective material and that they are appropriate for a lifetime of usability. Celestron will replace or work to repair the binoculars if they are sent in, with prepaid postage and a proof of purchase. Celestron will replace or fix the binoculars, regardless of how they were damaged, without asking any questions.

The Celestron Skymaster Giant 15×70 Binoculars are one of Celestron’s most popular models in their Skymaster series, due in large part to their tremendous quality and lightweight functionality at such an affordable cost. The Celestron Skymaster Giant 15×70 Binoculars exact specifications include a 4.4 degree angular field of view, 4.7 millimeter exit pupil, the near focus is 43 feet, and the binoculars come with an IPD minimum of 56 millimeters and maximum of 72 millimeters. The Celestron Skymaster Giant 15×70 Binoculars come with caps, a strap, a nylon carrier, and a tripod adapter. The Celestron Skymaster Giant 15×70 Binoculars are also water resistant and weigh 48 ounces.

These are incredibly high quality binoculars at a very reasonable price that are perfect for the casual user or for those that are more experienced. Whether you plan to take these on a hike for bird watching, check out the night sky for some amazing star gazing, or a myriad of other purposes which require distance viewing, the Celestron Skymaster Giant 15×70 Binoculars are a perfect fit at an incredible value.

70mm lens are some of the biggest lenses you can have on handheld binoculars. As a result, you have some of the greatest light gathering power on the market. The diopter settings range from -4 to +8, meaning you can adjust to low or high light situations.

Uses

Since these binoculars are made by Celestron, you can already guess what they’re good at. The moon is one of the brightest objects in our night sky and with the 70mm’s variable diopter settings, you’ll have no difficulty seeing it up close when the sky is clear.

These diopter settings work the same during daytime and landscape viewing as well. They come with a tripod adapter as they do weigh about 3lbs free handed. Birding and nighttime sky watching are going to be the biggest and most logical uses for the 70mm’s. 70mm means that you’re going to soak up whatever is giving off light, notably objects in the sky and the moon.

Versus Other Sporting Optics

These binoculars are big, hence why more often than naught, you’ll see them hooked up to a tripod. They don’t make the best hunting binoculars because they are designed for extreme range viewing rather than detailed viewing. Remember, just because a pair of optics has big lenses, doesn’t necessarily mean you’ll get the best details of an object.

Swinging these binoculars isn’t going to be easy due to their size and weight. Compared to wide angled binos and other smaller sporting optics, the 70mm’s aren’t the most logical to take on hunts when you’re lugging them around for hours at a time. Unless you plan to stay in given area, you’re better off using a smaller pair.

Overall

It’s astonishing to note that the 15x70mm’s aren’t the biggest or smallest pair of binos in the SkyMaster series. Regardless, the 15x70mms sit in the middle of the SkyMaster series and provide astounding images for a cheap price compared to other Celestron products.

The 15x70mms don’t have the power to see stars or planets beyond the moon up close and personal but provide a sort of middle ground between mainstream sporting optics and telescopes.

Click here to shop the SkyMaster 70mm.


Celestron SkyMaster 15x70mm Binoculars Review

While Celestron is more known for their telescopes, they sell all sorts of optical equipment including microscopes and binoculars. You don’t normally see Celestron binoculars in the field while you’re hunting and birding. That’s because Celestron manufactures some big binoculars. These 70mm binoculars are apart of the SkyMaster line of optics and isn’t even the largest set of handheld binoculars on the market.

Celestron as a company specializes in viewing objects very far away and objects too small for our naked eyes to see. The SkyMasters feature enormous 70mm lens, capable of getting clear images of the moon in the right settings and conditions.

Here we’ll explore the Skymaster 70mm’s, and where you can use them best.

Optics

Let’s take a look at the overall power of these 70mm optics.

  • 15x magnification
  • Field of View (FOV)-4.4 degrees
    • FOV at 1000yds-230
  • Multi-coated lenses
  • Diopter range- -4 to 8
  • Close Focus Distance 52.5

70mm lens are some of the biggest lenses you can have on handheld binoculars. As a result, you have some of the greatest light gathering power on the market. The diopter settings range from -4 to +8, meaning you can adjust to low or high light situations.

Uses

Since these binoculars are made by Celestron, you can already guess what they’re good at. The moon is one of the brightest objects in our night sky and with the 70mm’s variable diopter settings, you’ll have no difficulty seeing it up close when the sky is clear.

These diopter settings work the same during daytime and landscape viewing as well. They come with a tripod adapter as they do weigh about 3lbs free handed. Birding and nighttime sky watching are going to be the biggest and most logical uses for the 70mm’s. 70mm means that you’re going to soak up whatever is giving off light, notably objects in the sky and the moon.

Versus Other Sporting Optics

These binoculars are big, hence why more often than naught, you’ll see them hooked up to a tripod. They don’t make the best hunting binoculars because they are designed for extreme range viewing rather than detailed viewing. Remember, just because a pair of optics has big lenses, doesn’t necessarily mean you’ll get the best details of an object.

Swinging these binoculars isn’t going to be easy due to their size and weight. Compared to wide angled binos and other smaller sporting optics, the 70mm’s aren’t the most logical to take on hunts when you’re lugging them around for hours at a time. Unless you plan to stay in given area, you’re better off using a smaller pair.

Overall

It’s astonishing to note that the 15x70mm’s aren’t the biggest or smallest pair of binos in the SkyMaster series. Regardless, the 15x70mm’s sit in the middle of the SkyMaster series and provide astounding images for a cheap price compared to other Celestron products.

The 15x70mm’s don’t have the power to see stars or planets beyond the moon up close and personal but provide a sort of middle ground between mainstream sporting optics and telescopes.

Click here to shop the SkyMaster 70mm’s.


A Basic Guide to Birding

If you type in “what are the most popular outdoor activities in the U.S.?”, you’ll get a response you probably weren’t expecting. Birding ranks in the top 25 most popular outdoor activities in the U.S. The activity isn’t too complicated beyond what its name suggests, but there is no denying that it is a nearly billion dollar industry with a friendly community that spans the entire world.

In this guide, we’ll give you a general overview of birding and the best practices and equipment for you to consider when planning your next outdoor adventure.

What is Bird Watching?

We’ve compiled the massive history of birding (also called bird watching) for you to see just how far back this hobby has existed and how it seems to have flown under the radar literally and figuratively. Nearly 40,000 years!

It seems simple enough, but birding goes beyond the act of watching the thousands upon thousands of species of birds around the world go about their day. The activity will depend on how far one is willing to see a type of bird. Sure, you see starlings, ducks, and geese almost every day, but have you ever stopped and just watch them more than a couple of minutes? Perhaps you’ll notice something interesting about their behavior that you didn’t see before. For birds and humans, the sky is the limit regarding what you might see on any given day.

Who’s up for it?

There is no barrier to entry concerning age for birding. Families of all sizes and individuals of all ages are known to engage in birding on the regular. Not only is it a cheap hobby to get into, but it also combines one’s love of the outdoors with the desire to see wildlife in their native habitats.

Prices on travel and optics will be the largest concern. It depends on whether you are looking to just see the birds or take pictures of them, which will raise the question of what type of optics you should buy. The birding community is split about 50/50 in terms of who sees with their optics (binoculars/spotting scopes), and who takes pictures (cameras).

Equipment

While it’s perfectly fine to see birds with the naked eye, there’s no telling what conditions, locations, and distances you’ll be encountering. For these reasons, optics such as the following are used to view birds in their natural habitat without the risk of disturbing them—

To keep your valuable optics safe, a safety harness may also be in order if you are planning to go near uncertain terrain. A typical safety harness fits around cameras and binoculars. You’ll have to be even more cautious when handling a spotting scope or telescope on uncertain terrain. A tripod for your spotting scope or telescope will be absolutely necessary.

To get the most out of each day spent bird watching, consider investing in a Perception HD 20-60x60mm Spotting Scope or a pair of Perception HD 10x42mm Binoculars, both sold by Upland Optics.

 Finding Birds

Birding can be a little intimidating at first. You want to see all the birds within a given amount of time but there’s only so much light during the day. That is why some communities, particularly the  Cornell Lab of Ornithology, have built apps and tools specifically for helping you find birds.

To be successful at birding, the first step is identifying the bird you’re looking at. Here’s a quick how-to on identifying birds on the go. Field guides—usually picked up from a chamber of commerce, ranger station, or nearby bookstore—will usually detail most if not all the birds in the area.

Bringing birds to you

You can expect that not all birds are going to appear when you want them too. Some are shyer than others, and the sight of a big lumbering human like yourself will easily frighten them. Getting birds to come to you does seem like the more economical reason, and you can still get a wide variety of birds to visit depending on where you live.

There is a way you can bring them to yourself. Most of us are quite enthralled by the sight and smell of food and shelter, and so are birds. Birders skilled in woodcraft and overall construction place birdhouses, baths, and other structures to draw birds to within feet of their own houses.

  • Bringing a birdhouse out into the wilderness with you would be a little tedious.

A hummingbird, for example, is drawn to the nectar given off by certain flowers, and some birders put their gardening skills to good use by planting the flowers that are most desirable. Houses, baths, and plants range all over the place regarding price. As long as you provide an incentive for the bird to come to you, you’re all but guaranteed some visitors in the days and week.

Seasons and Travel

One aspect of birdwatching that you should take into consideration is the change in season. Birds never stay in one place for too long (unless you’re a penguin on Antartica), and usually, migrate towards warmer climates (unless you’re an owl who stays in a hollowed out tree for the winter).

You can’t count on a bird being in one place all the time unless it has a massive population worldwide. Rare birds will pay closer attention to the seasons than others and thus are harder to track.

Traveling is what will separate the amateurs from the life long enthusiasts. If you want to have the best possible chance of seeing rare birds, you will need to plan your traveling far in advance and study the migration and flying patterns of these particular birds.

  • If you dig deeper into your travel search, you’ll most likely find cabins and houses marketed specifically for birders that coincide nicely with certain migration times.

Listings

When you first decide to invest in birding, consider if you plan to pursue it as an amateur or professional. There is nothing wrong with either path, but keep in mind the latter will involve more time and money.

If you plan on seeing the most birds possible in your life time, it will be important to take detailed lists of the birds you’ve seen. Why? Two species that look identical could be different on the slightest level. You don’t want to spend lots of money to see a particular bird when you’ve already seen the same bird!

Some things to note about the birds you saw can be—

Name and family (scientific name)
Location
Body make up
Color and feather pattern
Migration pattern
Social interactions
Hunting habits

Not only will your lists help you determine which birds you haven’t seen but they will help other birders in the same situation or who are just starting out.

Community

The birding community is a vast and expansive collection of people around the world who are dedicated to helping you get started. We can almost guarantee you that there is a birding organization not too far away from where you are right now.

The reason why you probably don’t hear much about birding is similar to the activity itself. Keeping noise to an absolute minimum is necessary to get some of the more rare birds to emerge from their homes.

We’ve made a list of communities that are ideal clubs to help you get your birding career get off to a flying start.

What does Birding do for the environment?

We’re glad you asked! Birding is not only a popular hobby, but it also aids aviation and wildlife experts in keeping track of all species, particularly those that are threatened and endangered. Wildlife officials routinely utilize those lists, mainly the dates and times, to make correct judgments on habitat preservation and restoration.

Your work can be of great impact and we appreciate your concern for the wildlife.


Celestron NexStar 4 SE Review

After the 90 GT, we wondered what sort of telescope Celestron would produce next. It would probably be something straight out of the pages of a science fiction book if it were anything more advanced than the 90 GT. Indeed, Celestron seems to be moving in the direction of hands-free telescope movement, in particular with the development of the NexStar 4 SE.

At first glance, it looks like there’s a telephone connecting the telescope to the motorized altazimuth mount and tripod, but this is a next generation object tracking system. Many of the features common across Celestron products also appear in the 4 SE. Celestron NexStar 4 SE

Price

Where you end up purchasing the 4 SE will depend, but one thing that reviewers can’t deny is the unbeatable price. The 4 SE isn’t universally known as an entry-level/beginner telescope, but its hands-free control system makes it pretty easy to use.

The telescope’s small body means its optics can’t see the furthest distances into space, but that doesn’t mean that they sky isn’t full of objects within viewing distances. In addition to purchasing the 4 SE, you receive a 40,000 object database. These objects may not all be visible each night, but each night will yield a different sight.

Features

In addition to the control system, many features such as SkyAlign allow the user to line up three, bright celestial objects in the sky for viewing. The StarPointer finder scope will help you lock on and stay in view of whatever object(s) you want to track.

A new feature that the 4 SE sports is the StarBright XLT system. We mentioned that the 4 SE’s size limits its viewing range. To complement this, the StarBright system maximizes light transmitted from objects to the telescope. A 102mm aperture is the stock opening for light to travel through. This is such a small opening that you can understand why the StarBright system would need to be utilized.

You can also engage in light astrophotography with the 4 SE. It is not a dedicated astrophotography telescope. The pictures you take and what you’ll be able to view will be limited.

Assembly

If you’re looking at purchasing this telescope after handing your Vixen Space Eye off to your kids, you’re in the right direction. Most 4 SE users have raved about the telescopes portability and weight, making it easy to transport beyond the confines of your home and the surrounding area. Don’t get too over-confident, however, just like the 90 GT, it is quickly moved and if not rooted properly, can tip over with not too much force.

Overall

For the price, the 4 SE comes equipped with a majority of the features that appear individually in other telescopes. Don’t forget about its small but worthwhile ability to engage in astrophotography. It’s no surprise that the 4 SE is one of the best all around telescopes out there.

A major gripe is going to be the viewing range, but that shouldn’t limit your search for new objects in each night sky. With the 40,000 object database courtesy of Celestron, who knows what you will find in the last frontier!

Celestron NexStar 130 SLT Review

Astrophotography is exactly how the name sounds—taking pictures of the great unknown. However, astrophotography requires a different type of telescope altogether. The NexStar 130 SLT is built by the same company, Celestron, that makes the AstroMaster 114 EQ, also a great telescope. There are fundamental differences that come with the 130 SLT, specifically the optics that are involved for the telescope to specialize in astrophotography.

It is not uncommon to see people modify their typical telescopes to be astrophotography capable. However, this process can be very risky if you don’t know what you’re doing. That is why the 130 SLT, being dedicated to astrophotography, will be the best choice for you to avoid all the risks of modding. NexStar 130 SLT

Differences with Normal Telescopes

To start, the 130 SLT is computerized, unlike most telescopes that you can simply look through with no questions asked. SInce the 130 SLT is a dedicated astrophotographer, the computer systems, and the photography software can be a little tricky to operate. Most customers have found issue with errors that usually stem from a mix-up in the process of setting the telescope up to take pictures.

You can count on the 130 SLT being more delicate and sensitive to sudden movements than most telescopes. You might have the perfect picture of a celestial object lined up, and then lose the entire focus because of vibration or disturbance. Be careful around it and its computer hardware!

Aperture

The 130 SLT packs a large 130mm aperture, giving it the ability to collect light on a broad scale, which is perfect for astrophotography. If you are unfamiliar with aperture, here’s a quick rundown:

  • Smaller the Aperture (big numbers)— The less light enters the lens, but you will get more precise and sharper photos.
  • Bigger the aperture (small numbers)— The more light enters the lens, allowing for better depth of field and more light gathering from distant objects.

It can be quite confusing to remember the inverse details of aperture, but it’s important just to practice and test the limits of the 130 SLT. The telescope also sports a feature called SkyAlign, enabling you to align and focus on up to three bright objects in the sky. There are innumerable numbers of stars and objects giving off an extraordinary amount of light, so don’t feel limited!

Mount

The 130 SLT comes equipped with a motorized Altazimuth mount. This makes it easier to track objects as they move across the sky instead of using your hands. The real difference maker is the brightness of the object you are looking at. If you are trying to look at a far away planet or object, there’s a good chance it might not generate enough light for the telescope to see.

Similar to the accessories of the AstroMaster, Celestron provides you with a 4,000 object database to scour the sky for. Having the database is one thing, but the night sky is never the same as the evening before, so be on the lookout for new objects that appear each night!

Overall

The 130 SLT will be one of the more tricky telescopes to handle given its purpose, but that doesn’t mean it’s unfriendly to beginners. It will cost you a couple of hundred bucks, but you have to put that into perspective. You’ll be receiving one of the best astrophotography telescopes out there with some different features included.

With all the various tools and programs included, rest assured that you’ll be taking and saving pictures of the stars and planets in no time.

Celestron COSMOS 90GT Review

We all know that telescopes are some of the most advanced and intricate pieces of technology in the modern age. But have you considered a telescope that you can control…from an app on your smartphone? Celestron continues to amaze us with new and innovative products, this time with the COSMOS 90 GT.

You’ll be able to differentiate the 90 GT from other, powerful Celestron products by its longer, tubular body. You’ll also notice that there is no place to properly grip the telescope. The 90 GT is a completely hands-free telescope, except for the controls you make on the smartphone/tablet app. Celestron COSMOS 90GT

Apps and WiFi

Unlike most telescopes, this one is perhaps the best to be controlled within the vicinity of your home, assuming you have WiFi close by. The COSMOS Celestron Navigator app is free to download for iPhone, iPad, and Android smart devices.

This telescope seems like it’s a product of the next generation and more in tune with the larger, more advanced telescopes used by research institutions. Why bother fiddling with your hands when an app, database, and controls are all on your smart device?

A drawback to this telescope is that it can only be controlled through a WiFi connection to its associated apps. If you’re out in the wilderness hoping to use this telescope, the only solution would be to use your smart device as a mobile hotspot. Regardless, the 90 GT is a preferred stay-at-home telescope.

Tripod

One aspect of the 90 GT that can be difficult to adapt to is the stabilization of the tripod. Many users have reported problems with their view because the tripod’s legs are always displaced and at different levels. You will find the process of using this telescope harder than usual if you live near inconsistent terrain. Even streets can be uneven with cement being bumpy and rough.

You may have to innovate to get the tripod on solid and sturdy ground. This shouldn’t be too much of a problem if you have a mobile, flat surface for the tripod to stand on. A side walk will also make a good substitute.

Accessories

Like most Celestron products, the 90 GT comes with at StarPointer finderscope, always a handy addition for anyone who has trouble tracking objects with just their hands. The COSMOS Navigator App that controls the telescope will be immensely useful in finding stars and identifying constellations.

The 90 GT is perhaps the best in its class at generating fine views of planets. While planets do not produce nearly as much light as stars, the 90 GT makes up for this by employing a 90mm refracting lens. It also comes equipped with two differing size eyepieces (20mm and 10mm) for different magnifications, depending on how far you want to look up into the sky.

Overall

The 90 GT is a fantastic and outrageously advanced telescoped to be able to be controlled by your smartphone. The telescope will automatically adjust to the commands given to it and with the correct placement of the legs, give you quality viewing.

While some may find its requirement of WiFi to be problematic, the 90 GT will compensate you by giving you some of the best views of the planets in our solar system. Perhaps you’re interested to see what the long fabled rings of Jupiter look like?

The COSMOS 90 GT can help you with that.

How to Do Astrophotography Like a Pro

Astrophotography means taking pictures of objects in the night sky such the moon, stars and distant galaxies or constellations. Since these objects are very far away, and the light from them tends to be very faint, astrophotography is more difficult in some ways than other types of photography.

What You Need

Your equipment depends a great deal on what you are trying to photograph and the level of detail you want to achieve. If you want to photograph the full range of possibilities you should have all of the following:

  • Camera with manual shutter control and a wide aperture
  • Tripod mount
  • Telescope
  • Computerized altazimuth mount
  • Equatorial motorized mount
  • Camera remote control

Using a Simple Digital Camera (Beginners)

One of the best things about astrophotography is that just about anyone with a digital camera can take some simple but beautiful shots of the night sky without any sort of fancy equipment or complex technical know-how. If you are just starting out with this kind of photography, or you aren’t able to buy more expensive equipment, then just use the following tips to take good shots.

It is important that the camera be manually set for taking pictures of faint and distant objects. This means keeping the exposure time as along as possible and having a wide aperture. There are a few other digital camera tricks that can help as well. These settings can usually be found in the camera’s menu.

Digital cameras also have a sensitivity multiplier called the ISO setting. This is another way to capture more light and details. The trick here is to set the ISO as high as possible for the camera, and then go back and filter out any problems on the computer afterward.

Be sure to keep the auto-focus turned off. Standard digital cameras are not programmed to focus on such distant and faint objects, and it is very unlikely that auto-focus will get it right. Then you can manually focus the camera at its farthest focus setting.

Be sure to take steady shots either with a tripod mount or using some other anchor for support. Any movement in the camera will turn a long-exposure shot into a blurry mess. Keep in mind that with these extreme settings, many initial pictures may not look that great. Most shots done this way will require some tweaking on the computer before being presentable, but any digital photographer expects this. There is always computer work to be done afterward.

Your final pictures may also have star trails. This is a product of long-exposure shots done without the use of a motorized mount. Since the stars move even in the few seconds of exposure, their image elongates into a trail. This can be beautiful in its own right for some shots.

Using a Telescope and Mount (Advanced)

Those who truly wish to capture the glory of distant stars will want to use a telescope and motorized mount. This allows detailed images to be taken of the moon surface, as well as much better images of planets and distant objects. The motorized mount is important to compensate for the Earth’s rotation and prevent very long star trails or blurry images.

Hooking the camera to the telescope depends on the type of camera you have. Many cameras can be hooked to the telescope but still use their own lens, essentially seeing through the scope much like a person would. DSLR cameras and other advanced cameras may be able to hook directly into the telescope and use the telescope’s lens as their own. The direct hookup method is more advanced and will result in better pictures. This can be done with a few simple accessories, namely a T-mount and 2-inch or similar adapter. Be sure to get accessories that match your camera model and telescope size, since they are usually brand-specific.

Keeping the camera mounted on a motorized altazimuth mount or an even more advanced equatorial mount is very important for telescoped pictures. These mounts both stabilize the camera and keep it moving at about the speed of the Earth’s rotation. This allows the camera to stay steady on distant objects for very long exposure times. An altazimuth mount provides enough adjustment for about 30 second exposures. Longer exposures required equatorial mounts.

Most cameras can be manually set for an exposure time up to 30 seconds. Longer exposures will require a few extra tricks. After 30 seconds, the next highest setting is called bulb. The bulb setting means that the camera will keep its shutter open as long as you hold down the button. The problem is that you can’t do this while the camera is hooked up to the motorized mount and telescope. Your next accessory will be a remote control for the camera. Most brands have these to allow you to manipulate the camera shutter and settings without touching it.

Choosing the Right Location

As with all photography, location is critical to getting the best pictures. The most important factor for astrophotos is light pollution. Longer exposure times mean that even the smallest amount of light pollution can ruin the photo. You will not be able to take good pictures anywhere near a town or city, so the best astrophotographers travel as far as they can from civilization. Also be sure there is not a busy roadway nearby.

By keeping these simple tips and procedures in mind, you are well on your way to taking amazing shots of the night sky.

How to Choose and Buy Binoculars

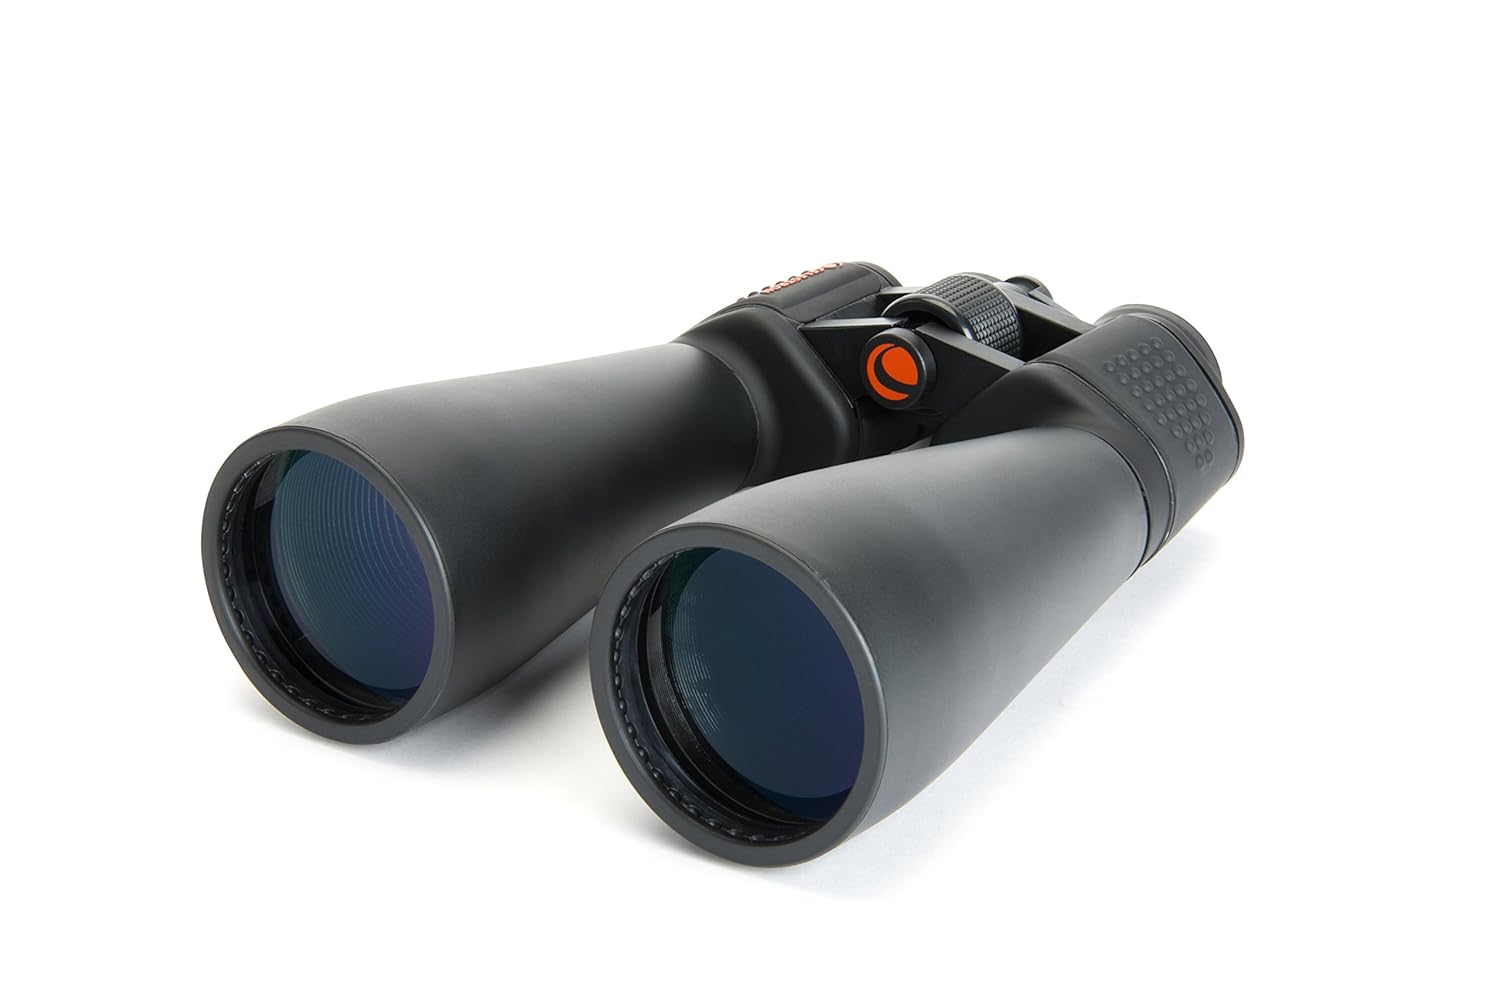
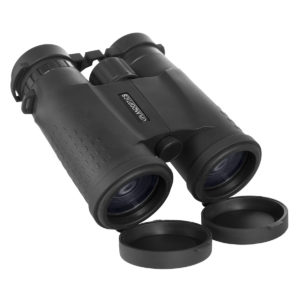
Binoculars are optical instruments consisting of two small telescopes placed side-by-side. Each of the telescopes consists of lenses that bring the image being observed into excellent focus. In addition to the lenses, they are further fitted with a pair of prisms in each of the chambers. The prisms play a significant role in giving an image the proper orientation. Binocular vision finds wide applications in many areas including hunting, watching distant birds in the sky and astronomy. Also, sports lovers use binoculars to catch a good view of a sporting event from a distance.

Unlike monocular vision, which utilizes only a single telescope device to observe objects, binocular vision provides a three-dimensional view of an object. Furthermore, using binoculars will result into perfect visual acuity or simply clarity of the subject matter under focus. Working with binoculars has various advantages. The light weight and small size make them portable and easy to handle, carry and store. The user, therefore, can easily work with them comfortably with minimal strain while getting an incredible view of the object.

There are however various brands of binoculars in the market today; it can be confusing to make a proper choice of binoculars. When shopping for binoculars, an in-depth knowledge of the functionality and the anatomy of the device is significant. Other than that, one has to understand their needs so as to choose a perfect binocular that will meet your needs. Consider when, where and how you to use your instrument. What criteria then should be taken into consideration when shopping for a binocular instrument? Well, there are various vital aspects that anybody interested in buying a binocular has to consider. Some of the most important factors include:

1. Get to know the numbers

Binoculars are identified by unique numbers assigned to them. Each binocular is referred to with numbers like 7×35 or 10×50. Each of this numbers represents a given attribute, the number appearing before the × accounts for the magnification factor or simply the power. The 7×35 lenses make the object seven times closer while the 10×50 will cause the object appear ten times closer. The second value, on the other hand, defines the diameter of the objective lenses in millimeters. 7×35 lenses, therefore, have a diameter of 35 millimeters or 1.38 inches. The 10×50 lenses, on the other hand, have a diameter of 50 millimeters or 1.97 inches.

When you divide the second value by the first value, you get the exit pupil value. It refers to the diameter of the light beam reaching your eye in millimeters. A larger magnification results in a dimmer and larger image. Consequently, your field of view will be narrow hence making it harder to keep the picture in focus. Binoculars with a more than 10× magnification require a tripod socket for mounting. It is important in making your binoculars steady. If a larger field of view is desired, then choosing a binocular of a lower magnification would be appropriate.

In astronomical activities and hunting at dawn or dusk, a binocular with a larger objective lens is the most suitable one; this lens gather more light making them best for low light intensity activities. The larger the exit pupil value, the more light that enters and reaches your eyes. Ordinarily the human eye dilates between 2 to 7 millimeters depending on the amount of light available. Therefore, go for the exit value that matches your eyes dilation value.

2. Check the Lenses

Binoculars often have two types of lenses, those made of glass and those made of plastic. Most binoculars, however, have glass lenses. Glass lenses, however, are expensive, but give quality images. However, a set of plastic lenses that will give the same image quality as glass lenses is even more costly.

Despite giving high-quality images, glass lenses have one disadvantage; they reflect back part of the light. This problem, however, can be rectified by giving the glass the right coating. Lenses coats are often described by certain codes; they include C, FC, and MC. Code C means only some parts of the lens has been covered with a single layer. Code MC means some lens surfaces are coated with various layers. While FC, on the other hand, means all the lens surfaces are coated with several layers.

Multiple coating is the best but; this increases the cost of the binoculars. Plastic lenses are known to give poor quality images and greatly rugged than the glass type. However, they find perfect application where durability is significant such mountain climbing.

3. Access the eyepieces

It is recommended that the eyepiece lenses should be placed in a good comfortable distance from your eyes. For those wearing glasses, they should even be placed further from them. This is referred to us eye relief and mostly ranges from 5 to 20 millimeters and 14 to 15 millimeters or greater when wearing glasses. Many of the binoculars have rubber eyecups around the eye pieces; this will help you set the eyepieces over the eyes when using them. Binoculars with eye cups that retractor flips out of the way are best for those people wearing glasses.

4. Test its ability to focusing

Testing the focusing ability is important when choosing binoculars. Check how close you can focus the binoculars and determine the distance between it and the object you are focusing. Most binoculars have two focusing mechanisms: most have a center-post mechanism and a diopter corrector. It allows one of your eyes to be more strong or weaker than the other. Waterproof binoculars, on the other hand, have individual focusing abilities for different lenses and controls on each eyepiece. Some binoculars, however, have no focusing ability; they can’t adjust their focus beyond the preset focus. This type causes eyestrain should you try to focus on something closer than the preset distance.

5. Check the prism design

A good binocular should have their main lenses spaced wider than the eyepieces this is because of the Porro prisms that are used. It has the advantage of making the binoculars larger and making near objects appear more 3- dimensional. Binoculars using roof prisms let the lenses rest in line with the eyepieces. This makes the binoculars more compact, however, these compromises with image equality. Roof prisms, however, can be made to deliver quality images; this, however, comes at a greater cost. Less expensive binoculars utilize BK-7 prisms, these squares one side of the image. More expensive binoculars utilize BAK-4 prisms. These types of prisms deliver more light, sharper and rounder images.

6. Consider the best weight for your binocular

Binoculars having a high magnification and wide lenses weigh more than the standard binoculars. This can, however, be fixed by using a tripod or a strap, which allows you carry them around. However, if you are involved in long distances traveling you may be forced to settle for a less powerful, but lighter one to make your movement easy.

7. Consider waterproof vs. water resistivity

The environment from which you conduct your activities determines the kind of binoculars you will purchase. Water resistant binoculars are useful in wet conditions; if you are operating in wet environments waterproof binoculars could just be perfect for you. It will be helpful in avoiding damages that may lead to an added cost of buying another binocular.

8. Consider the manufacturers reputation

Reviews other optical objects manufactured by manufacturers and level of confidence that the customers have in that manufacturers. Also, consider the period the manufacturer has been in the business. Additionally, find information on their how they handle matters relating to damage or malfunction of their devices.

9. Armoring

A good binocular should have a well-armored body. This will help protect it from physical harm due to bangs, bumps, and destructive element.

10. Gas filled

It is equally healthy to have binoculars filled with nitrogen gas; this is useful in preventing interior condensation. It happens when binoculars are moved from a warm environment to cold environment or vice versa. It causes condensation in internal optics fogging them up. Additionally, mold can even form over time from repeated condensation. Hence most weatherproofed optics is gas filled, though not always.

11. Price

Before settling on a specific binocular model, it is wise to do a comparative analysis of the prices from different outlets dealing with the same item to ensure you settle on not the only quality product, but also, cost friendly as well. Getting the right binoculars, therefore, is a combination of various factors, define your needs well that will set a precedence to shop for the right binoculars. Additionally, proper care and maintenance is the key to ensuring that your binoculars function properly and more efficiently. Binoculars are very stable optical instruments; they rarely get extensive damage. However, you may encounter a few problems like broken lenses caused by a shock, double imaging caused by collimation, getting ideal binoculars lies with, make a perfect choice depending on your needs. Taking the right steps before getting a binoculars from a shop is essential.

Now that you’re armed with the knowledge on how to best buy a pair of binoculars, check out our guide to this year’s best binoculars to get some ideas for great pairs that will meet your needs.

What is Eye Relief?

The term “eye relief” can be somewhat confusing due to its unusual construction but it is one of the most important factors to consider when purchasing any kind of optics such as binoculars, spotting scopes, microscopes or telescopes. The simple definition of eye relief is an exact measurement of distance between the limit of the eyepiece and where the user can still see the complete picture of what is being magnified in the scope or binoculars.

Imagine that a pair of binoculars has two cups where the eyes can be placed. Should the user pull their face backward from that point, the distance where the full image can still be viewed is the eye relief.

How Eye Relief Is Measured

Although all modern rifle scopes, binoculars and sporting optic instruments have the eye relief provided by the manufacturer, it is important to understand how this critical distance is calculated.

All scopes and sporting optics work by magnifying light through the use of a lens or a series of lenses. In effect, incoming light is channeled and refracted into a cone of light. The cone of light rays that pass through the eye piece is officially known as the exit pupil, a term normally reserved for photography but also applicable when it comes to scopes and binoculars. Effectively, the measurement of the exit pupil is usually described in either inches or millimeters, referring to the diameter of the cone of light that could can reach the eye of the user of the instrument.

Due to the way modern scopes and binoculars are constructed, the exit pupil diameter is often deliberately designed to be larger than the user’s pupil. In effect, there is more of an image being channeled through the lenses than the eye can comfortable take in with one glance. This is a deliberate engineering strategy to allow for the user to move slightly to the side of the eye piece without losing any visual information, a term known in the business as vignetting or clipping. The eye relief is therefore the distance from the eyepiece that the entire image can be viewed in its entirety, and rarely matches the same measurements for the exit pupil.

To use a practical example, a binocular rated at 10 by 52 refers to an internal series of lenses that can magnify a given visual image by ten times with an exit pupil of 52 millimeters with no magnification being employed. Should the binoculars be used at full power (i.e. at 10 times power) then the exit pupil then becomes subsequently smaller, in this case 10 times smaller, therefore just 5.2 millimeters.

The eye relief is therefore calculated to determine the maximum amount of distance the eyes of the user can be from the scope or binoculars when used at its most powerful magnification and still retail a full image as focused through the lens(es).

Why Eye Relief Matters

Whether purchasing a rifle scope, a spotting scope, or binoculars, it is not always feasible or comfortable to place the eyes directly on the instrument. Instead, it may be advantageous to pull the face back from making direct contact with the instrument. Although this may be more comfortable or desirable, it is still essential to be able to get a full view of what the instrument is magnifying or if the user’s eyes move slightly to the left or right of the eyepiece.

Individuals wearing eyeglasses, goggles, or other forms of eye wear may find it uncomfortable or impractical to place the lenses of their goggles or glasses directly on the sporting optic device. Hunters and sharpshooters using a scope on a rifle may have practical reasons to keep their faces a short distance away from the eyepiece in order to avoid damage from recoil. Going by the informal nickname of “idiot cut”, it is definitely possible to sustain a laceration around the eye if the shooter presses their face too close to a weapon when it is fired.

What to Look For In Terms of Eye Relief When Buying Sporting Optics

The simplest way to understand eye relief when first using a scope or binoculars is that the larger the eye relief, the better. While this maxim is not always true under all circumstances, it is essential to always review the manufacturer’s information on eye relief before purchasing a piece of sporting optics.

For professional sportsmen and hunters, the eye relief becomes a critical factor especially when using the optics for large-scale magnification. Hunters and sportsmen who wear glasses or wish to wear goggles must be especially careful to make sure that they have a sufficiently large eye relief to still be able to see the entire image without risking damage to either the lenses of their glasses or goggles or to the skin and area around their eyes.

Many professional sporting optical devices have built-in eye relief adjustment mechanisms. Usually designed for wearers of corrective lenses, a rotating eye cup can be adjusted to provide additional eye relief.