Best DSLR Cameras for Astrophotography

We constantly dream of taking pictures of the night sky, but they have no idea how to get started. In the past, there were no cameras that could be used to capture the sky’s stunning beauty, but today, there are several options to choose from.

The problem with older cameras is that they didn’t have the technological capabilities to get the job done. Since camera technology has become significantly more advanced, there are many DSLR cameras that are up to the task.

Why Get A DSLR for Astrophotography?

Maybe you’re wondering why a DSLR camera is required. The truth is that there are a few different types of cameras that can be used for astrophotography. There are a few dedicated CMOS and CCD cameras that work very well, but many consumers don’t have enough money to afford these high-tech devices.

DSLR cameras are popular because they’re inexpensive and can deliver excellent results. The main reason why these cameras work well is that they have large sensors. Although smartphones have become quite advanced, they still don’t have the right type of camera for astrophotography.

The camera sensor inside of a modern smartphone is too small, so it doesn’t receive enough light particles to capture the glorious night sky. A number of entry-level DSLR cameras can be purchased for about $500, and they can be used to get the job done.

It’s important to realize that you don’t need to start with an extremely expensive camera. Many of the best cameras for astrophotography cost several thousand dollars, so they’re not the best cameras to start out with.

However, if money isn’t a problem, you can check out some of the options towards the end of this article. If you’re just getting started, two great models to consider are the Nikon D3200 and Canon Rebel, or the Pentax models designed for astrophotography. Since they have larger sensors, DSLR cameras are best for shooting at night.

Choosing the Right Lens

Picking the right lens is just as important as choosing the right camera. Without the right lens, you might not get the results you were hoping for. When shooting pictures with almost no visible light, fast lenses tend to work the best. The best lenses for astrophotography should have a large aperture because you’ll need as much light as you can get.

A large aperture lets more light hit the camera’s sensor than a small aperture. For the best results, you’ll want to consider a lens that has an aperture of F/2.8 or bigger. It’s also important to think about what you want to shoot images of. A number of photographers enjoy taking large shots of the night sky.

For example, they might shoot a large section of the Milky Way galaxy. To get the best results when shooting large sections of the sky, you’ll want to consider getting a wide-angle lens, and it should have a focal length of 20mm.

Since this is a general guideline, you can get a lens with a focal length that is less than 20mm. If your goal is to take shots of the moon and various planets, you’re going to need a better zoom. For these shots, consider getting a lens with a focal length of at least 300mm. Depending on your goals, you can go much higher than 300mm.

Shooting In Manual Mode

When shooting for astrophotography, you’ll almost always need to use the manual mode on your DSLR camera. The manual mode is used because the camera won’t be able to automatically focus at night, and by setting the camera to manual mode, you can set the focus for whatever shot you’re trying to take. Since you’ll need to use manual mode, it might be a good idea to consider getting a manual-focus lens. There are several great options from Rokinon.

A popular example is the 14mm F/2.8 lens, which works exceptionally well for wide-field shooting. You can purchase this lens for under $400. If you’re looking for the Canon equivalent for this lens, you could end up spending $2,000.

Other Equipment

Although the camera and lens are important components, there are other pieces of equipment to consider. It’s always a good idea to purchase a strong tripod. Many consumers attempt astrophotography using a cheap tripod, and it almost never works because the tripod shakes too much.

A sturdy tripod won’t shake while you’re taking long exposures with your camera. Another piece of equipment to consider is a telescope mount. This is a great piece of equipment to have when you’re planning to take long exposures with your DSLR camera.

Choosing the Right DSLR Camera

Taking shots of the night sky can be fun and exciting. It’s especially enjoyable when you’re using the right camera for the job. When searching for a good DSLR camera for astrophotography, it’s always a good idea to keep it simple. There are many different brands that sell DSLR cameras, so you might feel overwhelmed when searching for that perfect model.

The best way to solve this problem is to narrow down your selection and only choose a camera from Nikon or Canon. These companies are known for creating some of the best cameras on the market, and they have several models that are affordable and great for astrophotography. However, two need models of Pentax designed for astrophotography are definitely worth considering.

It’s important to realize that this type of photography is specialized, so you want to choose cameras that are known to work well for this purpose. Nikon and Canon happen to have several models that are proven to work well for this specialized type of photography.

Most consumers who shoot pictures of the night sky use Canon DSLR cameras because they tend to work very well for this purpose. To shoot beautiful pictures of the night sky, a camera needs to have low-noise characteristics, and Canon is the first company to create a low-cost DSLR camera that has these characteristics.

Over time, Nikon has caught up and offers several comparable cameras to choose from. Many of the Nikon cameras have very powerful sensors, but Canon offers several cameras that are much better choices for astrophotography.

If you’re purchasing a DSLR camera for the first time, you should consider getting a Canon or Pentax. There are two minor problems that make Nikon cameras less suitable for this specialized type of photography. Unlike Canon DSLR cameras, Nikon models automatically apply a blurring filter, and they also don’t give you access to the bulb setting, which is important for exposures that are longer than 30 minutes.

Although Nikon’s blurring filter can be turned off, it requires a massive amount of time and great inconvenience. These are minor problems, but they serve as two great reasons to consider getting a Canon.

Top Cameras we Recommend

#1 Pick: Pentax K-3 II

The Pentax K-3 II is a mid-range DSLR at a nice price. Oh, and it has some extra perks for would-be astrophotographers. For under $1000, you can pick up a great all-around DSLR that will also let you take awesome photos of the night sky.

Features include the Astrotracer, which utilizes the built-in GPS to sync the sensor to the movement of celestial bodies.  Pentax also gave the K-3 II a sensor without an anti-aliasing filter (something typically only available on more expensive cameras). AA filters soften images, which can be troublesome for astrophotgraphers.

With no AA filter, Astrotracer, and a shockingly low price, the Pentax K-3 II is a fantastic option for an intermediate photographer interested in taking great shots and taking the plunge into astrophotography.

Nikon D3300 DSLR Camera
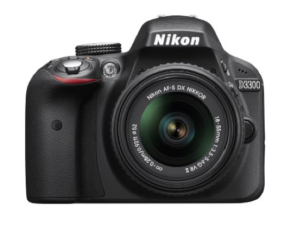
Nikon D3300 DSLR for AstrophotographyFor a great entry-level DSLR for astrophotography, consider the Nikon D3300. This camera has several features that make it great for taking shots of the night sky. For starters, it has a 24.2-megapixel CMOS sensor.It has a 3.0-inch LCD screen. The Nikon D3300 offers excellent image quality and uses an interface that is designed for beginners.

Although it’s designed with the beginner in mind, it offers plenty of manual control, which is what you need to focus on objects in deep space. This is a top DSLR camera from Nikon, and it provides many of the features that you’d want for astrophotography.

It doesn’t perform as well as cameras in higher price ranges, but it outperforms many of the cheaper entry-level DSLR cameras. You should be able to pick one of these cameras up for a modest sum and start capturing the stunning beauty of objects in deep space.

Canon EOS Rebel T5 DSLR Camera
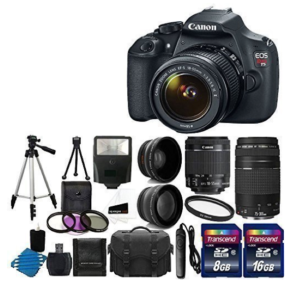
Canon EOS Rebel T5 BundleThe Canon EOS Rebel T5 is another top model to consider, and it’s in the price range that is one step above the entry-level DSLR cameras. You can use it to capture beautiful shots of large portions of the night sky. The kit linked to above comes with a variety of accessories (including lenses) which will be helpful for getting started.

As a base model, this camera works great for taking shots at night. With a large CMOS sensor, it absorbs lots of light and can give you incredible photos of space objects. It features an 18-megapixel sensor and has the low-noise characteristics that you need for shooting at night.

You even get the manual options that you need to focus the camera and get great shots of objects in space. The price of this DSLR camera is slightly higher than what you’d expect for entry-level cameras, so it’s an excellent choice for consumers who want to get a little bit more out of their astrophotography experience.
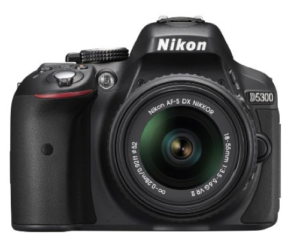
Nikon D5300 DSLRNikon D5300 DSLR Camera

Another mid-range DSLR camera that is great for shooting images of the night sky is the Nikon D5300. With a 24.2-megapixel CMOS image sensor, it can take incredible photos of objects in space. The image sensor is capable of producing the high-resolution images that show the glory of deep space.

It’s also a great choice because it has the low-noise characteristics that are required for shooting at night. Without these characteristics, photos taken at night would look very grainy.

For just the body, you could be looking at paying just under $700. However, you’ll need to get a lens to capture the beauty of the stars. All of the ISO settings on this camera deliver competitive image quality, which means it’s really good.

The Nikon D5300 delivers superior ISO performance with low noise, and it provides exceptional detail in every shot. If you’re looking for great image quality, agility, speed, and versatility, this is a top camera to consider.

The Nikon D5300 DSLR Camera delivers all of the features that you need for an enjoyable astrophotography experience, but since it’s a mid-range camera, you’ll need to pay more money for it. You should consider getting this camera if you want better performance than what an entry-level model can provide.

Canon EOS 5D Mark IV

The Canon 5D Mark IV is a great model for professionals. If you’re looking for an unbeatable experience, and you don’t care how much it’s going to cost, this is one of the best DSLR cameras that you can buy for astrophotography.

Since it has a 30.4-megapixel full-frame CMOS sensor, it has no trouble absorbing the light that pours down from the heavens above. When using this high-end camera, you can expect almost no noise, and it will deliver some of the best astrophotography photos imaginable.

It has all of the features that you need to take stunning shots of the Milky Way and planets. It delivers excellent resolution and ISO performance. It has powerful built-in features for noise reduction and features one of the best CMOS sensors for shooting photos at night.

Nikon D5 DSLR Camera
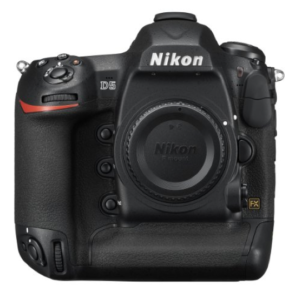
Nikon D5A final product to consider is the Nikon D5 DSLR Camera. It is Nikon’s latest flagship camera for professionals. With a 20.8-megapixel CMOS sensor, the Nikon D5 can shoot great images of the night sky.

However, if you choose to purchase only the body, you’ll need to get a lens that matches the specifications we recommended earlier. Like all of the other cameras mentioned, the Nikon D5 offers low-noise characteristics, but it does everything a little bit better than the cheaper cameras.

When used at high-ISO setting settings, it delivers unbeatable image quality. It’s compatible with virtually all Nikon lenses and takes amazing photos at night. It’s one of the best DSLR cameras for night shots, but it’s several times the cost of entry-level models.


Nikon 810A

The Nikon 810A is a tricked out version of Nikon’s fantastic full-frame 810. It is designed specifically for dedicated to long-exposure deep-sky astrophotography. This is an excellent model that will let you capture the night sky with professional precision.

The IR filter is optimized for a type of light called Hydrogen-alpha red tones. The 36.3-megapixel full-frame CMOS image sensor has no optical low-pass filter. Nikon has added a number of features that are specifically for astrophotography needs. It’s best used on a tripod for celestial shooting.

The 810A works great as a regular DSLR, too, so this is a great investment if you want a pro DSLR feel that also lets you take amazing astrophotography shots. If you have the budget for this, we highly recommend it.


Pentax K-1

A step up from the K-3 II, the Pentax K-1 has all the same astrophotography features as the less expensive model, but is a full-frame DSLR with a lot more to love. If this camera fits your budget, you will get a great DSLR and what is possibly the best option out there for astrophotographers.

The Astrotracer system eliminates the need for a star tracker. In astrophotography mode, the camera can capture up to five minutes’ worth of exposure. Other modes, like Star Stream, give photographers new options to capture the stars. All other features and bells and whistles either contribute directly to astrophotography, or just make this a darned good DSLR.

The price for this full-frame, 36mp sensor, astrophotography-ready DSLR is simply phenomenal. The functionality is pretty intuitive and the quality of photos is excellent. This is an amazing pick for an enthusiast who wants a really great full-frame camera and has an interest in astrophotography. This might be the best DSLR on the market for astrophotography.


When shopping for the best DSLR camera for astrophotography, the price is the biggest consideration to make. By choosing one of these recommended products, you can avoid picking a camera that doesn’t work very well for this specialized use.

Once you’ve purchased the right camera, lens, and equipment, you can begin your journey with astrophotography and capture the stunning beauty of the universe.

How to Use a Telescope like a Pro

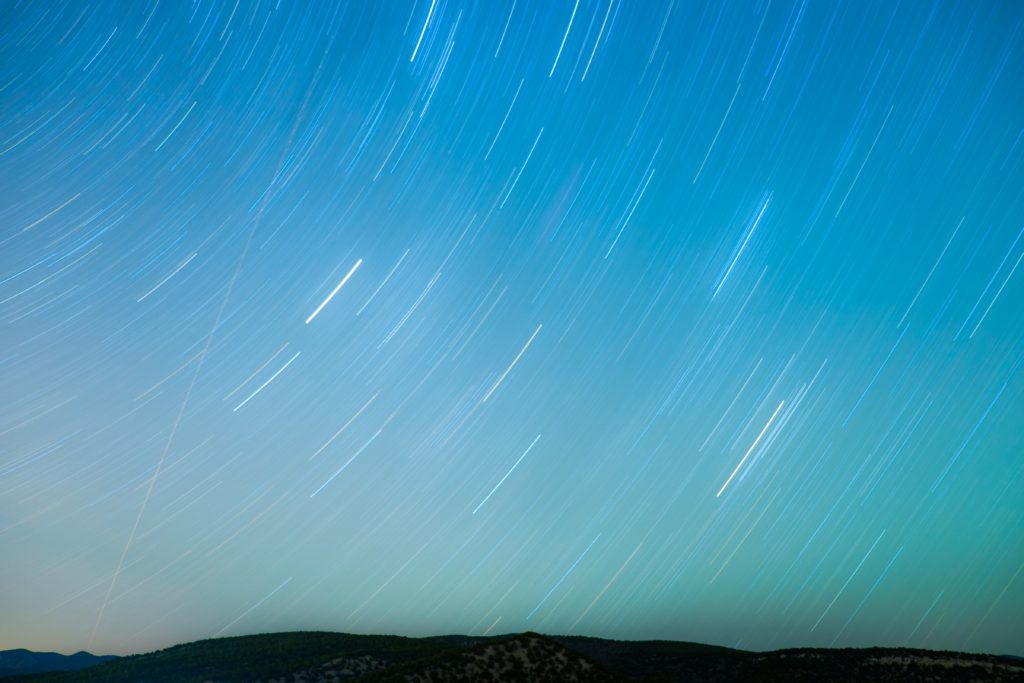
One of the great wonders in life is the sky. At night, when the sun has gone down and all the lights are turned off, we can stare up at this massive expanse of black with millions of tiny little dots in it, and we’re reminded just how small we are on a tiny little planet in the midst of a huge universe. So much of it is visible with just the naked eye. It’s quite enjoyable to lay on the lawn and look up at all the stars blanketing the sky, but it’s another feeling altogether to be able to experience them much closer through the lens of a telescope.

Buying Your First Telescope

A good home telescope doesn’t have to be expensive. There is a wide array available out there for any budget and any experience level, whether you’re looking to spend less than $50 or over $1000. As with everything, do your research and find the telescope that’s right for you and your personal situation. Amazon has hundreds of options to choose from, ranging from small and easy to use to massively complex monstrosities. Make sure you read the reviews before you buy, both good and bad. They will typically tell your more than the description will.

Setting Up Your Telescope

Once you’ve purchased your new telescope, you will need to assemble it. Follow the instructions provided carefully. Do not rush. Make sure everything is put together exactly how it is supposed to be. A mistake in assembly could result in an inaccurate or completely unusable telescope. Once you have it together, now it’s time to test it. Don’t try your first test at night. Night objects, such as the stars and moon, are harder to focus on and move due to the earth’s rotation. Try it out during the day and pick a stable object, such as a tree. Focus on the tree and practice using your adjustments.

A Note On Power

When first starting out with telescopes, many people assume that more power means a better telescope. This isn’t true. Ignore the claims of the ‘Barlow’ lens allowing 500x magnification. While it’s true, it will also give you a blurry image. Imagine blowing up your favorite photograph. The larger you make it, the blurrier it becomes, right? This is what happens with the telescope. Take note of what size your reflector is and multiply that by 50. That is the max power you should use. For example, if you have a 6-inch reflector, the most power you should use is 300. The image will be smaller, but clearer. In fact, a good rule of thumb is to use half of the max to achieve the best image.

Test It Out

As you focus on your tree or other stable object, play around with your adjustments. See what they all do, what effect they have when you twist one way versus the other. Now is the time to really figure out the ins and outs of your particular scope. If you have one of the more popular home telescopes, read the reviews on Amazon. Often, reviews will post advice or things they learned in their reviews. Search for your telescope on a search engine. In all likelihood, someone has posted a guide out there that you can use to fine tune your own viewing. There are numerous resources you can make use of. Don’t be afraid to look for them.

Get Some Guides

While many telescopes will come with a basic star map, it would be best to get one of your own. There are numerous books out there that will give you a full overview of what to look for and what you will see when you look through your telescope. Find one that will give you a good idea of what you can see from where you are and give good instructions on how to locate each constellation.

Find The Right Spot

Finding the right place to set up your telescope is key. Sometimes your options are limited, such as to a back deck or rooftop terrace, but if you can, do a little testing and see where you get the clearest night view. You want someplace that’s dark without a lot of ambient light. If you are stuck on the deck, turn off the lights inside the house. If you can remove yourself to a dark area, that is going to be the most effective for you. Also keep in mind the height of your telescope. Some are designed to be set on railings or tables. You don’t want to be using a miniature telescope and have to lay on the ground for hours if you find that uncomfortable.

Start Exploring

Now that you’re all set up, it’s time to start your journey through space. The easiest object to find is usually the moon. It’s the biggest and brightest. But it’s also one of the most interesting. With a telescope, you can see amazing detail on the moon. Did you know that the moon reflects the Earth? If you look closely, you can see a negative image of the Earth on the moon, due to the way the Sun reflects off the oceans. Other easy to see objects are the other planets in our solar system, especially Jupiter and its moons, Mars, and Saturn. Some constellations are easily recognizable, including the Big and Little Dippers and Orion’s Belt. The Milky Way is a stunning cluster of beauty that shouldn’t be missed. Pull out your guide and see what you can find.

Owning a telescope can be a rewarding experience if you take the time to set it up right and learn how to use it before trying to explore the night sky. With a little patience, a lot of interest, and a good guide book, you’ll be discovering the wonders of the universe in no time at all.

How do Telescopes Work? Your Question Answered

Telescopes have the ability to see objects from hundreds of thousands of miles away in space, but how do they work? Truth is, telescopes come in many shapes and sizes, and they range from the little plastic tube that you can buy at the toy store for $2 to the Hubble Space Telescope. On the middle end of the spectrum, you have amateur telescopes that fit in the middle, and while they are not as powerful as the Hubble, they can still accomplish incredible things like read the writing on a dime from more than 150 feet away. When it comes to the amateur telescopes of today, you have two types: a refractor telescope and a reflector telescope.

The Two Telescopes

Instead of using lenses, the reflector telescope uses mirrors while the refractor telescope uses glass lenses. They both accomplish the same thing, but they do it in different ways. To understand what makes telescopes work, first, let’s look at why you cannot see far away. For example, why can’t you read a dime from 150 feet away without a telescope? The answer is that the object does not take up enough space on your eye screen. To give an analogy, it is like how digital cameras couldn’t see the writing on a dime because it does not cover enough pixels on your retinal sensor.

Using a bigger eye, you can collect light from the object and create a bright image that will magnify the image to stretch it over more pixels on the retina. This is what lets you see further away.

The Objective Lens and the Eyepiece Lens

The objective lenses, also known as the primary mirror, will collect light from distant objects and bring the light to a point of focus. On the other hand, you have the eyepiece lens, and this takes bright light from the objective lens, and it focuses the objective lens. In other words, it spreads out and magnifies the primary mirror. Telescopes operate using the same principle that you find with a magnifying glass. In essence, the idea behind it is to collect as much light as possible to form images inside the telescope, and the light magnifies it like a glass that takes up the space on your retina.

The Ability to Collect Light

Your telescope’s light collecting capabilities relate directly to the diameter of the lens or mirror that is known as the aperture or objective lens. The aperture gathers light, and the larger your aperture, the more light that your telescope can collect and bring into focus. The more light that you have, the brighter the final image will be. How does a telescope magnify things? A telescope’s ability to magnify images will depend on the lenses and the combinations that are used. The eyepiece will perform a magnification, and that magnification can achieved with almost all telescopes.

Why Can’t the Eye See Objects at a Distance?

While human eyes do have the ability to see for long distances, most of it will appear to be a tiny point in the sky. For example, humans can see the Andromeda Galaxy, which is more than 2.5 million light years away, but even in a massive galaxy like Andromeda, it appears as a tiny point in the sky to the naked eye. As an object gets further away, the harder will be to see, but that is why telescopes have proven an invaluable tool for exploring the known universe.

Will a Bigger Lens Yield a Bigger Image?

If you want to make a distant object appear bigger and brighter, you want to collect more light. You can create a brighter image so that it takes up more space on your retina. In fact, the big lens of telescopes will collect more light than what the naked eye has the ability to collect, and this focuses the light to a point from inside the telescope. Your telescope’s ability to collect light will largely depend on the objective lens, which will gather and focus the light from a narrow portion of the sky. The performance of your telescope will depend almost entirely on the size of your objective lens, which is why you should look for a telescope with a larger objective lens.

Refracting telescopes have sometimes been seen as inferior. If you have ever watched light bend through a prism, then you know where the problem comes in at with a refracting telescope: the lens. As light passes through the glass, it will slow down, and while lenses have the shape to bend light, the amount of bending will depend on the wavelength. Understanding this, however, you can make an informed decision on the best choice for a telescope. Reflecting telescopes can be much larger, and they look deeper into space because of the design.

Best Binoculars on the Market 2021

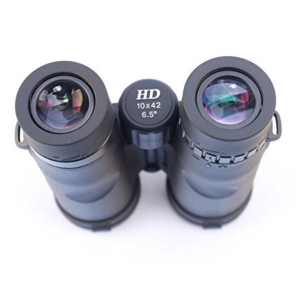
The Best BinocularsIt may seem like a strange notion to those who have never done it before, but buying a great pair of binoculars takes quite a bit of research and knowledge. Just like anything else, a quality pair of binoculars will provide you with a lot better images than buying a cheap pair from a discount store. As technology has improved, binoculars have become more modern and have improved in quality. We hope that this guide and the reviews in it will be useful to you in finding the perfect pair of binoculars for your needs.

My #1 Recommendation

Choosing just one pair of binoculars to crown as my number one pick is a difficult thing to do. But if you made me do it, I would choose the Upland Optics Perception HD 10x42mm. These guys are tough as nails and give an excellent picture quality. They have the perfect magnification and field of view for a general pair of binoculars that could be used for everything from hunting to bird watching. Our partner company Upland Optics does an amazing job, these binoculars are first class! Click here to see their price.

Best Binoculars for Hunting

When hunting big game, binoculars are one of the most important pieces of gear you will need. They will allow you to scan for animals that are thousands of yards away, that you wouldn’t be able to see with your naked eye. This makes them an indispensable tool in the field. There are a few key things to keep in mind when choosing a pair of binoculars for hunting. First off, remember that you’ll often be looking for animals in low light conditions, so light transmission is crucial. Also, you’ll be lugging them around difficult terrain, so buy a quality pair that will be able to take a few bumps without any major problems. 10×42 is the most common size of binoculars to carry while hunting, although you may want a larger pair if you are doing long range spotting.

With so many binoculars on the market, it can be difficult to discern which pair can be used best for hunting. Here are four pairs that are extremely highly rated and are worth checking out:

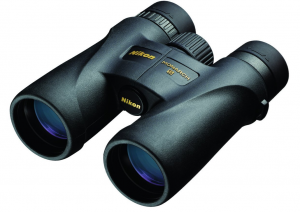
Nikon Monarch Best Hunting BinocularsNikon Monarch Binoculars

Nikon Monarch binoculars come in three sizes: 8X42, 10X42, and 12X42, so you have many choices at your disposal. The standard 10X42 have a 288 ft. field of view, and 18.4mm eye relief. Also, these binoculars are waterproof, fog proof, and have coated lenses. They weigh around 21.9 ounces.

Bushnell Legend Ultra HD

These are Bushnell’s most critically acclaimed binoculars, and it is no surprise that they are some of the best binoculars for hunting out there. They come in 4 sizes: 8X36, 8X42, 10X36, and 10X42. The 10X42 variety have a 340 ft. field of view, and 15.2 mm eye relief. Like the Nikon pair, Bushnell Legend Ultra binoculars are waterproof, fog proof and have coated lenses. They weigh in at 24.7 ounces.

Upland Optics Venator

The upgraded version of our #1 recommendation above, the Venator are the pair to get if you are a hunter looking for the best glass possible and have a bit more of a budget. With excellent light transmission and lens coatings, they deliver top grade optical performance while also being durable enough to survive hunting in the toughest of environments.

Vanguard Spirit ED

Vanguard’s Spirit ED binoculars are very worthy of mention in this section. They come in four sizes: 8X36, 8X42, 10X42, and 10X50. The 10X42 pair have a 314 ft. field of view and 16 mm eye relief. Like its counterparts in this section, these binoculars are waterproof, fog proof, and have coated lenses. They weigh a bit more than the other binoculars in this section at 29.8 ounces.

Best Binoculars for Birding

If birding is your hobby, the following are some binoculars that you should definitely consider purchasing in order to have the best viewing experience. Because birding is more about the picture quality and feel, picking a pair of binoculars without trying them first is very difficult. I have included some comments from users in order for you to get an idea of what it is like to use all of these binoculars.

Bluebird Optics Zonos 8×25

This compact option from Bluebird is great for bird watchers who don’t want to be constantly lugging around a full sized binocular. Weighing less than a pound, it’s small enough to even be slipped into a pocket. They are also very affordable considering their high end features, like ED glass.

Athlon Argos G2 UHD

If your main priority is high quality glass and you don’t want to spend a fortune, the Argos G2 UHD might be the perfect fit for you. High quality ED glass and ESP Dielectric coating give these binoculars excellent clarity and light transmission, making them perfect for bird watchers who want to see every detail. These are part of Athlon’s new lineup of binoculars, and they have performed excellently in our testing.

Zeiss Victory Best Birding BinocularsZeiss Victory THT 8X42

These binoculars are considered top-of-the-line, and this is noticeable in the price tag. They feel great in the hands and have great clarity and eye relief. They are widely considered some of the best binoculars that money can buy.

Zeiss Victory TFL 8X32

These are a smaller version of the THT binoculars, but they still have all of the benefits of a top-of-the-line pair of binoculars. If you can afford these, you cannot go wrong with them. Zeiss also has midrange priced binoculars, Zeiss Conquest HD, which are of excellent quality and a great alternative to the Victory line.

Nikon Monarch 7

These are ¼ of the price of binoculars like the Zeiss Victory, but they deliver exceptional quality and image. The Monarch line has been very popular among birders for years, and it continues to deliver.

Leica Trinovid

The Trinovid line has been around for a long time, and experienced birders will likely recognize it. The new Trinovid line offers exceptional quality and a bright, clear image.

Best Compact Binoculars

If you are looking for compact binoculars that you can take with you comfortably everywhere, here is a list that will give you an idea of where to start looking. The following are widely considered some of the best compact binoculars on the market.

Swarovski CL Pocket 8X25 Binoculars

These are very high quality compact binoculars that fold up easily and can fit in your pocket. Furthermore, they are waterproof and fog proof. They are made by Swarovski, so you know you are getting some of the best binoculars on the market with these.

Vanguard Orros 10X25 Binoculars

These binoculars feel great in your hands, as they have a very lightweight rubberized body. The shape is very compact, and they can fold down to store anywhere. Furthermore, these binoculars are very affordable.

Pentax Papilio 8.5X21 binoculars

These compact binoculars have a very unique design, and they have a great minimum focusing distance. This means that you can view insects and flowers with great detail out in the field. They are great hiking and general purpose binoculars. Furthermore, they are also very affordable.

Pentax 9X28 DCF LV Binoculars

Unlike many compact counterparts, these binoculars offer a 9X magnification without sacrificing too much field of view. They are waterproof and fog proof, and while they are mid-priced binoculars, they offer exceptional optical quality. They also have a great design and feel great in your hands.

Best Astronomy and Stargazing Binoculars

Many stargazers and astronomers prefer to use binoculars instead of telescopes to look at the stars. If you want to get into stargazing, or are already an avid stargazer and are looking for binoculars, the following are a few binoculars that are definitely worth your consideration.

Celestron Echelon 20X70 Binoculars

Since you are stargazing, you want a higher magnification along with a bigger lens. These are very high quality binoculars that are tripod adaptable in order to allow for long stargazing periods. They are not too heavy that you cannot pick them up and use them with your hands for added flexibility.

Celestron 15X70 SkyMaster Binoculars

These offer exceptional performance and come at a great price for viewing the night sky. The lenses are multicoated, which makes your image of the stars much clearer. Aside from stargazing, these have other great uses including bird watching as well.


Best Binoculars for Safaris

If you enjoy viewing wildlife, specifically wildlife on safaris, there are a few binoculars that you should research and test before looking at any others. Consider these as you embark on your safari trip.

Celestron Granite 9X33 Binoculars

These binoculars have a wide field of view, which is excellent for safaris. Since they are 9X, you get a little more detail of the object you are looking at. The lenses are very high quality, and with these you will get a very crisp image.

Swarovski EL W B Traveler 8X32

These are top-of-the-line midsized binoculars that offer impeccable optical quality. They are optimal for taking on safaris, and their open bridge design makes them comfortable to hold with one hand. Furthermore, they offer a digital camera adapter so that you can take high quality photos through them. Swarovski produces some of the best imaging products in the world, and this is no exception.

Best Binoculars for Kids

When engaging children in nature activities, the right set of binoculars can go a long way towards getting them excited about their surroundings. Certain binocular features are more important than others when it comes to children’s binoculars, such as the maximum magnification level. The recommended maximum is 8x, as this gives children a wide enough view to keep their eyes on the interesting sight even if their hands are shaky. Additionally, the size and weight of the binoculars are important as well, as a binocular that is too bulky may be difficult for children to hold on to. With these factors in mind, consider both of the following highly rated binoculars for kids:

Bresser 6×21 Junior Compact Binoculars

With a colorful casing guaranteed to catch your child’s eye, the Bresser 6×21 is a compact binocular with a maximum 6x magnification that is perfect first binocular for children of any age. The state-of-the-art optical system delivers clear images, while the rubber armored body is built to endure all types of damage. Affordably priced, the Bresser 6×21 also comes with a five year guarantee.

Opticron Discovery WP PC 8×32 Binoculars

Built for the older child, the Opticron Discovery is both compact and lightweight enough to deliver comfort regardless of how long the nature walk lasts. An 8x optical system also delivers clear images from a distance, while the affordable prices guarantees a great return on the investment. With a durable design built to last through years of wear and tear, the Opticron Discovery remains one of the best children’s binoculars on the market.

Best Binoculars with Built-inCamera

For the professional photographer or birdwatcher, a quality sighting through a pair of binoculars is only worthwhile if the image can be captured. Luckily, modern technology has intersected with current demands to yield a new generation of binoculars with built in cameras. Some of the best digital camera binoculars on the market today are both inexpensive and easy-to-setup. Learn more about two of the industry leaders below:

Vivitar 10×25 DigiCam Binoculars

Though the slightly heavy design may seem inconvenient at first, the Vivitar Digicam Binoculars are well worth the effort with a 640X480 resolution on the attached camera. Add to that the 16 megabytes of internal storage and these camera binoculars become perfect for both long and short sightseeing events, from sports games to nature walks and more. Designed for comfort and precision, the Vivitar 10×25 carries a long battery life as well to ensure long-term use on almost any outing.

Eoncore 2″ LCD Display Digital Camera Binoculars 12×32 

For a highly affordable set of binos with a built-in digital camera and video camera, look no further than this Amazon bestseller that averages 4 stars from customers. These are very popular with avid birdwatchers, making it simple to capture quality images of the birds in the wild for identification or saving for later. There are many things you can do with this device, so it’s highly versatile and easy to customize.

Best Rangefinder Binoculars

Open ranges can be a thing of beauty all on their own. However, there are few ranges that cannot be enhanced by a great pair of rangefinder binoculars. Regardless of the type of rangefinder binoculars you plan on purchasing (golf, hunting, digital, etc.), the goal is to improve aim while also allowing for a wide field of view regardless of the terrain. Learn more about two of the best rangefinder binoculars on the market below:

Leica Geovid HD-B Binocular

Though pricier than other brands of binoculars, the reward is well worth the cost as the Leica Geovid is one of the most accurate rangefinder binoculars on the market. Featuring state-of-the-art optics and a field of view exceeding 1,000 yards, these industry-leading Leica binoculars offer everything from automatic adjustments of the visual settings to an ergonomic design that ensures comfort regardless of how long they are held.

Zeiss Victory RF Binocular

Fluoride glass is one of the secrets to the Zeiss Victory’s premium imagery, ensuring that every sight seen through these lens is of the best quality possible. A 45 millimeter objective lens adds to sight quality while the field of view remains one of the best in its class. Though slightly heavier than other comparable binoculars, the Zeiss Victory makes up for it with convenient button placement for added comfort.

The Best Binoculars for the Money

After all of the binoculars that have been listed so far, you may be wondering, “Which ones provide me with the best value?” The following binoculars are widely thought to give buyers the best bang for the buck.

Swarovski CL Pocket 8X25 Binoculars

Although they may seem pricey, these binoculars are cheap compared to the other $1200+ priced binoculars that Swarovski offers. Furthermore, they are better than almost anything else on the market.

Hawke Sapphire ED 8X42 Binoculars

These binoculars have amazing specs, they are waterproof and fog proof, and they have a lightweight body made of magnesium. Add to this the unparalleled optical quality that they offer and you will realize that the price is a great bargain.

Upland Optics Perception HD 10×42 Binoculars

These are some of the best binoculars out there at any price point, and they are under $300 dollars! They offer exceptional optics, water repellant lens coating, a light weight chassis, and unparalleled image quality.

Celestron Nature DX 8X42 Binoculars

These will appeal to those on a tight budget, but also to those looking for a great value and optical quality. These are fully sealed waterproof and fog proof binoculars that deliver a great image, and the price will make you very happy.

Best Binoculars for Under $100

If you are on a very tight budget and can only spend $100 or less, you should not worry. The following binoculars will offer great quality for their price.

Nikon 8245 Aculon Binoculars

These binoculars are so good that you may find some vendors selling them for $200 due to demand, but if you look in the right place, mainly online, you can find them for $100 dollars. They provide a quick central focus system and a 420 foot field of view. One downside to these is that they are not waterproof.

Celestron 20X80 Skymaster Binoculars

By this time you should realize that Celestron makes great quality products at a great price. These are great for stargazing and many other uses, and they have a water-resistant, not waterproof body.

Best Binoculars for Under $200

If you have a little more to spend, these are some binoculars you should consider that are under $200 dollars.

Vanguard 10X42 Spirit XF Binoculars

These binoculars offer a wide field of view, multi coated lenses, and high quality images. If you are a causal binocular user, you simply cannot go wrong with these.

Hawk Nature-Trek 8X42 Binoculars

If you want high quality, low weight binoculars, then you have found them. These are fully waterproof and fog proof, and they provide a relatively good field of view and close focus. These are a great choice for the budget conscious buyer.

The Best Binoculars on the Market

If you want the best-of-the-best, and you are fortunate enough to have no price limitations on the binoculars that you are looking for, then the following is a list of the best binoculars that money can buy.

Upland Optics Perception HD 10×42 Binoculars

See description in the Best Value section.

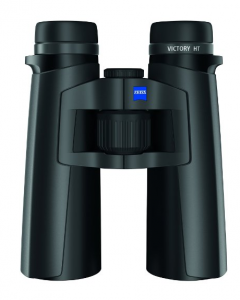
Zeiss 10X42 Victory HT Binocular

These are often listed as the best binoculars that money can buy, period. They offer a viewing experience like no other binoculars, and you can see even the finest details of your object in dimming light. They are very robust, and offer a staggering 95% light transmission. If you want the best-of-the-best, then these are the binoculars for you.

The Best Binocular Brands

Bushnell

Bushnell is a giant in imaging products in the United States, and it makes everything from high quality rifle scopes, microscopes, telescopes, and of course, binoculars. The company was founded in Japan by David P. Bushnell when it was occupied by Allied forces during WWII in 1948. Bushnell’s binoculars have won multiple awards for their quality, and most recently, the Bushnell Legend Ultra HD 10X42 binoculars were awarded binocular of the year by binoculars.com.

Zeiss

Zeiss is one of the oldest, most reputable optics and imaging companies in the world, and it makes very high quality binoculars. Not only does it deal in sporting optics like Bushnell, but it also makes optic devices for medical use and even space telescopes. It was founded in Germany in 1846, and it has become a leader in the industry since then. One of the most popular binoculars it has on the market right now are the Zeiss 10X42 Victory HT binoculars.

Nikon

Known for its digital cameras, Nikon also makes stellar binoculars. Nikon is now a huge company that was founded in Japan in 1917. It specializes in lenses, binoculars and other advanced imaging technology. Their best-selling binoculars have historically been from the Monarch line. Today, the 8X42 Monarch 5 take that distinction.

Zhumell

Zhumell is not a large company like the three that were previously mentioned, but it prides itself on bringing high quality optics to people for a reasonable price. It produces binoculars, telescopes, spotting scopes, and monoculars. Their 10X42 short barrel binoculars are very high quality and in high demand.

Steiner

Steiner has a rich history in the optics industry, and it has arguably one of the most advanced optics laboratories in the world. Every lens and pair of binoculars that Steiner produces is field tested extensively to ensure that it is a very high quality product. This German company prides itself in producing binoculars that will be serviceable for multiple lifetimes. You can be sure that if you buy Steiner binoculars like the Safari Ultrasharp 8X22, you will have a product that you are satisfied with for life.

Of course, this is not an all-inclusive list, and there are many more manufacturers that make outstanding binoculars. If you are in the market for a pair of high quality pair of binoculars, you should not limit yourself to these brands.

Conclusion

The world of binoculars is huge, and it will take many years for the beginner to explore and learn. With time, you will be able to appreciate minor differences between binoculars, and you will develop a taste of your own. I hope that this guide will provide you with sufficient information to begin your exciting journey into the world of binoculars.

How to Choose the Best Binoculars for Birding

optics den birding binoculars 5Binoculars, field glasses, telescopes. We see them in action adventure films, high seas capers and spy thrillers. The first telescopic lens was attributed to the research of Hans Lippershey (1608), who marketed his device in Holland. Much of the fanfare surrounding 17th century optics focused on the inventions of Galileo — Galilean optics.

Exactly.

Galilean optics refers to the telescope designed by, of course, Galileo in 1609. Comprised of a plano-convex lens and a plano-concave lens at the eyepiece, this technology was able to magnify viewed objects by 30x. Not bad. It allowed Galileo to see the moon’s craters. And if that isn’t exciting — modern day improvements on Galileo’s creation allow you to see that yellow warbler in the apple tree at a hundred feet away. That’s just as intriguing as looking at dust pits on the moon.

Sir Isaac Newton of the “falling apple gravity” fame, reconsidered earlier designs and came up with a novel approach involving the use of mirrors. The mirror lens collected the light and used reflection to gather that light to a focal point. The power of the mirror’s ability to do this allowed for magnification possibilities far beyond those of standard lens capabilities. Telescopes moved from double-digit magnifications to those in the millions.

The modern binocular, which consists of two “telescopes,” didn’t appear (pun intended) until the early 19th century.  An Italian inventor, Ignatio Porro, saw the light and used prisms to concoct his binocular in 1854. Curiously, Lippershey was originally told to fashion his single-style field glass into a double – binocular – design in 1608! Everything old is new again. Unfortunately, none of these inventors had bird watching in mind. Now that really is astounding.


What do binoculars do best? Magnify birds!

Optics Den Banner Optics Perception HD BinocularsHaving a hardscrabble pair of quality binoculars is as important as a good field guide for birdwatching.  The problem is, many birders focus on their “homework,” identifying birds, learning calls and habitat (all important) but don’t spend any time researching binoculars. Bird watchers want birds, not technology. No one wants to waste time with a bunch of optics lectures when there are avians waiting outdoors. Besides, you don’t want to require a degree from MIT to figure out binoculars, just pack any old pair that’s easy to use.  That approach is not a good idea. Here is why.

You need to purchase a pair of binoculars that:

  1. Don’t require a Ph.D. to understand.
  2. Are easy to use.

If you run out and buy the cheapest and smallest pair for sale at your local dime store – you will be disappointed. They won’t do the one thing we birders absolutely require in a pair of binoculars.

Birdwatching binoculars need to be able to focus QUICKLY! Ah, most of us have been there. We grab grandpa’s clunky double-telescopes, rip off the covers and run to the window to get a close look at the pileated woodpecker drumming on the old maple.

You’re flipping aside that darn neck strap and turning the stupid focus grips. This is a horse race, darn it, you don’t have all day. Come on…come on, focus you %^^&&. The pileated woodpecker got sick of those binoculars too…and flew into the forest. Yup.

What you WANT:

  1. Light-weight binoculars that will fit in your gear and not require you to weight lift in order to use them in the field. If you have ever focused a pair of heavy lenses for long-term species’ observation, your arms feel like you are a losing contestant on a reality show. “How long can you hold your arms up? BEEEP, time’s up.”
  2. The binoculars must be designed well enough to register brightness/light in many field conditions, including low light.
  3. The binoculars need excellent acuity. They must be able to focus on a distant bird and provide you with exquisite clarity. You need to be able to distinguish feather patterns, plumage color (produced through a lens’ prism coatings) and fine details.
  4. Focus, focus, focus. Unlike the birder using grandpa’s spyglass, you want a pair that will focus quickly and sharply. If you ever tried “following” a bird as he winged his way by, you know how important this is. It is very easy to “lose” sight and track of a moving bird.
  5. Magnification is a variable. For most enthusiasts choose a pair that will deliver 7 or 8x. The higher the magnifying abilities the heavier the binoculars. For birders that will be doing optics den how binoculars work birdingfrequent and dedicated distance sightings, invest in a tripod set-up.
  6. Distance and power is not always an advantage. Backyard and homestead birdwatchers that want to get “up close” to the visitors at feeding stations will want to consider binoculars that offer a close-focus feature.


For specific information on how binoculars work click here – Optics Den.


Note: People who use spectacles know the trials of propping binoculars in front of their eyeglasses. Your glasses make the experience frustrating. The image is hard to get into focus and you may only get a clear view of the center, and even then, you are squinting and everything is wavering.  This is because binoculars are designed by how far your eye is from the piece! Your glasses change this distance. Purchase binoculars with “eye relief” features – 16mm (for low prescriptions only) —20mm. Or, wear contacts when you go birdwatching!


Porro Prism and Roof Prism

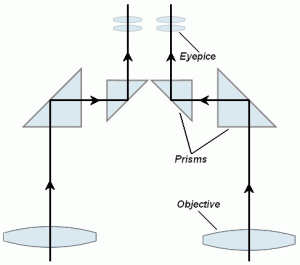
Porro prism binoculars are the old-standard. Just like your father’s Buick, these hinged field glasses with the off-kilter lens path still do the job. And if you require a low-priced pair for simple and occasional backyard viewing purposes — these will certainly give you contrast and clarity. They are worth their weight, and price, for hobby birders.

Roof prism binoculars replaced the porro over 40 years ago.  These sleek, modern “flat-bridge” designed glasses allow for a straight line from the eyepiece to the objective lenses. Requiring more precise manufacturing techniques their price reflects that. Most binoculars are roof prism, but be sure to buy a quality pair (and the $$ will reflect that).

If you have simple needs and/or a low budget – purchase the porro models.

Your purchase

Binoculars are like cars. You can buy a Toyota or you can buy a Porsche. It’s up to you and your budget. Visit a local birding store or sporting store to talk to the experts about your needs. Always mention that you will be using the binoculars for birdwatching and also whether you will require a pair for backyard spotting or serious field observations. There are so many variables beyond price, that only an expert can assist you in getting the perfect pair of binoculars that will last “forever.” Try out the field glasses to find the design and model that you feel the most comfortable using.

For more information on which binoculars will work for your needs visit the Optics Den. A specialist is waiting to assist you.

What are your favorite binoculars? Leave us a comment and let us know what birdwatchers are using today!

The Best Monocular

the best monocular buyers guideA great alternative to a conventional set of binoculars is a small scope designed to produce magnification like a binocular but only requires a single eye like a telescope, called a monocular. Like a telescope, a monocular has a single viewing lens and body. Like binoculars, a monocular utilizes lenses and prisms to reflect light and magnify an image. When choosing to purchase a monocular, make sure to consider the range of factors that fit your intended purpose, budget, and needs. Here are five things to consider before choosing the right monocular for you:
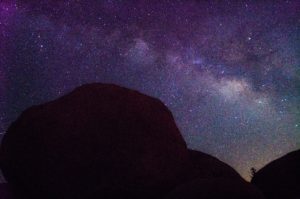
Purpose of the Monocular

Whatever your viewing requirements may be for your next professional and recreational activity, there is a monocular for you. If you plan to be around water during your sailing or canoeing adventures, then a waterproof and fogproof monocular will protect your unit from the natural environment. Will darkness be an issue? No problem. Choose a night vision monocular with a sophisticated Infrared illuminator to allow night vision capability for your hunting for camping trips.

Magnification

While magnification levels are generally higher in a telescope, and viewing depth is generally greater in binoculars, a monocular is suitable for situations that require a lightweight and compact device. The magnification of a monocular is how much larger the viewed image is enlarged over normal and is indicated by the first number of the optical specification, as in the 12 in “12×50.” (The second number is discussed below.) Lower magnifications ensure that the zoom on the object is minimized and field of view is maximized. As the magnification increases, the field of view becomes smaller. Here are the advantages to both lower and larger levels of magnification.

  • 6x and below – These lower magnifications will keep the object smaller and are suitable for viewing wide landscapes.
  • 7x to 14x – These mid-range magnifications are a good balance between a diminished field of view and increased object size.
  • 15x and higher – These higher magnifications with decreased field of view are excellent for viewing specific objects at quite a distance

Objective Size

The objective size of a monocular is the diameter of the front lens given in millimeters and is indicated by the second number of the optical specification, as in the 50 in “12×50”. In this case, the diameter of the objective lens is 50mm, or about the average length of an adult’s thumb. This number indicates the light gathering ability of the device. Although a larger lens does allow more light and thus enhanced clarity and sharpness of the image, increased size and weight does become a factor.

Eye Relief

Eye relief is especially significant for people who wear glasses. Eye relief, measured in millimeters, is the furthest distance that the eye can be placed from the eyepiece while allowing the widest possible field of view. If your eye is further away from the given eye relief distance, you will loose the end of the sight picture. To accommodate the offset effect of various eyewear, it is recommended that you choose an eye relief distance in the range of 14mm – 16mm.

Lens Coating

Monocular coatings come in a variety of finishes such as fully multi-coated, multi-coated, fully coated, and coated. Each type of coating is associated with increased brightness, clarity and reduced glare of the viewed image. Expect to pay a bit more for fully multi-coated lenses than simply coated lenses. In general, multiple coatings increase light transmittance and definition.

The Best Monoculars on the Market Now

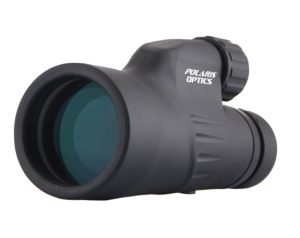
  • Polaris Explorer – 12X50 High Powered Monocular Designed for any weather environment, this powerful monocular allows you to view objects at 12 times their original size. The 50mm lens allows for a clearer and brighter range of view. At about 50 yards, individual leaves on a tree may be easily seen. Use the focusing mechanism to make minor adjustments to clarity. The Polaris Explorer High Powered Monocular features fully multi-coated lenses and renders a high quality image under low lighting conditions. In addition, the waterproof and fogproof features secure it from dirt, dust, and debris. The durable external protective material makes this monocular capable of withstanding wear and tear.
  • HDE 15x – 55x Zoom 21mm Compact Monocular At just 4 ounces, this monocular can easy fit into your pocket or bag while allowing for the same power that much larger units offer. You will value the wide range of magnification settings from 15x up to 55x zoom allowing you see up to five miles away. The 21mm lens is most suitable for bright conditions at a long distance. To compensate for vibrations associated with higher magnification levels, the HDE® Compact Monocular comes with a tripod screw for steady viewing.
  • Night Owl Optics 5-Power NOXM50 Night Vision Monocular For your next campout or hunting trip, amplify light under the darkest conditions with this rugged high quality monocular designed with the latest optics technology. The 5x magnification and 50mm lens with activated infrared light will clearly illuminate a small area up to about 100 yards. The Night Owl Optics Night Vision Monocular comes with a sturdy protective finish, hand strap, and plastic focus ring for increased clarity. Requires a lithium battery that is not included.

Conclusion

Ultimately, monoculars are single-tubed optical devices used to view distant objects under a variety of conditions. Although the main advantage over binoculars and telescopes is portability and carrying convenience, the main disadvantage is lack of comfort, depth, and ease of continuous viewing. When purchasing the right monocular for you, make sure that the purpose, magnification, objective size, eye relief, and lens coating specifications align with your sightseeing goals for a fun, comfortable, and enjoyable experience.

Using Your New Monocular

Once you’ve selected the monocular that will fulfill your needs, check out the video below to learn how to properly and effectively use your new optic:

The Best Spotting Scope Tripod

Tripods are used with a wide variety of optical equipment. These devices are essential accessories not only for supporting spotting scopes, but also for other optical equipment such as telescopes, binoculars and cameras. Tripods play two main important roles namely:

  • They improve the steadiness of the equipment when using sensitive and high-magnification instruments
  • They support the weight of large and heavy instruments that the user would otherwise struggle to support adequately

Tripods have two basic parts: a tripod head that holds the optical product and a tripod leg set. On less expensive tripods (cheaper tripods usually cost less than $100) the tripod head and the leg set are sold together by the manufacturer. Most of these tripods do not allow the user to remove the head and switch it with a different one. For more expensive tripods, however, the heads and leg sets are interchangeable and can be bought separately. For instance, a Bogen tripod only sells the leg set if the customer orders for a ‘‘Tripod.’’ If the customer needs the complete device, they must order for a ‘‘Bogen Kit.’’ Manufacturers of high-end tripods usually mention this in the product specifications.

Heavy instruments require tripods with heavy heads, and these tend to be expensive. It’s important that you buy a tripod that matches your specific needs otherwise you will end up wasting your money. Most cheap tripods feature plastic heads which are prone to cracking and can easily drop your spotting scope on the ground. These types of tripods are often not the best for use with spotting scopes. Some manufacturers specify the correct payloads for their tripods. But, it’s always best to take these figures with a pinch of salt since they are often inflated.

Compact Tripods

Compact tripods are bigger than table-top tripods, but can still be used conveniently when the user is sitting on a chair. These tripods are loved by backpackers and mountain hunters due to their portability. Compact tripods are best for spotting scopes of not more than 70mm but not so good for spotting scopes larger than 80mm.

The Leupold Compact Tripod 56446 is one of the best compact tripods. The device sells for $142 on Amazon. It weighs 2.3 pounds and measures 17 x 9 x 5.2 inches. It is reputed to hold spotting scopes as large as 19 inches and supporting weights of up to 4.5 pounds quite well.

But, for people who prefer larger scopes, it would be better to go for the Bushnell Trophy XLT 20, a heavy-duty and waterproof spotting scope that comes fitted with a good compact tripod. The spotting scope sells for $374.95 on Amazon, though you can get it at an off-price of $185.30. This spotting scope and tripod weigh 7.2 pounds.

Full-Size Tripods

Full-size tripods allow a user of average height to use a spotting scope while in a standing position. Being full size, however, does not automatically mean that the tripod is ideal for heavy loads. The user should make sure to match tripod strength with the weight of the spotting scope. It’s also important to remember that as a general rule of thumb, cheap plastic tripods are only suitable for light weights and cannot be expected to support heavy spotting scopes reliably. The average full size tripod with its head attached extends from 26 inches to 57 inches but can go up to 72 inches with the center column at its highest point.

The Bushnell advanced tripod is one of the best full size tripods. The tripod sells for $166.95 on Amazon and weighs 5.5 pounds. This full-featured tripod can support 11 pounds of instrument and has a minimum height of 18.3 inches and a maximum height of 61 inches (50.3 inches without the column extended). It’s a great device to use where portability is not a primary concern. The universal head fits a wide variety of scopes, range finders and binoculars. The tripod is sturdily built with rugged corrosion-resistant finishes that guarantee years of trouble-free service.

Table Top/Shooter’s Tripods

Table top tripods, or shooter’s tripods as they are commonly referred to, are tripods that are designed for use on a table or a shooting bench. Most of these tripods are between 8 inches and 18 inches in height depending on the model and the manufacturer. Table top tripods mostly do not have telescopic legs. This limits their range of adjustability since many can only be adjusted using an extendable center column, though some models lack this feature. A shooter tripod consists of a table top tripod that has a knob that can be used to make fine adjustments on the evaluation and windage. Their light weight and narrow led span make them ideal for use in limited spaces but they are generally not recommended for use with heavy equipment.

If you feel that a table tripod is good enough for you, the try the Alpen Micro Adjustable tripod. It sells for just $72 on Amazon and weighs a mere 1.2 pounds. The tripod is a real midget and has a maximum standing height of just 13 inches, though it can go to 16 inches when the legs are bunched. The good thing about it is that it is sturdily built and made entirely of metal (with the exception of the adjustment knobs) which makes it a good choice even for heavier loads.

The most important thing to consider when buying a tripod for your spotting scope is how well it can support your scope. The height is also important, though the weight tends to be a secondary concern for many users.

Beginner’s Guide to Astronomy

There’s no wrong age to get into Astronomy (not to be confused with Astrology). People from all walks of life can enjoy looking at the stars no matter their age or skill level. Companies like Celestron, Meade, and Vixen have dedicated themselves to producing telescopes accessible to all. What may be classified as an advanced telescope because of its price can usually be understood quickly, now that technologies such as WiFi and hands-free controls are being implemented.
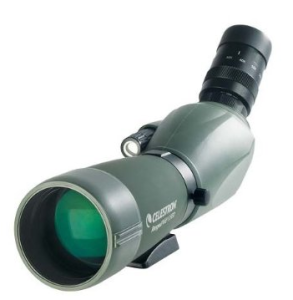
You don’t need the fanciest or most expensive telescope to see the planets in our solar system. However to see further into space, where some of nature’s masterpieces lie, more sophisticated optics will be needed.

If you’re a bit clueless as to handle a telescope in general, check out our guide to handling telescopes for beginners.

Starting Out

Location, Location, Location

Your first step towards a successful, continuous experience with astronomy is to scout the area around you for a good place to set up a telescope. Keep in mind that densely populated areas such as cities will have a lot of light pollution. Light pollution is the accumulation of all the light generated in a particular field. For example, a city will have street lights, cars, buildings, and various other generators that will interfere with the light given off celestial objects and a telescope’s ability to see them.

  • Our recommendation will always be the suburbs or in an open field, away from large sources of light.

If you do decide to go off-trail and away from solid ground, make sure your telescope is equipped with adequate power and stability. Chances are you’ll probably take a trip away from your home to get a good view of the night sky.

Getting a telescope

One question on every beginner’s mind—what sort of telescope should I buy? To start off, we have a couple of questions for you to help narrow down your search:

  • What do I want to be able to see?
  • What is my budget?
  • Am I still a beginner?
  • What constitutes a beginner’s telescope?
  • Am I into astrophotography?

What you shouldn’t do is buy the first fancy looking telescope you see on the internet. If the option is available to you, head into an optics store or dedicated telescope merchant to see and handle telescopes for yourselves and possibly hear from experts. Head on over to our list of best telescopes to check out the ones we think you should be interested in.

Most versions of telescopes have interchangeable optics such as eyepieces, which will keep your wallet safe from having to purchase another telescope if something happens to your optics. However, the lenses are directly proportional to the primary tube. If you want to buy a bigger or smaller tube of the same version of the telescope, make sure your parts can all fit together!

Star Maps

You can look up into the sky each night for the rest of your life and always find something new. The companies that sell telescopes will usually, but not always, include a star map or database full of celestial objects. These will be of great help to you if you desire to look at a particular planet or distant nebula.

It can be difficult to understand or read star maps at first, but one thing you can do is point out a familiar constellation. Asterisms (minor aspects of constellations) such as the Big Dipper and Orion’s belt are some of the easiest to see with the naked eye, so it would be a good idea to use those sets of stars as a foundation for viewing other, harder to find objects.

Set up

Great! Now that you’ve purchased your telescope, you’re just about ready to see the stars. Most telescopes nowadays are becoming increasingly user and assembly friendly. That’s not saying that all of them are going to be easy to deal with, but the precedent remains that you should take great care with handling your new telescope.

  • Handle the optics (eyepieces, lenses) with care. A stray fingerprint or scratch will ruin your view!
  • Don’t apply too much pressure when mounting the primary tube on the tripod or the mount. Most telescopes are designed for flexibility, not durability.
  • If you’re telescope runs on a battery, make a note to give it fresh batteries (if they are interchangeable).
  • If it runs on a rechargeable battery, ensure that it is charged and ready for each excursion.

Viewing

Congratulations! You’ve set up your telescope, powered it up, and it is now ready for the next nightfall. Wait for a clear night, preferably during the spring or summer when the skies are mostly clear. You can’t do much which thick, nighttime cloud cover.

Bring all your spare eyepieces with you. Eyepieces give you magnification, and no object is going to be in the same position each night. Distances and light spectrums shift all the time, and even the slightest of differences can leave you scratching your head wondering where Jupiter went.

Enjoy the stars!

Celestron AstroMaster 114 EQ Review

For a beginner, it can be hard to determine what type of telescope to purchase. There are telescopes designed for easy handling by children, but you’re probably looking to take a step further into the more advanced and sophisticated telescopes. If this is the case, then Celestron has constructed a reflector telescope called the AstroMaster 114 EQ specifically for your needs.

The AstroMaster makes use of an easy, no tool assembly process so buyers can have an easier and quicker time putting the main components together. This telescope is collectively known as a beginner’s telescope. It would make sense that the Celestron is easy to use, but it’s also a powerful instrument in its right.

Eye Piece

Depending on the seller, the AstroMaster will come with two eyepieces—10mm and 20mm. The 10mm is a 100x magnification eyepiece while the 20mm is a 50x magnification. This will be helpful in clearing up blurry images of objects near and far.

All in all, the eyepieces of this telescope pack a powerful punch, with many reviewers able to see planets such as Saturn and clear views of the moon’s many craters. Compared to most stars and galaxies, the local planets in our solar system are relatively easy to see, so don’t be afraid to test the Astromaster’s magnification to see what otherworldly views you can discover.

Star Pointer

The star pointer is not all too different from a handheld laser pointer. It attaches to the telescope and fires a laser into the sky to match what you are looking at. If you want to see something during the day, the color of the laser can sometimes be interchangeable, but Celestron’s is primarily red.

Object Database

Purchasing the AstroMaster will also provide you with the SkyX – First Light Edition database. The software has over 10,000-night sky objects stored on star maps(which you can also print) and a variety of HD images that you can look at.AstroMaster 114 EQ

Cool Features

If you’re willing to spend a little more, you can upgrade the AstroMaster to accomplish even more feats.

Have you ever thought about tracking the movement of an object across the sky? It may look like all those stars and planets in the heavens are standing still, but in reality, they are moving at a rapid pace. If you look away from your telescope for a few minutes or even adjust the settings slightly, whatever you were viewing could be miles away in a different part of the sky.

The AstroMaster solves this problem by offering a motor drive that locks on to a particular object of your choosing and tracks its movement across the sky. Even further, the telescope itself automatically adjusts for the curvature and spin of the Earth during the night.

Overall

For the price, the AstroMaster is one of the best telescopes on the market, and it is a worthwhile investment. It also comes equipped with the tripod necessary to maneuver the telescope across a wide range of space. If you’ve outgrown your child’s telescope but aren’t quite ready to make a huge leap into stargazing, the AstroMaster is the right choice for you.

Celestron Regal M2 65ED Spotting Scope: Two Reviews

Celestron Regal M2Today we’re lucky enough to have two complete reviews of the same scope, Celestron’s Regal M2 65ED. It overall sounds like a great spotting scope. Here they are:

First Review:

Whether you love bird watching or taking pristine photos of other wildlife in nature, the Celestron 52304 M2 65ED Spotting Scope can help you take the perfect pictures. Celestron is a trusted brand when it comes to creating a multitude of different scopes to give the user the best-quality view possible. This M2 series spotting scope is made from state-of-the-art materials to ensure maximum durability that allows you to use it in any type of weather. The scope also comes with a variety of adjustable options as well as accessory upgrades to make your viewing experience even better.

Celestron Quality Scopes

For years, Celestron has been creating high-quality optics. They make telescopes to view the stars, microscopes for the smallest objects on earth, binoculars and best of all they make spotting scopes. Celestron ensures that that they keep up with the latest technology by creating smartphone and tablet apps for your convenient. Not only can you access different Celestron apps, but they also make accessories that allow you to hook up your smartphone to this M2 series spotting scope. Their goal is to stay on top of innovation and provide the best quality possible for every one of their customers.

Regal M2 65ED Spotting Scope Material

Celestrong has created the Regal M2 65ED Spotting Scope with a magnesium alloy body. It’s light in weight, extremely strong and durable. Celestron understands that outdoorsman who use their products trudge through some rough terrain, so they ensure that this spotting scope can take a hit if it were to drop. The material is completely waterproof as well, so whether it’s raining or snowing when you’re out spotting wildlife, you won’t have to worry about water damage.

The M2 Spotting Scope Lens

The lens in the M2 65ED Spotting Scope is created with the same proprietary material that Celestron uses for their best telescope that helps astronomers view stars and galaxies millions of miles away. When you purchase this spotting scope, you’ll have the choice of a three different sizes that include 65mm, 80mm and 100mm. The extra-low dispersion glass helps you spot the tiniest of creatures hidden in brush or in the dimmest of light by providing maximum light transmission. No matter what the situation may be, you can rest assured that you’ll have bright, sharp images. The scope also has an easily-accessible dual focus knob so you can quickly spot your subject with crystal-clear quality.

The Comfort of the Regal M2 65ED Spotting Scope

Celestron has engineered this spotting scope to provide the maximum amount of comfort for anyone who is using it. The tripod that the spotting scope sits on is completely adjustable. You’ll be able to adjust the height and the angle of the spotting scope with ease to get the perfect angle. The spotting scope also comes with a fully adjustable lens shade and twist-up eyecup.

Accessorizing the Regal M2 65ED Spotting Scope

You’ll be able to instantly share the photos you take with the 65ED Spotting Scope with the smartphone adaptor that’s compatible with a variety of iPhone and Android products. This adaptor lets you attach your camera to the twist-up lens to take perfect pictures to save to your phone and easily upload the photos to your social media accounts or email them to friends and family. Another great accessory that Celestron makes for this scope is the stay-on case. This case gives you extra protection from the elements while not hindering the quality of your viewing.

When you want to experience nature and wildlife at its finest, the Regal M2 65ED Spotting Scope is one of the best on the market and backed by a limited lifetime warranty.

Second Review:

For enthusiastic amateur viewers, the Celestron 52304 Regal M2 65ED Spotting Scope makes a sound choice. It features many standout components, including an ED objective lens, XLT coatings and a rotating tripod mount. The quality of images is exceptional. The telescope comes in a durable magnesium alloy body, which gives users the confidence to take it out in all types of viewing conditions. This scope also offers uncommonly good features for an average price. This makes astronomers looking for a solid, high-performing telescope at a reasonable price quite happy.

The objective lens, a notable feature, produces a clear and vivid image. It replicates images in a high quality and precise color scheme. The lens has a 16-48x eyepiece with automatic zoon. It also reduces chromatic aberration and shows remarkable contrast. The eyepiece mount measures 1.25 inches — a standard dimension that makes the scope compatible with many types of telescope eyepieces. The eyepiece has a diverse magnification range, a rubber eyecup and a 20mm eye relief, which enables comfortable and accurate viewing for long viewing sessions. In addition to enabling easy adjustments and creating a precise, clear image, the lens has a special coating –Celestron’s own—that enriches color and produces a bright picture. This coating includes BaK-4 prisms and a low-dispersion ED glass piece that reduces chromatic aberration but expertly gathers light to produce a great photo. The Regal M2 boasts a long-rang viewing field of 1,000 yards and has a 16.4 foot, or 5-meter, close focus capacity for clarity and precision.

This telescope has several adjustments and mechanisms to help astronomers customize the scope to their specific viewing needs. The Celestron rests on a rotating tripod, which makes setting up and changing positions a breeze. Rounding out the tripod’s notable features are a ¼-inch mounting socket and sighting aid. A sliding sunshade lets users allow or seal out the correct amount of light for the best viewing, while a dual-focus mechanism makes the scope perfect for looking at objects nearby and afar. Once in position, the tripod locks in place with a special locking system. This gives viewers peace of mind knowing that the scope will stay safely in place.

The Regal M2 comes with a T-adapter ring, which helps astronomers easily mount a DSLR camera to the objective assembly. In less than a minute, viewers can transition from tradition viewing to digital viewing and back again. This feature is one of the scope’s greatest assets, as it makes it perfect for traditional astronomers as well as the more technologically oriented crowd. Users can adjust the scope with a set of coarse and fine adjustments to create a personalized and enjoyable experience.

The Regal M2 weighs in at 46.8 ounces, which makes it a bit heavier than other scopes in its class. This excess weight comes in handy for stabilizing the scope in a prime viewing location, but makes it less transportable. In addition to stability, the Regal M2 is constructed with magnesium alloy, which makes it ideal for withstanding all types of weather conditions. It also resists erosion, thanks to a proprietary addition of nitrogen filling, which protects them from the inside. The nitrogen filling also does double duty by keeping the viewing pieces from fogging up.

Overall, the Celestron 52304 Regal M2 65ED Spotting Scope makes a fine instrument for amateur astronomers looking for a high-quality device without spending a fortune. The scope’s rugged design and versatility make it perfect for other outdoor viewing activities too, such as birding and looking at insects. As a bonus, this instrument comes with sturdy carrying cases to transport the components with care and ease.

Bonus Video Review!