Nikon D500 Review

Rounding out our selection of “Best Overall” in our roundup of Best DSLR Cameras is the Nikon D500, a super affordable alternative to some of Nikon’s more expensive gear (ahem, D5) with some great features.

The D500’s speed and sharpness make it a go-to choice of photographers shooting sports, wildlife, and action shots, but many outside of that sector love it for more intimate settings like weddings.

 Nikon D500

Specs

Here are some of the key specs of the Nikon D500:

  • 20.9MP DX format CMOS sensor without Optical Low Pass Filter
  • EXPEED 5 image processor
  • Multi-CAM 20K AF sensor with 153/99 AF points
  • ISO range of 100-51,200
  • 4K UHD video
  • Dual card slots – XQD and SD media
  • 2.36M-dot tilting touchscreen display
  • 180,000 pixel RGB sensor for metering and subject recognition

Powerful Performance

Prepare yourself: with continuous shooting, you get 200 frames of 14-bit RAW. The D500 has one of the fastest continuous shooting options out there – not just at this price point, but overall. For photographers who need speed without sacrificing quality, look no further. The resolution works great for the speed and doesn’t have the bulky file size that higher resolution carries.

The autofocus on the D500 is also worth noting. With 153 autofocus points and 99 cross-type sensors, the quality of AF on the D500 is fantastic. All of this comes with high ISO performance and 4K video shooting, in addition to some other sweet performance features.

Usability

The D500 has a unique tilting touch screen that makes reviewing simple, but it also makes catching tricky shots much easier thanks to the tilt mechanism that lets you hold the camera overhead or in other different locations. Professionals will also appreciate the combo XQD and SD slots, great for having different options or back-up in longer shoots.

Nikon gives you plenty of room to customize, too, as it has with other high end cameras. You can fine tune AF behaviors, customize buttons, and use the joystick for whatever function makes the most sense for your needs. Auto ISO also allows users to set thresholds and manage exposure.

Connection Options

The D500 offers unique connectivity options – such as offering both Bluetooth and Wi-Fi – but as you’ll see on any review or website, the bugs aren’t quite smoothed out yet. SnapBridge is Nikon’s new connectivity system, but many users are still reporting issues. So, it’s best not to purchase this camera with any intention of using SnapBridge or some of the other connection options right away without any problem.

Other issues, such as short battery life, are related to the still-developing connectivity options with SnapBridge and Nikon’s software, so be sure to read up on some of the tips and tricks to save battery life (for example, turning on airplane mode if you notice batteries draining too quickly).

Bottom Line

The Nikon D500 is a fantastic camera at the price point, and will be an invaluable camera for action shots and more. For many users looking to move from an entry level to the next step, the D500 is a smart choice with lots of punch.


DSLR Cameras: Canon EOS Rebel SL1 Review

Those looking to up their photography game inevitably start considering digital SLR (Single Lens Reflex) cameras. DSLR (Digital Single Lens Reflex) cameras can be complex, but users tend to find that they get the hang of things pretty quickly. Having good auto settings makes the transition easier, and new photographers can get used to the camera before moving into custom settings to elevate their practice even more.

Beginners looking into DSLR cameras tend to check out the heavy hitters first: Nikon and Canon, and for good reason. These brands are well-established leaders in photography, particularly digital. The Canon’s EOS Rebel SL1 was our pick for one of the best DSLR cameras for beginners. The Rebel SL1 is an older model that’s currently offered at a great price (under $500), making it a super affordable and accessible pick for new shutterbugs.Canon EOS Rebel SL1


Specs

Here are some of the key specs of the Canon Rebel SL1

  • 18 MP APS-C CMOS Sensor
  • DIGIC 5 Image Processor
  • 0″ 1.04m-Dot Clear View II Touchscreen
  • Full HD 1080p Video Recording at 30 fps
  • 9-Point AF and Hybrid CMOS AF II
  • Native ISO 12800
  • 4 fps Shooting for 28 JPEG, 7 Raw Files
  • 63-Zone Dual-Layer Metering System
  • Scene Intelligent Auto Mode
  • EF-S 18-55mm f/3.5-5.6 IS STM Lens


Parents’ Choice

Many of the features of the SL1 make it pretty clear who Canon’s target customer is. The “Special Scenes Mode” gives users a simple way to adjust the settings based on three common shoots: Kids, Food, and Candlelight. These modes are preset to capture the scene in just the right way, giving newbie photographers a chance to use the camera right out of the box.

Even the auto settings (without those specific shooting modes) produce nice shots, though of course they can be improved with manual settings once learned. The entire setup is user-friendly and intuitive. That makes this camera a super attractive pick for busy parents who want to take the camera out and use it – and figure out the additional features when time permits.

Creative Shooting

Those same presets and modes that make the SL1 attractive to parents also beckon other would-be shutterbugs with filters and effects. A few of the included filters are Art Bold, Water Painting, Miniature, and Soft Focus. There’s even a Miniature Effect for movies, making this a fun camera for some creative shooting.

Shooters can use those effects in Effect Shot Mode, and the SL1 will capture the image with the effect and without. And, until you figure out aperture and other settings, you can use Background Simulation to automatically blur or sharpen your backgrounds.

Design

One of the biggest appeals of the Rebel SL1 for many shoppers is its size. It is compact and lightweight, making it a great choice for users of all ages and abilities. It also functions well as an entry level Canon because you can add lenses that will work with different models (as long as you stick with the crop sensor, otherwise you might need an adaptor). The popular EF 50 mm f/1.8, for example, is an affordable add on lens that gives you beautiful portrait shots.

The interface is extremely functional, too, again making it a great option for first time DSLR users of any age or ability. The touchscreen works great and gives you direct access to all the settings you’ll need, without getting too technical. Playback is a breeze and works even in bright light.

Bottom Line

The Canon EOS Rebel SL1 will soon be replaced by the SL2, which should have some new bells and whistles. But, at a stellar price, the SL1 is worth picking up right now. Parents, budding creatives, and hobbyists will love the usability and the features, as well as the affordable lenses and intuitive interface.


DSLR Cameras: Nikon D3300 Review

Those looking to move beyond smartphone photography inevitably start considering digital SLR cameras. Beginners looking into DSLR cameras tend to check out the Big Two first: Nikon and Canon, and for good reason. These brands are well-established leaders in photography, particularly digital, making them a safe choice for new DSLR users. Nikon has a pretty loyal following, and with the perks and ease of use that come standard in their entry-level line-up, it’s fair to say they’ll keep gaining new converts.

We ranked the best DSLR cameras for beginners and Nikon’s D3300 hit the top of our list. With a budget-friendly price and a compact size, the D3300 is an excellent choice for a budding Nikon D3300shutterbug.


Specs

Here are a few key specs of the D3300:

  • 24.2 MP CMOS DX-format sensor
  • 5 frames per second continuous shooting
  • 11 AF points with 3D tracking
  • ISO 100-12800 (expandable to 25600)
  • 3 inch LCD with 921,000 dots
  • Expeed 4 processor
  • 1080/60p HD video
  • 700 shot battery life

Newbies Rejoice

The D3300 continues to be an attractive choice for new photographers for a number of reasons. For newbies, the interface and overall design are pretty intuitive, and the look and feel in general just make it easy to pick it up and start shooting. The auto features produce nice shots, which can get you by until you get the feel for the different settings and features. All of this combined makes for a DSLR that isn’t overly intimidating.

It also makes for an attractive entry-level camera because the capture speed is good for this class of cameras. Many of those considering a move to DSLR are parents – the speed on the D3300 works pretty well for catching shots of those kids who just won’t sit still.

Bells & Whistles

Some of the extra features on the D3300 make it attractive to those target customers, too. The Effects modes, for example, offer some fun options like Super Vivid, Miniature, and Easy Panorama. Again, for beginners, this offers a ton of new potential. Shooting in Effects modes is easy, so it gives new users even more practice with this light-weight, intuitive camera.

The D3300’s video feature is also a nice addition. Video shots look great and even end up being decent in low light. With 1080/60 HD, you’ll get sharp details and vibrant colors, and up to 20 minutes of video capture time.

Consistency

While any of the “best” DSLRs are going to produce consistent shot quality, the D3300 is good for beginners because of the consistency not just in shooting, but in use.  Nikon’s technology is known for shooting quality at high ISOs, and the D3300 has a decent autofocus for being an entry-level camera. What this means for beginners is that you’ll see a lot of good practice shots even as you’re figuring out what all the terms mean and what the settings will do.

Nikon’s cameras offer consistency across models, which makes for a relatively simple transition when upgrading to a higher model. Nikon has fairly good consistency with lens investments, too, so additional lenses or other accessories you purchase for the D3300 should carry forward (of course, always check with the manufacturer to be sure).

Not Just for Newbies

Many photographers also keep the D3300 around even when they upgrade, or even purchase a D3300 as a backup. With great quality and plenty of features, professionals find the D3300 to be a nice addition to their lineup. Plus, the lighter weight and user-friendly body design provide a nice break from the much heavier higher-end models.

There’s a lot to love about the D3300, and at the price point and given its lightweight feel, it will likely be a backup camera pros will actually use.

Bottom Line

For individuals looking to make the move to DSLR, the Nikon D3300 is an excellent choice. It’s affordable, produces high-quality shots, and can shoot right out of the box.


Canon EOS 5DS Review

The Canon EOS 5DS nabbed one of our top “Best Overall” slots thanks to its superior high resolution offering – in fact, it offers the highest resolution of any full-frame camera. It’s that fantastic resolution that makes the 5DS so highly regarded in the lineup of DSLR cameras.

The Canon EOS 5DS comes in two versions: The 5DS and the 5DS R. The only difference between the two models is the R version includes an optical self-canceling filter.Canon EOS 5DS

Specs

Here are some of the top specs of the Canon EOS 5DS:

  • 50.6 megapixels CMOS sensor
  • 5 fps continuous shooting
  • ISO 100-6400
  • 1080/30p video
  • 61-point AF module with input from 150k pixel metering sensor
  • Dual Digic 6 processors
  • 3.0″ 1.04M-dot LCD
  • CF & SD slots (UHS-I compatible)
  • M-Raw and S-Raw formats
  • 30MP APS-H crop and 19.6MP APS-C crop modes
  • USB 3.0 interface

Max Resolution

The format, function, and design of the 5DS clearly illustrate the intended photographers for this model. This camera is best for landscape, architecture, and portrait shooting – shoots where resolution matters, and speed and ISO range matter less.

The overall quality of the images the 5DS produces does not disappoint. Images are rich, sharp, and show detail beautifully. This makes the 5DS an excellent camera for enlargements, gorgeous portraits, and professional prints.

Artistry and Technique

The Canon EOS 5DS is truly a camera for experts. The emphasis is on technique and gear, but the outcome, of course, is stunning. Many creative users and designers, as well as landscape photographers and more, will find the resolution and other perks of this model are well worth the larger file sizes. Still, it lacks the ability to shoot 4K video, which some users have pointed out as being a missed opportunity, especially for users like wedding photographers.

Despite that miss, the overall feel of the 5DS is that it is all business. In addition to functionality and the focus on pixels, the added technology of the shutter delay feature helps to practically eliminate all chances of vibration – critical for shots like long exposure or other instances when even minute details matter.

Advanced Features

Many users are comparing the 5DS to the 5D Mark III, but whichever model you’re comparing it to, you’ll find that Canon definitely focused on updating the technology and features of this, most likely in order to take on medium-format cameras. The 5DS is more cost effective than many of those pricier models, and it’s not just the ridiculous pixels that make it a competitive offering.

One of the coolest new features of the 5DS is the new metering system. Shooting in bright daylight proves to be no problem for this camera. Canon also added time-lapse to the EOS 5DS, making it simple to use in camera. Users will also love the silent shutter. These are just a few of the new and advanced features offered on the 5DS.

Bottom Line

The Canon EOS 5DS isn’t for everyone, but for those who fall into the niche, you’ll be blown away by the resolution. The price is nice for a medium-format camera, especially (yes, we’re going to say it again) given the high resolution that no other camera can match.

Review of Canon EOS 5D Mark IV

Canon’s 5D series is well known and well loved, and the EOS 5D Mark IV adds itself to the lineup of excellent cameras. We think that the only Canon camera better than the Mark IV is the flagship D5. Price-wise, there isn’t much difference between the two. Having said all of that, the 5D Mark IV offers some differences that will appeal to many.

There are plenty of reviews of the 5D Mark IV out there, but we want to cover some of the basic takeaways for this camera to get you started.canon EOS 5D Mark IV

Specs

Without further ado, let’s take a look at some of the most attractive specs of the Mark IV

  • Full-frame CMOS sensor, 30.4MP
  • DCI 4K video capture
  • 61-point AF system with 41 cross-type sensors
  • ISO 100-32000 (expandable to 102400)
  • 7 fps continuous shooting
  • Dual Pixel Raw
  • 150,000-pixel RGB+IR metering sensor
  • 3.2-inch touchscreen

Dual Pixel FTW

There’s a lot of talk about the differences between the Mark III and the Mark IV. There are some design improvements (like better weather sealing) that are worth noting, and several updates that make the Mark IV an upgrade if you’re coming from the Mark III. One of the features we are most excited about on the Mark IV is one you’ll notice no matter which camera precedes this one: the advanced AF system.

The 5D Mark IV boasts the Dual Pixel AF technology. The overall autofocus in live view and stills shooting is a huge improvement over previous models and is just an all-around winner for this price point. The Dual Pixel Raw gives options like image micro-adjustment, bokeh shift, and ghosting reduction.

Monitor: Good, but Still Lacking

The LCD monitor offers a beautiful display, full touchscreen interface, and excellent responsiveness. However, as many have noted, it’s unfortunate that Canon did not add tilt screen. The touchscreen works really well, and overall, it’s easy to customize it. But it does still incite confusion, at least in the button customizing, a problem reported with many of Canon’s cameras.

Video Options

Canon made a smart move on the Mark IV and added 4K video. However, as many users have pointed out, it’s rather limited. The setup makes it simple to grab stills with good results. The Dual Pixel autofocus translates fantastically to video, especially subject tracking. With many photographers using video more frequently on their cameras, this is an overall good addition to the Mark IV, but still a bit flawed.

Versus the 5DS

One of the key differences between the 5DS and the Mark IV is that addition of 4K videos. That will likely be a deal breaker for many shoppers. In terms of resolution, the 5DS has the advantage (50.6 compared to the Mark IV’s 30.4). The Mark IV’s big advantage is the fantastic AF, but minute differences in speed, fps, and ISO will more than likely be the tipping factor. Between the two, it really depends on your preference, but you honestly can’t go wrong with either camera in our opinion.

Overall Thoughts

If you’re planning to drop over $3000 on a DSLR camera, you’re obviously going to do a lot more research. However, we think the EOS 5D Mark IV is worth considering. At the price, and given the technology it shares (and often surpasses) in other more expensive cameras, it won’t disappoint. It’s definitely among the best cameras out there for a number of reasons – keep it high on your list.


DSLRs Cameras: Pentax K-50 Review

For beginners looking into DSLR (Digital Single Lens Reflex) cameras, the two big go-to names tend to be Nikon and Canon. However, there are some other brands that are well worth considering, including Pentax. In fact, the Pentax K-50 rounded out our picks for Best DSLR Cameras for Beginners thanks to its fantastic lineup of features.

Specs

Here are some of the key specs of the Pentax K-50:


pentax k-50


  • Weather resistant body
  • Stabilized 16 MP CMOS sensor
  • ISO up to 51200
  • Continuous Shooting 6fps
  • 100% Pentaprism viewfinder
  • Eye-Fi Card Compatibility with Eye-Fi wireless SD cards
  • Full 1080p h.264 HD video recording

Designed for Use

One of the flashiest features of the K-50 is the body design. While few newcomers to digital photography are buying their first DSLR for the look of it, the added options of white or red are kind of a nice addition to the sea of black cameras. But the K-50 isn’t just a pretty face – it’s weather resistant, dustproof, and designed with the outdoors in mind. It also offers comfortable grips and it’s lightweight, perfect for hikers and outdoor enthusiasts.

Many users note the ease of use when it comes to the menu system. Any setting you might need is easy to find and quick to get to. This adds to the appeal for outdoorsy photographers who want to quickly update settings to capture nature’s fast-changing landscapes and wildlife.

Features & Function

For an entry level DSLR and given the price point, the K-50 has all the features and specs a beginner will need or want. The picture quality is consistently great, and the auto features enable newbies to capture great shots right out of the box. There’s plenty to learn with the K-50, but the menu system makes that easy.

The Pentax K-50 boasts nearly 6 frames per second in high-speed continuous mode (taking up to 30 JPEGs or 8 RAW shots in a burst). It also provides a max shutter speed of 1/6000 second and an 11-point (9 cross type) autofocus system with subject tracking. The SR mechanism does an excellent job of compensating for camera shake, and delivers consistently sharp images, even under the most typically shaky conditions.

Save Some $$…

The K-50 is no more, but that doesn’t mean you can’t grab it at an excellent price. The new and upgraded K-70 offers some appealing new perks over the K-50, but the price of the remaining K-50s just can’t be beaten. At that price (under $500), it’s worth every penny, even without the fancy offers of the K-70.

…Or Take the Upgrade

Though we don’t have a full report on the K-70 just yet, the word on the street is that it has some great updates. You will probably spend a few hundred bucks more, though.

Bottom Line: We recommend grabbing a Pentax K-50 while you can. You’ll save a ton of money off the original price (and from the price of the new K-70) and you’ll get some great features. Outdoorsy types will especially love the K-50’s design.


Beginner’s Guide to DSLR Cameras

If you are looking for the next step up from your smartphone or point and shoot camera, it’s probably time to take a look at DSLR (Digital Single Lens Reflex).

DSLR cameras do take some time to figure out. However, they are very popular with a variety of people, including: DSLR Buying Guide

  • Nature/Architecture Enthusiasts
  • Bloggers
  • Parents
  • Travelers
  • Retirees
  • Hobbyists
  • Film Makers
  • Artisans and Makers

And much more!

Whether you are interested in photography as a hobby, want to make a living from it, or just want to take professional-looking pictures, a DSLR camera is a must-have.

DSLR cameras are complicated, though. There is an entirely new language to learn, and getting good pictures from a DSLR camera depends as much (if not more) on technical skill as it does on the camera you use. For that reason, you’ll see many experts explain that you don’t need to start with the most expensive camera out there. Entry-level cameras are not only affordable, they are also designed to help new shutterbugs learn how to shoot.

In this guide, we’ll take a look at DSLR cameras to help you understand what you’re getting yourself into and how you can approach the buying process.

What is DSLR?

DSLR cameras use digital formats (rather than film) and are superior over point and shoot digital cameras in both quality and options. DSLRs use built-in mirrors and interchangeable lenses, which makes them the best choice for anyone hoping to enhance their photography.

It’s the interchangeable lenses themselves that really set DSLR cameras apart. Our smartphones continue to provide us with expanded options in terms of quality, focus, and artistry. But DSLR cameras have numerous lens options so you can choose the lens that best fits your specific needs – beautiful portraits, far-off landscapes, wide-angle architecture, macro. Aside from artistic shots, different lenses will produce great results for things like product shots (for your website, blog, or Etsy shop), sports, and video clips.

When you change out your lenses, you also have several options within the camera itself. This is where the DSLR and camera terminology comes in. You’ll see options like ISO, AF, F, TV, Raw, and more. What do these even mean? Let’s talk about some of these features next.

What are the Features of a DSLR Camera?

There are a ton of features available on today’s DSLRs. When you start shopping around, you’ll see the specs of each camera. Without knowing what all those terms and numbers mean, it probably looks like a completely different language. In fact, it can feel a little isolating to read up on camera specifications because the language is so technical, and newbies have a hard time understanding the implications of any of the terms.

Here’s a crash course on a few of the most common terms you’ll see related to DSLR cameras.

Aperture

This term is an important one once you start shooting. Aperture is simply the size of the opening on the lens’s diaphragm, and it regulates light passage. When you adjust aperture on your camera, you’ll change the f/stop.

Aperture can get a little confusing because the lower numbers are actually wider openings (more exposure). So, for example, if f/1.4 is the lowest available aperture on your camera, it will give you the biggest opening in the lens, and, thus, the most light.

Aperture is related to another term you’ll hear a lot: depth of field. Depth of field is the sharpness or blurriness of the area around your subject. You’ll hear it as “greater” or “less” depth of field. This helps add to the confusion of f/stops and aperture (we promise you’ll get the hang of it eventually). Here’s essentially what it means:

  • Low f/stop – less depth of field – blurrier background
  • High f/stop – greater depth of field – sharper background

The nice thing about learning aperture and depth of field is that it’s an easy setting to play with. There are also many articles online that explain the differences in depth of field and provide example pictures with various f/stop settings.

When you buy a DSLR camera, aperture isn’t something you’ll worry about in the specs. Having a wider range of f/stops comes from additional lenses that you might buy later on.

Focus

When it comes to “focus” in DSLR, we’re usually talking about the camera’s autofocus (AF). Some (though not many) entry-level cameras don’t have a manual focus, though, and we recommend avoiding those. Manual focus isn’t necessarily something you’ll use every single time you shoot, but it’s nice to have and gives you control over the subject in focus whenever you need it.

Autofocus is a pretty crucial part of your photography, so it’s worth it to check on the camera’s autofocus ability. In specs and reviews of cameras, pros talk about the “sensors” that function in AF. The speed and accuracy of AF are the most important parts of the function, and have added importance if you intend to rely on AF frequently (especially for action shots, wildlife shooting, sports, kids playing – you get the idea). While autofocus depends heavily on the subject, particularly the light level and contrast, but you should still be able to figure out whether the camera’s AF is good or lacking.

You can absolutely read up on the AF reviews and specs of the camera you are considering, but if you have the means to play around with the device before you buy, that’s even better. You can test to see for yourself if the autofocus tends to operate quickly or lag, and whether it seems to focus on the subject correctly or not.

Not having a good AF can make for an extremely frustrating photography experience, so it’s well worth it to do a little homework. You’ll see that “good” AF is typically based on the number autofocus points, but you’ll spend quite a bit more for cameras with lots of points, so don’t base your entire decision on that.

ISO

Like aperture, ISO is connected to the light. The difference is ISO decides how sensitive the image sensor is to light. In ISO, the lower the number, the lower the sensitivity. This makes it a bit less confusing than aperture! An ISO of 100 will always be the lowest available option on your camera and is generally a good setting for bright light, daytime, and so forth. Choosing higher ISO settings tends to mean more noise (graininess and discoloration) in the shots.

ISO ranges vary from camera to camera, but it’s another good area to check out before you buy. Nearly any camera you’re considering should have some info online with pictures taken at different ISOs. A camera that produces noisy images at a relatively low ISOs might not be a good investment. If you know you will be shooting frequently in low light, it might be worth spending a bit more to get a camera that is rated well for higher ISOs.

ISO settings are organically tied to shutter speed and aperture, too, so it does take a bit of time to figure out ISO settings. Using manual ISO isn’t a bad idea at all – it gives you a chance to learn some of the other settings before worrying about this one (which can be tricky).

Megapixels

Megapixels get a lot of attention when it comes to assessing the quality of a DSLR. Megapixels relate to resolution and are simply a unit of measurement for the number of pixels. However, megapixels also relate to file size, and more megapixels create larger digital files. This means you’ll need more memory for more prints, and it also means it’s more time consuming to send or upload photos.

Resolution matters, of course, but for the most part, entry-level cameras will have a fairly standard range. Even getting into mid-level cameras you’ll see most of the big names and lists of “best” cameras will be pretty close. Add that to the fact that more isn’t always better when it comes to megapixels, and you’ll find that it all is pretty confusing.

When choosing a DSLR camera, you will want to take megapixels into account, but that isn’t the be-all, end-all of camera buying. In fact, the sensor tends to be more important (more on that later). Manufacturers like to tout high megapixel counts, and in some cases, it may give them a competitive edge. But when we’re talking about new DSLR users, this shouldn’t factor much into your decision. Higher megapixels often mean higher price points, and for your first camera, there are other features that should influence your decision much more.

Metering

Metering is yet another term that relates to – you guessed it – light. What you need to know about it at this stage is just this: it helps guide exposure, and you can change the way the camera reads the light. Matrix metering reads the light from the whole shot. Center-weighted measures the middle of the frame only. Spot metering is simply reading the light based on your focus.

Metering is actually a relatively simple setting to figure out, but it’s also something you don’t have to worry about too much to start with. It’s also standard, so it’s not a feature to concern yourself with when you’re shopping for your new camera.

Modes

When you first start shooting, you’ll probably find yourself relying on the camera’s ability to sense settings. This means you should start out in Auto mode. Your camera’s auto mode will set everything up for you: ISO, f/stop, shutter speed, etc. This enables you to take the camera right out of the box and start using it.

If you’ve spent any time around photographers in person or online, you might already have a kneejerk reaction to AUTO MODE. If that’s the case: STOP IT. There’s nothing wrong with shooting in Auto mode, especially when you’re learning! Your DSLR is smart, and it can configure all the settings for you so you can work on capturing the shot, or playing around with manual focus. Plus, your camera will record all the settings it uses for every shot, so you can get to know what you like and which to use when moving to manual or semi-manual.

There will probably come a time when you do want to make your own choices regarding aperture or ISO. One way to start figuring out what sorts of settings you prefer is to try out the camera’s semi-automatic modes. For example:

  • Aperture Priority (A or AV): You control the depth of field and the camera will figure out the rest
  • Shutter Priority (S or TV): Great for action shots or long exposure, set the shutter speed and let your camera handle the other settings
  • Other: This might be portrait, macro, landscape, sports, etc. These have presets for things like aperture or shutter speed, and will try to give you the best possible shot for that scene

Sensors

Sensors matter when buying a DSLR, at least to some. As we mentioned, megapixels don’t always matter quite as much as many would have you think. Sensors, on the other hand, can make a big difference in quality based on the sensor size.

You might notice some different types of sensors when considering DSLRs, like CCD and CMOS. There are new trends in digital photography that can affect the quality of the sensor, but for now what really matters is size.

The sensor size listing may vary from manufacturer to manufacturer, but overall, the bigger the sensor, the better (you can decide how to interpret size). This is another category that deserves a bit more research when you start narrowing your choices. If you’re on a budget, a slight size difference in sensor may not matter quite as much as some of the other features. No matter what, just keep in mind that sensor size and megapixels should be assessed together.

Shutter Speed

The f/stop affects shutter speed in a big way. Shutter speed impacts the amount of light that comes in, so it’s a setting you’ll need to get to know when you move to manual settings. Like aperture, it can sometimes be confusing:

  • Low f/stop – more light – faster shutter speed (less light needed)
  • High f/stop – less light – slower shutter speed (to allow for more light)

You might play with shutter speed using Shutter Priority mode and notice which settings the camera defaults to in order to catch your shot. This can help you get to know the delicate balance of ISO, aperture, and shutter speed.

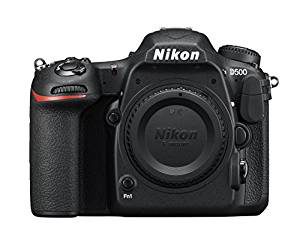
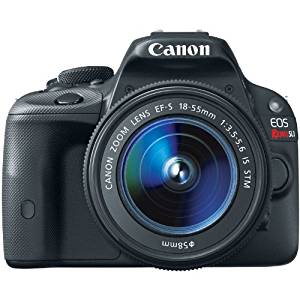
Which Brand Should I Get?

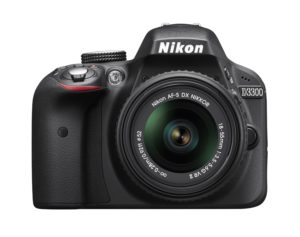
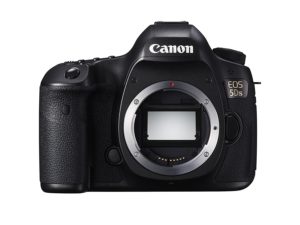
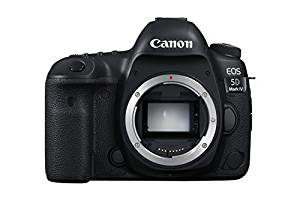
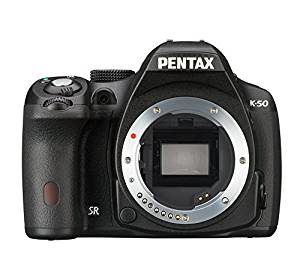
Oftentimes, when people have made the decision to purchase a DSLR, they want to know exactly which one to get. There are two major brands that make up the majority of DSLR business – Nikon and Canon. You’ll find die-hard fans on both sides, and there’s no shortage of convincing arguments for either brand. They aren’t the only brands, however – Pentax and Sigma also have DSLR offerings.

Photographers tend to become fiercely loyal to their preferred brand, so asking around or doing some internet research will help you find some passionate views about particular brands and models.

Okay, So, Which Camera Should I Buy?

Here’s the thing: there’s no one PERFECT camera. There’s probably going to be a perfect camera for you, but to figure that out, you’ll want to do some research.

Get as specific as you can while asking these kind of questions:

  • How much do I actually expect to use this camera?
  • What will I primarily use it to shoot?
  • Will I use it for action, portraits, low light, astronomy, etc.?
  • What is my budget?
  • How much of that do I want to use on add-ons, accessories, lenses, etc.?

From there, you should be able to narrow down some specifics – your price range, for example, will help you identify a selection pretty quickly. If you want to spend less on the body and use some of your budget to get lenses or other extras, that will limit you a bit. If particular features really matter (say, frames per second or video recording), that can help you further narrow your scope.

Definitely read lots of viewpoints about “best” cameras. You’ll see that there’s often plenty of agreement about which cameras are worth the money. You’ll also find people making strong cases for or against those same models.

Above all, choose the camera that speaks to you and seems to fit all your criteria. Don’t worry about brand names or specs you don’t really need. Plus, nearly any DSLR camera you get will be such a big improvement from your smartphone or point and shoot that you’ll have plenty to be excited about.

Do I Need Extras?

As we mentioned above, you might feel inclined to set some of your budget aside for add-ons, extras, gear, and so forth. Before you buy anything, keep in mind that you’ll always want more gear. We’ve yet to meet a photographer who doesn’t want some new lens or flash or other gear. And, gear is just a tool. To take great pictures, you have to learn how to shoot DSLR first and foremost – the fanciest gear isn’t going to do much if you don’t know how to use it.

A few things you might want to buy initially:

  • Camera bag
  • Neck strap
  • Tripod
  • Extra battery
  • Extra memory cards
  • Cleaning accessories
  • An extra lens (we like a 50 mm f/1.8 for both quality and affordability)

How Can I Learn to Shoot DSLR?

Now you just need to learn to use the darn thing.

First, don’t be scared of it. Simply taking the camera out and using it to shoot as many bad photos as possible helps you get to know your camera. Plus, there’s always a good chance you’ll accidentally get some great shots.

Next, keep shooting! Use it all the time. Try new settings and modes. Read online articles about using your particular camera. Learning to shoot DSLR takes time, so don’t be discouraged if you’re still using auto settings several months in. There’s no shame in that!

If reading isn’t working as well for you, check out some YouTube videos, enroll in an online workshop or class, or check out photography classes at your local university or community college. There are many ways to learn how to use your DSLR camera.

Above all, have fun with you new camera!


Nikon D5 Review

When we ranked DSLR Cameras, the flagship Nikon D5 was on the top of the list, and for good reason. Take a peek at any website or customer review and you’ll see consistently high marks from photographers who can’t stop raving about the D5.

While the hefty price tag for the Nikon D5 makes it out of reach for many photographers, those with the budget to buy it will get some of the most advanced technology available. The D5 is the top-of-the-line choice for sports and portraits, and with excellent autofocus and high ISO, the D5 is sure to deliver each and every time.Nikon D5

Specs

Here are the top specs of the Nikon D5

  • 8MP FX-Format CMOS Sensor
  • EXPEED 5 Image Processor
  • Native ISO range 100 to 102,400
  • Redesigned AF (153 points, 99 cross-type sensors and a dedicated processor)
  • 2″ 2.36m-Dot Touchscreen LCD Monitor
  • 4K UHD Video Recording
  • Multi-CAM 20K 153-Point AF System
  • 12 fps Shooting for 200 Shots with AE/AF
  • 180k-Pixel RGB Sensor and Group Area AF

Shooter-Friendly Design

The D5 is bulky and heavy – weighing in at 3.1 pounds – but that’s necessary due to the design and built in battery grip. It’s a breeze to shoot in either landscape or portrait mode, and it’s super comfortable to hold. The D5 was obviously designed for the right target customer, as it offers incredible customization features, and the button placement (once you get the hang of it) enables you to keep shooting without having to stop and make adjustments.

Some new design features work well, but may require a bit of adjustment for experienced Nikon shooters. The new touchscreen, a first for Nikon, works well but takes a bit of getting used to. The biggest change Nikon users will encounter is the change in some button placement. This might take time to appreciate, but the overall design is smart – once you get used to it.

Beautiful Shots

The new autofocus is hard to pass up – it’s just that good. It offers an astounding 153 points.  The D5 produces great shots at all kinds of low light situations, too. For photographers who rely mainly on natural light, the D5 will not disappoint. Basically, you have to try really hard to get a bad shot out of the Nikon D5.

The native ISO range goes up to 102,400 and the high ISO performance will leave you astounded at the quality of your shots. However, shooting at the expanded ISO (up to 3,280,000) does not produce clean shots, so this “perk” of the D5 might not actually be beneficial to most photographers.

Fast Performance

When it comes to talking about the overall performance of the Nikon D5, all we can say is “fast.” It is fast, period. The shutter speed and continuous shooting options are obviously designed (much like the interface and button placement) for the kind of shooter who is most likely to shell out the money for the D5 – photographers who shoot sporting events, weddings, and so forth, and who need the kind of speed the D5 offers. You’ll likely get way more shots than you actually need in any given session, but add in the fantastic battery life, and there really isn’t much to complain about here.

Bottom Line: The Nikon D5 is absolutely incredible and well worth the high sticker price. Of course, that sticker price is what will limit the number of photographers who can buy Nikon’s flagship camera, but for those who can – it’s worth every penny.


How to Safely Photograph the 2017 Solar Eclipse

On August 21, 2017, the United States will experience a solar eclipse, with 14 states experiencing a total eclipse. Many experts predict that millions will be traveling to the path of totality to get a glimpse of this historic event.Solar Eclipse

If you are one of the lucky ones traveling to or already in the path of totality, you might be wondering how to capture this celestial event with your DSLR camera. Let’s talk about how to safely photograph the solar eclipse.

First Things First: Safety Must-Haves

Eye Protection

Before you do anything else, make sure you pick up solar eclipse glasses. You can find these around town through libraries, schools, or museums, or you can find them online.

Eclipse glasses are absolutely essential for viewing the solar eclipse and need to be worn at all times while viewing the eclipse, with the exception of the few minutes of totality. Do not look at the sun or through your viewfinder without your glasses on!

Equipment Protection

Your eyes aren’t the only things that risk damage by the sun during an eclipse. Your camera needs protection, too. Grab a solar filter for your camera well before the day of the eclipse. There are a few options for this:Solar Filter - Unversal Lens Filter 50mm

  • Find a solar filter designed for your specific camera model
  • Buy a universal lens filter (double check which aperture it fits)
  • DIY with solar filter sheets

Don’t use your eclipse glasses for this – invest in a solar filter to protect your camera.

Basics You’ll Need for the Show

Once you have all the safety stuff taken care of, you can start putting together what equipment you’ll need in order to photograph the eclipse. Here is a list of the minimum number of things you’ll want to have ready to go:

  • Tripod
  • Batteries (and extras)
  • LOTS of memory
  • The right lens (more on that in a minute)

Getting good photos of an eclipse requires taking many photos during the eclipse. You will definitely want to have lots of storage space (bring an empty SD card, for example) and plenty of fresh batteries. Totality is the neatest part of the eclipse, and you’ll want to have plenty of space and battery to capture those few minutes. What we’re saying here is, don’t waste space and battery life on the partial eclipse if you don’t have time, space, or extra batteries for the total eclipse.

Preparation is Key

If you’re serious about capturing good photos during the eclipse, it pays to prepare.

Educate Yourself

Understanding what happens during the eclipse, when it’s going to happen where you are, and what to expect from the experience will help you handle the setup and photographing when the even starts. It’s definitely worth the time to check out others’ pictures of past eclipses, and to read professionals’ tips on how to shoot an eclipse.

Practice

Many pros recommend practicing your shots by photographing the moon. The full moon is best, since it appears to be about the same size as the sun. August’s full moon is early in the month, so start practicing soon!

You also can practice preparing for totality. Your solar filter should stay on the camera until totality begins, but you’ll want to pull that filter off to capture the total eclipse. (And then you’ll want to put the filter right back on.) You’ll be surprised by your reaction to the total eclipse, so practice and find the best method for removing and replacing the solar filter.

Prepare for Everything

It’s a good idea to run through possible issues, and not just from a photographer’s standpoint. For example, considering the weather and planning for heat, clouds, rain, or wind can help you ensure you have a good eclipse experience no matter what. If it’s going to be hot, bring lots of water, but also pack protection for your equipment. If there’s a chance of gusty winds, make sure your tripod will stay standing. You get the idea.

How to Capture the Eclipse

Fortunately, there are plenty of comprehensive articles online (and even in books at the library) that cover photographing a total solar eclipse. We recommend searching for articles that cover your specific brand and model. There are specific steps and settings for each phase of the eclipse; the most impressive phase and most coveted shots comes during totality, of course. Therefore, we recommend finding the best settings for this phase and waiting to shoot until then, or be ready to quickly adjust to capture this short but magnificent event.

You will need to pay particular attention to your lens, though. If you are new to photography, you may not yet have a lens that will work for the solar eclipse. Renting lenses is a great option if you don’t have a telephoto lens.

Again, do a little research to determine which lens will work best for the shots you want. For example, for full-frame cameras you can use lenses from 400mm-1000mm. But during totality, if you want to capture the sun and the corona, 500mm-800mm is best.


Shooting the eclipse will be a lot of work, but you’re sure to capture some amazing shots. Don’t wait until the last minute to prepare for this event if you do intend to photograph – spending time before hand learning and preparing will make the event that much more amazing.

Remember to keep your eyes and your equipment safe during the eclipse! Get ahold of your eclipse viewing glasses and your solar filters as soon as possible – these are necessities and are in high demand.

Our best piece of advice, though, is to enjoy the eclipse, and not worry too much about photographing. Be sure to take a moment to be present and enjoy this once in a lifetime celestial event.


Best Ways to View the 2017 Solar Eclipse

Solar Eclipse 2017
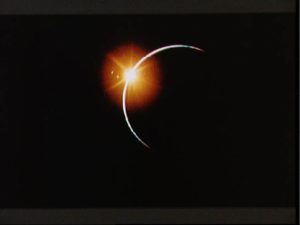
Unless you’ve been living under a rock the past few months, you’re probably aware of a major event coming up on August 21st: the 2017 total solar eclipse.

This year’s solar eclipse will be one for the record books. If all the predictions are true, towns small and large that fall in the path of totality will be packed and roads will be a nightmare. It is estimated that this will be the most viewed solar eclipse in history.

Be Prepared

If you’ll be traveling

Planning ahead for this event is crucial. While everyone in the continental United States will have a view of the eclipse, only those in the path of totality will get to experience the full eclipse. This means a few things:


  • Communities in the path of totality are anticipating huge crowds
  • Most lodging options are already overbooked
  • Many communities are planning viewing parties
  • Cities close to (but not in) the path of totality anticipate high traffic

Essentially, patience is absolutely crucial for this, as is preparedness. If you haven’t already made travel plans, you’ll need to get a little creative and start planning right now.

This site has a comprehensive overview of each state that falls in the path of totality. You’ll see that each state’s page includes communities in the path. While it’s pretty much guaranteed that all lodging is either completely booked or outrageously expensive, there are some other options to consider.

Many of the states in the path of totality have some remote areas where viewing will be outstanding. Consider planning a hike or a camping trip to one of the regions least likely to be full. Or, if you can make it into a day trip, leave early and drive to a viewing area. Keep in mind, however, that there’s simply no way to know exactly how busy any area will be. And if the high end of estimates is correct, millions of people will be traveling to areas in the path of totality.

Even if you are well-prepared, have all your arrangements confirmed, and have taken the time off work already, you’ll still want to have a backup plan in place. Again, there’s no way to know for sure just how many people will be traveling, but it’s safe to say there’s a good chance traffic will be awful and travel plans will be delayed. Prepare for the worst case scenario now to avoid missing out on the eclipse due to unforeseen snags.

If you’ll be staying put

Travel isn’t essential in order to enjoy the 2017 solar eclipse. You might be lucky enough to be in the path of totality (or very close to it), or you could just decide not to mess with the chaos of travel and just stay where you are. You’ll still get to see a partial solar eclipse, which is still a neat experience.

No matter what you’re doing on August 21, you absolutely must have equipment in order to view the eclipse.

Have the Right Equipment

Eclipse Glasses

The first and most important piece of equipment you’ll need is solar eclipse glasses. You can find these online, but many libraries and community centers are giving them away, too. Pick them up soon – they are likely to become a hot commodity in the weeks leading up to the eclipse.

It’s essential that you have eclipse glasses to view the eclipse. Those in the path of totality can remove their glasses only during totality. The rest of the time, glasses must be worn in order to avoid damaging your eyes. If you’re not in the path of totality, be sure to keep your glasses on the entire time.

Binoculars

While you don’t need additional equipment beyond eclipse glasses to see the solar eclipse, extras can enhance the experience for you. Binoculars are a great way to look at the beautiful solar corona (the aura around the sun, visible during totality). There are binoculars specifically designed for eclipse viewing, but using traditional binoculars works just fine as long as you add a filter.

As we’ll explain, all your equipment needs to be equipped with a solar filter to avoid damage. If you only look up during totality, you can get by without the filter, otherwise be sure to find a filter. There are sheets that let you create your own, or you can try universal lens filters.

Telescopes

Using a telescope during the total eclipse can be a cool experience. You can use either binoculars or a telescope to create a projection (a fun activity with kids). But you also can use a telescope during totality to get a look at the solar corona and at the skies around you.

If you do not have a telescope already equipped for solar viewing, you must fit it with a solar filter in order to avoid damaging it. Solar filters for telescopes are more specific than what we mentioned above for binoculars, so you can find the right filter for your aperture. This one, for example, fits 66-94 mm aperture telescopes.

Safety First!

No matter where you plan to enjoy the eclipse or what (if any) additional equipment you’re using to make the most of this historic event, prioritize safety. There is plenty of good information available online and at libraries, schools, museums, and other locations in your community. Knowing how to view the eclipse safely is the most important part of the day. Be sure to have your eclipse glasses, and DO NOT take them off until totality occurs – this means that if you’re not in the path of totality, your eclipse glasses MUST stay on!

If you’re using equipment, take care to ensure no one uses it incorrectly – eclipse glasses should stay on even while looking through the lens. Also, watch for other potentially damaging concerns – magnification of the sun through a lens can start a fire, for example.

Plan ahead, stay safe, and enjoy the 2017 full solar eclipse!