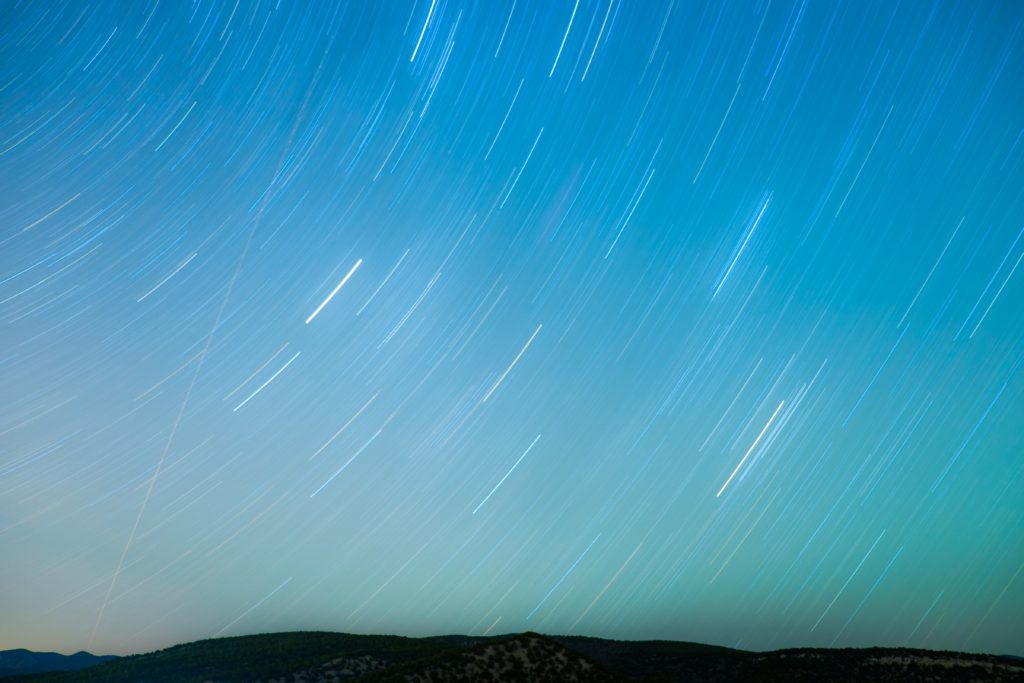
We constantly dream of taking pictures of the night sky, but they have no idea how to get started. In the past, there were no cameras that could be used to capture the sky’s stunning beauty, but today, there are several options to choose from.
The problem with older cameras is that they didn’t have the technological capabilities to get the job done. Since camera technology has become significantly more advanced, there are many DSLR cameras that are up to the task.
Why Get A DSLR for Astrophotography?
Maybe you’re wondering why a DSLR camera is required. The truth is that there are a few different types of cameras that can be used for astrophotography. There are a few dedicated CMOS and CCD cameras that work very well, but many consumers don’t have enough money to afford these high-tech devices.
DSLR cameras are popular because they’re inexpensive and can deliver excellent results. The main reason why these cameras work well is that they have large sensors. Although smartphones have become quite advanced, they still don’t have the right type of camera for astrophotography.
The camera sensor inside of a modern smartphone is too small, so it doesn’t receive enough light particles to capture the glorious night sky. A number of entry-level DSLR cameras can be purchased for about $500, and they can be used to get the job done.
It’s important to realize that you don’t need to start with an extremely expensive camera. Many of the best cameras for astrophotography cost several thousand dollars, so they’re not the best cameras to start out with.
However, if money isn’t a problem, you can check out some of the options towards the end of this article. If you’re just getting started, two great models to consider are the Nikon D3200 and Canon Rebel, or the Pentax models designed for astrophotography. Since they have larger sensors, DSLR cameras are best for shooting at night.
Choosing the Right Lens
Picking the right lens is just as important as choosing the right camera. Without the right lens, you might not get the results you were hoping for. When shooting pictures with almost no visible light, fast lenses tend to work the best. The best lenses for astrophotography should have a large aperture because you’ll need as much light as you can get.
A large aperture lets more light hit the camera’s sensor than a small aperture. For the best results, you’ll want to consider a lens that has an aperture of F/2.8 or bigger. It’s also important to think about what you want to shoot images of. A number of photographers enjoy taking large shots of the night sky.
For example, they might shoot a large section of the Milky Way galaxy. To get the best results when shooting large sections of the sky, you’ll want to consider getting a wide-angle lens, and it should have a focal length of 20mm.
Since this is a general guideline, you can get a lens with a focal length that is less than 20mm. If your goal is to take shots of the moon and various planets, you’re going to need a better zoom. For these shots, consider getting a lens with a focal length of at least 300mm. Depending on your goals, you can go much higher than 300mm.
Shooting In Manual Mode
When shooting for astrophotography, you’ll almost always need to use the manual mode on your DSLR camera. The manual mode is used because the camera won’t be able to automatically focus at night, and by setting the camera to manual mode, you can set the focus for whatever shot you’re trying to take. Since you’ll need to use manual mode, it might be a good idea to consider getting a manual-focus lens. There are several great options from Rokinon.
A popular example is the 14mm F/2.8 lens, which works exceptionally well for wide-field shooting. You can purchase this lens for under $400. If you’re looking for the Canon equivalent for this lens, you could end up spending $2,000.
Other Equipment
Although the camera and lens are important components, there are other pieces of equipment to consider. It’s always a good idea to purchase a strong tripod. Many consumers attempt astrophotography using a cheap tripod, and it almost never works because the tripod shakes too much.
A sturdy tripod won’t shake while you’re taking long exposures with your camera. Another piece of equipment to consider is a telescope mount. This is a great piece of equipment to have when you’re planning to take long exposures with your DSLR camera.
Choosing the Right DSLR Camera
Taking shots of the night sky can be fun and exciting. It’s especially enjoyable when you’re using the right camera for the job. When searching for a good DSLR camera for astrophotography, it’s always a good idea to keep it simple. There are many different brands that sell DSLR cameras, so you might feel overwhelmed when searching for that perfect model.
The best way to solve this problem is to narrow down your selection and only choose a camera from Nikon or Canon. These companies are known for creating some of the best cameras on the market, and they have several models that are affordable and great for astrophotography. However, two need models of Pentax designed for astrophotography are definitely worth considering.
It’s important to realize that this type of photography is specialized, so you want to choose cameras that are known to work well for this purpose. Nikon and Canon happen to have several models that are proven to work well for this specialized type of photography.
Most consumers who shoot pictures of the night sky use Canon DSLR cameras because they tend to work very well for this purpose. To shoot beautiful pictures of the night sky, a camera needs to have low-noise characteristics, and Canon is the first company to create a low-cost DSLR camera that has these characteristics.
Over time, Nikon has caught up and offers several comparable cameras to choose from. Many of the Nikon cameras have very powerful sensors, but Canon offers several cameras that are much better choices for astrophotography.
If you’re purchasing a DSLR camera for the first time, you should consider getting a Canon or Pentax. There are two minor problems that make Nikon cameras less suitable for this specialized type of photography. Unlike Canon DSLR cameras, Nikon models automatically apply a blurring filter, and they also don’t give you access to the bulb setting, which is important for exposures that are longer than 30 minutes.
Although Nikon’s blurring filter can be turned off, it requires a massive amount of time and great inconvenience. These are minor problems, but they serve as two great reasons to consider getting a Canon.
Top Cameras we Recommend
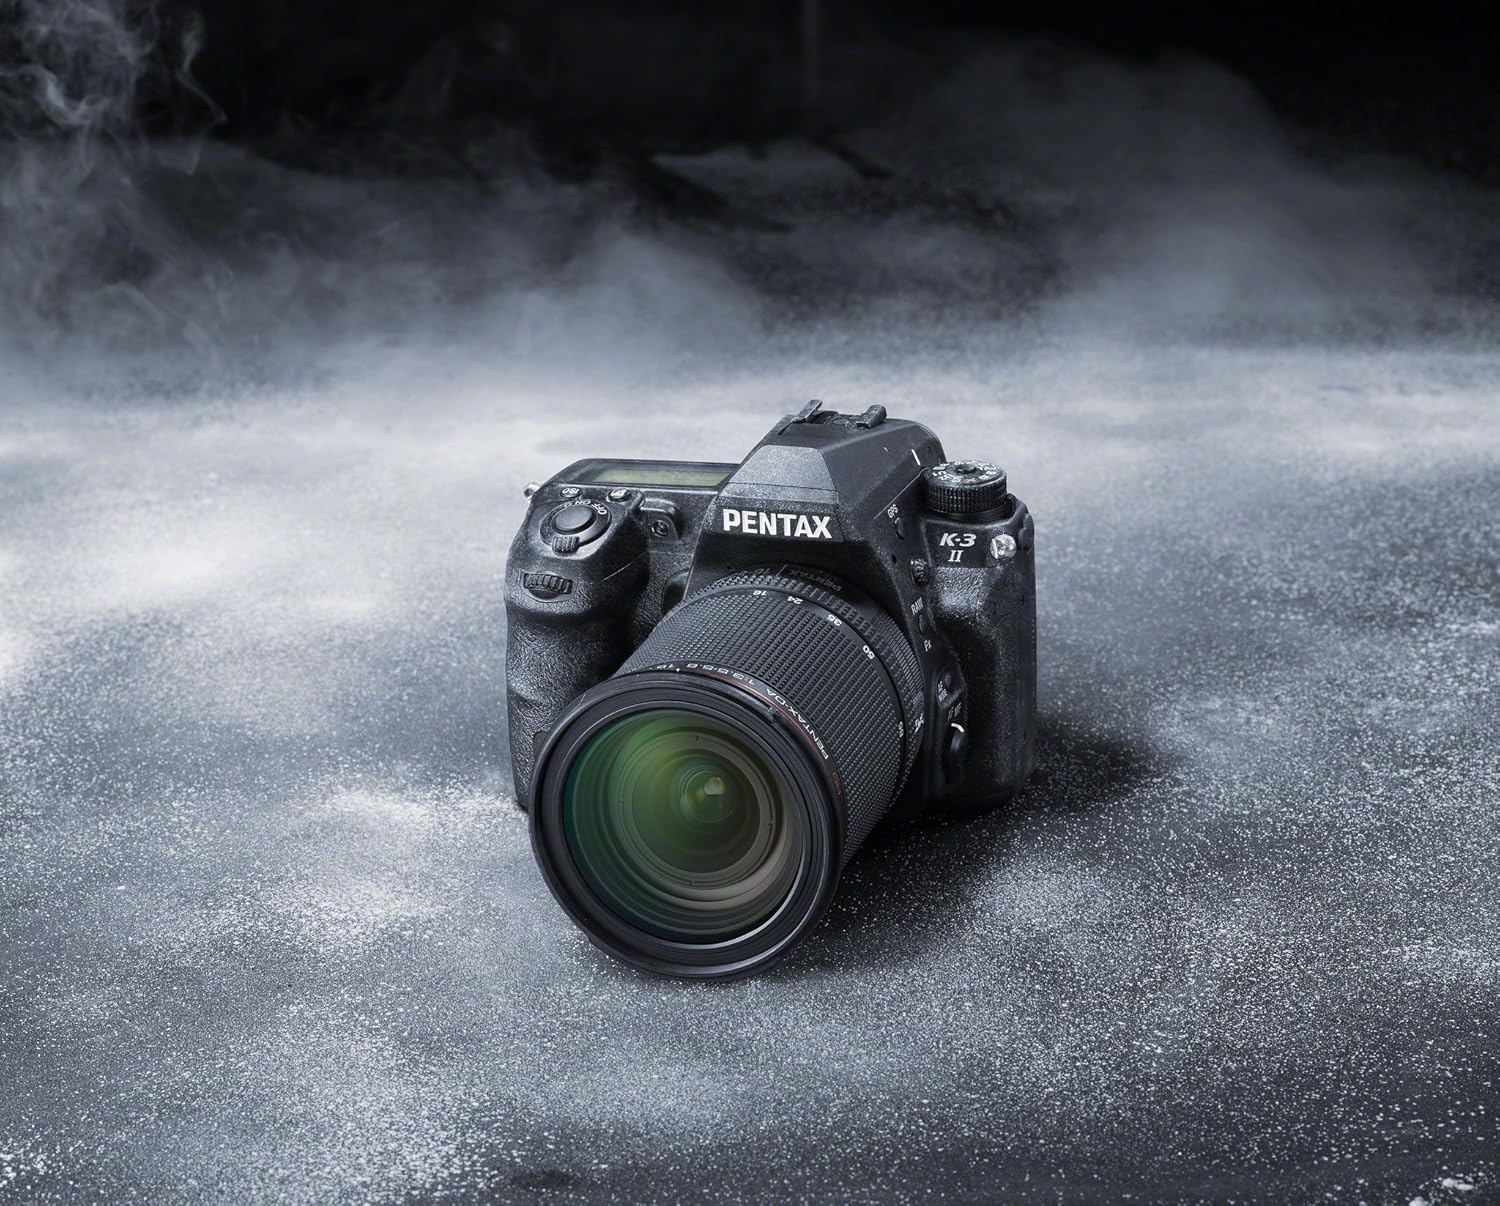
#1 Pick: Pentax K-3 II
The Pentax K-3 II is a mid-range DSLR at a nice price. Oh, and it has some extra perks for would-be astrophotographers. For under $1000, you can pick up a great all-around DSLR that will also let you take awesome photos of the night sky.
Features include the Astrotracer, which utilizes the built-in GPS to sync the sensor to the movement of celestial bodies. Pentax also gave the K-3 II a sensor without an anti-aliasing filter (something typically only available on more expensive cameras). AA filters soften images, which can be troublesome for astrophotgraphers.
With no AA filter, Astrotracer, and a shockingly low price, the Pentax K-3 II is a fantastic option for an intermediate photographer interested in taking great shots and taking the plunge into astrophotography.
Nikon D3300 DSLR Camera
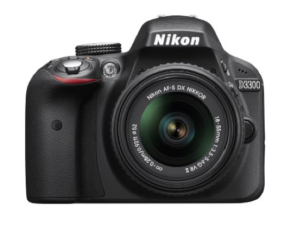 For a great entry-level DSLR for astrophotography, consider the Nikon D3300. This camera has several features that make it great for taking shots of the night sky. For starters, it has a 24.2-megapixel CMOS sensor.It has a 3.0-inch LCD screen. The Nikon D3300 offers excellent image quality and uses an interface that is designed for beginners.
Although it’s designed with the beginner in mind, it offers plenty of manual control, which is what you need to focus on objects in deep space. This is a top DSLR camera from Nikon, and it provides many of the features that you’d want for astrophotography.
It doesn’t perform as well as cameras in higher price ranges, but it outperforms many of the cheaper entry-level DSLR cameras. You should be able to pick one of these cameras up for a modest sum and start capturing the stunning beauty of objects in deep space.
Canon EOS Rebel T5 DSLR Camera
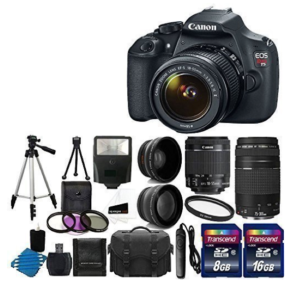 The Canon EOS Rebel T5 is another top model to consider, and it’s in the price range that is one step above the entry-level DSLR cameras. You can use it to capture beautiful shots of large portions of the night sky. The kit linked to above comes with a variety of accessories (including lenses) which will be helpful for getting started.
As a base model, this camera works great for taking shots at night. With a large CMOS sensor, it absorbs lots of light and can give you incredible photos of space objects. It features an 18-megapixel sensor and has the low-noise characteristics that you need for shooting at night.
You even get the manual options that you need to focus the camera and get great shots of objects in space. The price of this DSLR camera is slightly higher than what you’d expect for entry-level cameras, so it’s an excellent choice for consumers who want to get a little bit more out of their astrophotography experience.
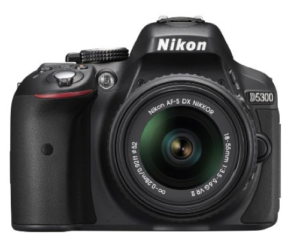 Nikon D5300 DSLR Camera
Another mid-range DSLR camera that is great for shooting images of the night sky is the Nikon D5300. With a 24.2-megapixel CMOS image sensor, it can take incredible photos of objects in space. The image sensor is capable of producing the high-resolution images that show the glory of deep space.
It’s also a great choice because it has the low-noise characteristics that are required for shooting at night. Without these characteristics, photos taken at night would look very grainy.
For just the body, you could be looking at paying just under $700. However, you’ll need to get a lens to capture the beauty of the stars. All of the ISO settings on this camera deliver competitive image quality, which means it’s really good.
The Nikon D5300 delivers superior ISO performance with low noise, and it provides exceptional detail in every shot. If you’re looking for great image quality, agility, speed, and versatility, this is a top camera to consider.
The Nikon D5300 DSLR Camera delivers all of the features that you need for an enjoyable astrophotography experience, but since it’s a mid-range camera, you’ll need to pay more money for it. You should consider getting this camera if you want better performance than what an entry-level model can provide.
Canon EOS 5D Mark IV
The Canon 5D Mark IV is a great model for professionals. If you’re looking for an unbeatable experience, and you don’t care how much it’s going to cost, this is one of the best DSLR cameras that you can buy for astrophotography.
Since it has a 30.4-megapixel full-frame CMOS sensor, it has no trouble absorbing the light that pours down from the heavens above. When using this high-end camera, you can expect almost no noise, and it will deliver some of the best astrophotography photos imaginable.
It has all of the features that you need to take stunning shots of the Milky Way and planets. It delivers excellent resolution and ISO performance. It has powerful built-in features for noise reduction and features one of the best CMOS sensors for shooting photos at night.
Nikon D5 DSLR Camera
 A final product to consider is the Nikon D5 DSLR Camera. It is Nikon’s latest flagship camera for professionals. With a 20.8-megapixel CMOS sensor, the Nikon D5 can shoot great images of the night sky.
However, if you choose to purchase only the body, you’ll need to get a lens that matches the specifications we recommended earlier. Like all of the other cameras mentioned, the Nikon D5 offers low-noise characteristics, but it does everything a little bit better than the cheaper cameras.
When used at high-ISO setting settings, it delivers unbeatable image quality. It’s compatible with virtually all Nikon lenses and takes amazing photos at night. It’s one of the best DSLR cameras for night shots, but it’s several times the cost of entry-level models.
Nikon 810A
The Nikon 810A is a tricked out version of Nikon’s fantastic full-frame 810. It is designed specifically for dedicated to long-exposure deep-sky astrophotography. This is an excellent model that will let you capture the night sky with professional precision.
The IR filter is optimized for a type of light called Hydrogen-alpha red tones. The 36.3-megapixel full-frame CMOS image sensor has no optical low-pass filter. Nikon has added a number of features that are specifically for astrophotography needs. It’s best used on a tripod for celestial shooting.
The 810A works great as a regular DSLR, too, so this is a great investment if you want a pro DSLR feel that also lets you take amazing astrophotography shots. If you have the budget for this, we highly recommend it.
Pentax K-1
A step up from the K-3 II, the Pentax K-1 has all the same astrophotography features as the less expensive model, but is a full-frame DSLR with a lot more to love. If this camera fits your budget, you will get a great DSLR and what is possibly the best option out there for astrophotographers.
The Astrotracer system eliminates the need for a star tracker. In astrophotography mode, the camera can capture up to five minutes’ worth of exposure. Other modes, like Star Stream, give photographers new options to capture the stars. All other features and bells and whistles either contribute directly to astrophotography, or just make this a darned good DSLR.
The price for this full-frame, 36mp sensor, astrophotography-ready DSLR is simply phenomenal. The functionality is pretty intuitive and the quality of photos is excellent. This is an amazing pick for an enthusiast who wants a really great full-frame camera and has an interest in astrophotography. This might be the best DSLR on the market for astrophotography.
When shopping for the best DSLR camera for astrophotography, the price is the biggest consideration to make. By choosing one of these recommended products, you can avoid picking a camera that doesn’t work very well for this specialized use.
Once you’ve purchased the right camera, lens, and equipment, you can begin your journey with astrophotography and capture the stunning beauty of the universe.

 The EOTech 512.A65 is one of the most popular short target holographic sights on the market today. Meant as a high tech replacement to iron sights, the EOTech 512 has rocketed in acclaim thanks to its ease of use, high accuracy, and durability.