Celestron COSMOS 90GT Review

We all know that telescopes are some of the most advanced and intricate pieces of technology in the modern age. But have you considered a telescope that you can control…from an app on your smartphone? Celestron continues to amaze us with new and innovative products, this time with the COSMOS 90 GT.

You’ll be able to differentiate the 90 GT from other, powerful Celestron products by its longer, tubular body. You’ll also notice that there is no place to properly grip the telescope. The 90 GT is a completely hands-free telescope, except for the controls you make on the smartphone/tablet app. Celestron COSMOS 90GT

Apps and WiFi

Unlike most telescopes, this one is perhaps the best to be controlled within the vicinity of your home, assuming you have WiFi close by. The COSMOS Celestron Navigator app is free to download for iPhone, iPad, and Android smart devices.

This telescope seems like it’s a product of the next generation and more in tune with the larger, more advanced telescopes used by research institutions. Why bother fiddling with your hands when an app, database, and controls are all on your smart device?

A drawback to this telescope is that it can only be controlled through a WiFi connection to its associated apps. If you’re out in the wilderness hoping to use this telescope, the only solution would be to use your smart device as a mobile hotspot. Regardless, the 90 GT is a preferred stay-at-home telescope.

Tripod

One aspect of the 90 GT that can be difficult to adapt to is the stabilization of the tripod. Many users have reported problems with their view because the tripod’s legs are always displaced and at different levels. You will find the process of using this telescope harder than usual if you live near inconsistent terrain. Even streets can be uneven with cement being bumpy and rough.

You may have to innovate to get the tripod on solid and sturdy ground. This shouldn’t be too much of a problem if you have a mobile, flat surface for the tripod to stand on. A side walk will also make a good substitute.

Accessories

Like most Celestron products, the 90 GT comes with at StarPointer finderscope, always a handy addition for anyone who has trouble tracking objects with just their hands. The COSMOS Navigator App that controls the telescope will be immensely useful in finding stars and identifying constellations.

The 90 GT is perhaps the best in its class at generating fine views of planets. While planets do not produce nearly as much light as stars, the 90 GT makes up for this by employing a 90mm refracting lens. It also comes equipped with two differing size eyepieces (20mm and 10mm) for different magnifications, depending on how far you want to look up into the sky.

Overall

The 90 GT is a fantastic and outrageously advanced telescoped to be able to be controlled by your smartphone. The telescope will automatically adjust to the commands given to it and with the correct placement of the legs, give you quality viewing.

While some may find its requirement of WiFi to be problematic, the 90 GT will compensate you by giving you some of the best views of the planets in our solar system. Perhaps you’re interested to see what the long fabled rings of Jupiter look like?

The COSMOS 90 GT can help you with that.

Should You Upgrade Your Entry-Level DSLR?

If you’ve had your entry-level DSLR camera for a while, you might be wondering if it’s time for the next step. The price difference between entry level cameras and mid-level DSLRs can be pretty substantial, so it’s worth researching and considering your decision closely before spending the money.

The Upgrade Debate

A lot of people in the photography community seem to have strong opinions about upgrading DSLR camera bodies. You’ll hear a lot of “a better camera won’t make you a better photographer” and “you want to upgrade just to upgrade.”

This isn’t very helpful, and it’s actually a bit condescending. Nearly every serious photographer will upgrade their camera at some point. These statements are rooted in some good ideas that should play into this kind of decision, however. So let’s take a closer look at what they mean. 

You Wont Become A Better Photographer

This statement is mostly true in a few cases. For example:

  • You don’t know your DSLR very well
  • You rarely (or never) use manual settings
  • You haven’t invested in any lenses or equipment

    DSLR

In those cases, it’s best to really assess what you want and what you’re willing to put into photography. Shooting DSLR isn’t easy, and it takes dedication and time to learn. If you have hopes that a more expensive camera will be easier and automatically elevate you as a photographer… well, we hate to break it to you, but it won’t.

Similarly, if you haven’t considered equipment besides what came in the box, you’re missing out on a lot. New lenses make a world of difference in your photography, and there are a ton of options for any camera.

You Want to Upgrade Just to Upgrade

This is very closely aligned to the “better photographer” critique we just mentioned. However, the problem with this one is that you should upgrade if you want to upgrade. And, heck, even if you fit all those bullets above and you want to upgrade your camera anyway — you go for it. Just know that your purchase might not fit your expectations.

What to Look for in an Upgrade

Upgrading your DSLR body can be advantageous if you are feeling limited by your entry-level camera. If you’ve thought it through and have come to the conclusion that you are ready to invest in a new camera body, there are a few different things you’ll want to take into consideration.

Keeping Your Gear

If you’ve invested anything at all into your camera, you’re probably going to want to make sure your replacement can accommodate your gear. This means you’ll need to stay within the brand you started with. Lenses are specific to both brand and type of sensor, so it’ll save you a lot of time and trouble if you double check compatibility before you buy.

Of course, if you are not into the brand you started with, you can obviously move to a new brand. Keep in mind, though, that you’ll have to replace your lenses, batteries, and other components that are brand-specific.

Knowing What You Need

If you’re planning to replace your camera, you’ve probably figured out what you don’t like about your entry-level. However, let’s take a look at what kinds of settings or specs you will want to seek out.

  • Autofocus: you might want to have faster or more accurate autofocus
  • Low light capabilities: you might want to take better shots in different light situations (psst, this can sometimes be related to lenses)
  • Frames per second (FPS): you might need faster frames per second (FPS) to catch sports or weddings
  • Customization: you may want to be able to change settings more easily or quickly
  • Storage: you may want additional storage or a better ability to use raw


The biggest differences between entry-level DSLRs and mid-level DSLRs are overall design quality (including weather sealing), AF, and viewfinder/controls.

If you are looking for a larger sensor, you typically have to look into semi pro level cameras.

Take a look at our comprehensive guide to the best DSLR cameras to get an idea of some mid-range cameras and the features they come with.

What to Do with Your Old Body

DO NOT throw it in the trash. You can sell your old DSLR body, but we recommend keeping it for backup. Sometimes entry-level DSLRs can actually do some things more expensive cameras can’t. And, they are great to have around for backup or to teach someone else how to shoot DSLR.


Vixen Space Eye Telescope Review

So your kids have been crying and pulling your clothes begging for you to get them a telescope. The question is, can you trust your children to handle such a delicate, intricate piece of equipment? Maybe they want to be astronauts or astronomers one day, and there is a telescope perfect to suit their unquenchable thirst to explore.

The Vixen Space Eye is an excellent family-friendly telescope that has brought people of all ages together through its power to make the distant stars light up in its lenses. Let’s explore how the Space Eye has earned its reputation. Vexin Space Eye

Assembly and Parts

One of the reasons behind the Vixen’s family-friendly nature is its weight. At a comfortable scale of 6 pounds (minus the tripod), the Space Eye is the lightest telescope on the market. This makes it easier for younger children to carry it around without close adult supervision. Nevertheless, you’ll want to be careful considering the telescope and its optics are still pricey.

Be careful, however—just because the telescope is light doesn’t mean it isn’t easy to tip over by accident if bumped or hit.

Eyepiece

The Space Eye is constructed with a single 50mm eyepiece which makes it suitable for entry point magnification. It also comes equipped with a slow motion 5×20 finder scope for an easier time tracking objects as they move across the sky. People with telescopes that are not equipped with finder scopes might experience their object “skipping” as they view it.

This is a refracting telescope, which according to our guide, means that it makes use of a primary lens as its objective. The maximum magnification of the Space Eye is 100x the original. This gives it a noticeable punch to its viewing power but not on the level of the Astromaster, the next step up.

The Space Eye can come equipped with a 51x magnification and additional 70mm, 20mm, and 4mmm eyepieces depending on the customer. You are likely to pay extra for these modifications.

Mount

To be able to look up into the night sky in the first place requires a particular type of mount. The Space Eye makes use of an altazimuth (alt-azimuth) mount that allows it to objects on the vertical and horizontal axis.

Overall

Prices vary on the Space Eye, but one thing you can count on with this telescope is reliability. It doesn’t have the most powerful optics in the world, but it will give you a good first impression of the stars. For its unbeatable low price, the Space Eye is fun for not just one user, but the entire family.

Celestron AstroMaster 114 EQ Review

For a beginner, it can be hard to determine what type of telescope to purchase. There are telescopes designed for easy handling by children, but you’re probably looking to take a step further into the more advanced and sophisticated telescopes. If this is the case, then Celestron has constructed a reflector telescope called the AstroMaster 114 EQ specifically for your needs.

The AstroMaster makes use of an easy, no tool assembly process so buyers can have an easier and quicker time putting the main components together. This telescope is collectively known as a beginner’s telescope. It would make sense that the Celestron is easy to use, but it’s also a powerful instrument in its right.

Eye Piece

Depending on the seller, the AstroMaster will come with two eyepieces—10mm and 20mm. The 10mm is a 100x magnification eyepiece while the 20mm is a 50x magnification. This will be helpful in clearing up blurry images of objects near and far.

All in all, the eyepieces of this telescope pack a powerful punch, with many reviewers able to see planets such as Saturn and clear views of the moon’s many craters. Compared to most stars and galaxies, the local planets in our solar system are relatively easy to see, so don’t be afraid to test the Astromaster’s magnification to see what otherworldly views you can discover.

Star Pointer

The star pointer is not all too different from a handheld laser pointer. It attaches to the telescope and fires a laser into the sky to match what you are looking at. If you want to see something during the day, the color of the laser can sometimes be interchangeable, but Celestron’s is primarily red.

Object Database

Purchasing the AstroMaster will also provide you with the SkyX – First Light Edition database. The software has over 10,000-night sky objects stored on star maps(which you can also print) and a variety of HD images that you can look at.AstroMaster 114 EQ

Cool Features

If you’re willing to spend a little more, you can upgrade the AstroMaster to accomplish even more feats.

Have you ever thought about tracking the movement of an object across the sky? It may look like all those stars and planets in the heavens are standing still, but in reality, they are moving at a rapid pace. If you look away from your telescope for a few minutes or even adjust the settings slightly, whatever you were viewing could be miles away in a different part of the sky.

The AstroMaster solves this problem by offering a motor drive that locks on to a particular object of your choosing and tracks its movement across the sky. Even further, the telescope itself automatically adjusts for the curvature and spin of the Earth during the night.

Overall

For the price, the AstroMaster is one of the best telescopes on the market, and it is a worthwhile investment. It also comes equipped with the tripod necessary to maneuver the telescope across a wide range of space. If you’ve outgrown your child’s telescope but aren’t quite ready to make a huge leap into stargazing, the AstroMaster is the right choice for you.

Beginner’s Guide to Telescopes

When you set out to purchase a telescope, ask yourself, what do you want to see? Do you want to be able to see planets and bright, pulsing stars? Maybe you want to be able to view objects but aren’t keen on purchasing the most advanced telescope on the market.

Telescope manufacturers construct different telescopes according to the user’s needs. Some are specialized in astrophotography—taking pictures of the various objects in the night sky. Others are simple and easily assembled for children to get the most out of them.

In this guide, we will explore what you will want to look for in a good telescope when you decide to purchase one for the first time. We only wish we could provide you with the power of the Hubble Space Telescope in your hands. But with this guide, you’ll be looking at the most affordable and accessible options.

For further information on the individual and more accurate parts of different telescopes, check out our guide here. Telescope

What to Look for When Purchasing a Telescope

There are some different features that you should consider when seeking to buy a telescope. However, some things could deter you from buying one as well. For instance, some telescopes and their ads talk only about the power of the telescope. Even though power can be a major feature, which you will learn shortly, generally, a telescope that has a large power ad is on the lower end of quality.

As we mentioned earlier, different telescopes are built for specific purposes; you make sure you’re looking at one that suits your needs. However, there are basic features that most telescopes will have.

Aperture

The aperture of a telescope can refer to one of two things: the objective mirror of a reflector or the objective lens of a refractor. This is the part that gives a telescope “power”. The aperture is required to let the light into the scope, and therefore, this is why it is important to look at. For most amateurs, you want a refractor around 2.4 inches to 3.1 inches and a reflector around 4.5 inches to 6 inches.

Price

With this aspect, one saying comes to mind, “You get what you pay for.” This saying is particularly the case when purchasing a telescope. There are a lot of different telescopes on the market, and some of them are more expensive than others. To tell the truth, the average astronomer does not need an extremely expensive telescope. They can observe what they want to see without spending all of the excess money. However, if you are interested in higher end astronomy, you will not be able to witness it with a lower price ranged telescope.

Mount

This part is a lot more important than most people might think. The mount connects the cylindrical object that is the telescope to the tripod. You will be able to choose between one of two types of mounts: an equatorial mount or an altazimuth mount. An equatorial mount is designed to look at the sky while the altazimuth mount is designed more like a camera tripod and can be adjusted up and down & back and forth.
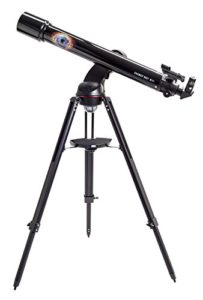
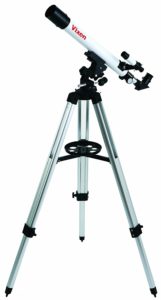
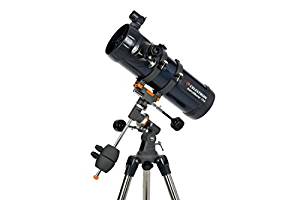
Refractor/Reflector

When light first enters a telescope, it hits the objective, which promptly redirects the light to the appropriate lens. Most telescopes will vary between refracting and reflecting lenses. A refracting telescope makes use of an actual lens called the primary lens as its objective. A reflecting telescope uses one or more curved lens to focus light in different directions to produce the highest quality image.

  1. Reflecting Telescope-Primary Mirror
  2. Refracting Telescope-Primary Lens

This is the part that holds the pieces that allow the light to come through, which lets you view the stars. Refractors come in different sizes, and they have two different lenses.

Focal Length

The focal length of the entire telescope is the total distance between the primary lens (or mirror) and the focal point of the eyepieces (where all light rays meet). With telescopes and indeed most optics, their ability to gather light everything and focus it towards your eye is everything.

  • Not all light rays approach the objective at a straight line, most are curved or bent and need to be redirected towards the eyepiece. However, these bent light rays will not hit the same focal point as the straight facing light rays do. They will hit different focal points that are parallel to the main one.
    • Where all these focal points are lined up is called the focal plane and it is here where all possible light is focused to your eye.

How does this pertain to you? Before you purchase a telescope, you’ll probably have to do a little math and determine what you want to be able to see.

Eye Relief

You probably don’t hear too much about eye relief unless you wear glasses. Eye relief is commonly known as the distance between the outermost lens (the one closest to your eye) and the pupil of your eye that absorbs the light running through the various optics of the telescope.

You’ll probably be placing your eye up close and personal with the eyepiece, but those with glasses or contact lenses will have a more difficult time with eyepieces with short eye relief. Those with glasses or contacts should look into orthoscopic eyepieces which provide a narrow and focused view uninhibited by short eye relief.

Eyepieces

Eyepieces are some of the most delicate pieces of telescopes, and it’s important you know what eyepiece you’re handling before you buy them. For this reason, we recommend you try them out in person at a store, club, or university open to the public.

For most telescopes, you only need one eyepiece, but some telescopes will have two or three to make it easier to view different aspects of the stars. For most beginners, the eyepiece is around 25mm. This is large enough to let you see what you wish to, but not too large to distort the images that you find.

  • Don’t be fooled by telescopes advertising “high power” and “high magnification”. In the end, your first telescope purchase will depend on what you want to see and how you want to see it. A “high-powered” telescope may have such powerful magnification that you can’t see what you’re looking at because it’s too bright.
    • Having an eyepiece at a “low-power” will give you a greater field of view. That is—you have a wider field to look at more than one object. This is where you can decide to swap out for a higher magnification lens. Don’t settle for just one eyepiece that is either low or high power. Having more than one is usually the norm.

When we talk about eyepieces, the term magnification often comes up as well. This is because the magnification is directly related to the focal length of the entire telescope, and the focal length of the eyepiece. To get magnification, divide the focal length by the focal length of the eyepiece you are currently using.

  • If a focal length is 2500 and the eyepiece is 25, then the magnification 100x (the “x” usually symbolizes magnification).

The smallest known eyepiece available to consumers is around 2.5mm while the largest extends beyond 60mm. Different combinations of focal lengths and focal lengths of eyepieces will yield you different sights and perhaps better quality views of the same celestial object.

  • Millimeters stand for the length of eyepieces by their diameter.

Tips and Advice

Not all telescopes are going to have the desired specifications. Before you purchase your first telescope, test its magnification and limits before looking into replacement or more powerful lenses. Since a telescope’s optics are extremely sensitive, you should handle every piece with the utmost care. We don’t want your hard earned money to go down the drain because one of the lenses has a big, dirty finger print on it!


Nikon D500 Review

Rounding out our selection of “Best Overall” in our roundup of Best DSLR Cameras is the Nikon D500, a super affordable alternative to some of Nikon’s more expensive gear (ahem, D5) with some great features.

The D500’s speed and sharpness make it a go-to choice of photographers shooting sports, wildlife, and action shots, but many outside of that sector love it for more intimate settings like weddings.

 Nikon D500

Specs

Here are some of the key specs of the Nikon D500:

  • 20.9MP DX format CMOS sensor without Optical Low Pass Filter
  • EXPEED 5 image processor
  • Multi-CAM 20K AF sensor with 153/99 AF points
  • ISO range of 100-51,200
  • 4K UHD video
  • Dual card slots – XQD and SD media
  • 2.36M-dot tilting touchscreen display
  • 180,000 pixel RGB sensor for metering and subject recognition

Powerful Performance

Prepare yourself: with continuous shooting, you get 200 frames of 14-bit RAW. The D500 has one of the fastest continuous shooting options out there – not just at this price point, but overall. For photographers who need speed without sacrificing quality, look no further. The resolution works great for the speed and doesn’t have the bulky file size that higher resolution carries.

The autofocus on the D500 is also worth noting. With 153 autofocus points and 99 cross-type sensors, the quality of AF on the D500 is fantastic. All of this comes with high ISO performance and 4K video shooting, in addition to some other sweet performance features.

Usability

The D500 has a unique tilting touch screen that makes reviewing simple, but it also makes catching tricky shots much easier thanks to the tilt mechanism that lets you hold the camera overhead or in other different locations. Professionals will also appreciate the combo XQD and SD slots, great for having different options or back-up in longer shoots.

Nikon gives you plenty of room to customize, too, as it has with other high end cameras. You can fine tune AF behaviors, customize buttons, and use the joystick for whatever function makes the most sense for your needs. Auto ISO also allows users to set thresholds and manage exposure.

Connection Options

The D500 offers unique connectivity options – such as offering both Bluetooth and Wi-Fi – but as you’ll see on any review or website, the bugs aren’t quite smoothed out yet. SnapBridge is Nikon’s new connectivity system, but many users are still reporting issues. So, it’s best not to purchase this camera with any intention of using SnapBridge or some of the other connection options right away without any problem.

Other issues, such as short battery life, are related to the still-developing connectivity options with SnapBridge and Nikon’s software, so be sure to read up on some of the tips and tricks to save battery life (for example, turning on airplane mode if you notice batteries draining too quickly).

Bottom Line

The Nikon D500 is a fantastic camera at the price point, and will be an invaluable camera for action shots and more. For many users looking to move from an entry level to the next step, the D500 is a smart choice with lots of punch.


DSLR Cameras: Canon EOS Rebel SL1 Review

Those looking to up their photography game inevitably start considering digital SLR (Single Lens Reflex) cameras. DSLR (Digital Single Lens Reflex) cameras can be complex, but users tend to find that they get the hang of things pretty quickly. Having good auto settings makes the transition easier, and new photographers can get used to the camera before moving into custom settings to elevate their practice even more.

Beginners looking into DSLR cameras tend to check out the heavy hitters first: Nikon and Canon, and for good reason. These brands are well-established leaders in photography, particularly digital. The Canon’s EOS Rebel SL1 was our pick for one of the best DSLR cameras for beginners. The Rebel SL1 is an older model that’s currently offered at a great price (under $500), making it a super affordable and accessible pick for new shutterbugs.Canon EOS Rebel SL1


Specs

Here are some of the key specs of the Canon Rebel SL1

  • 18 MP APS-C CMOS Sensor
  • DIGIC 5 Image Processor
  • 0″ 1.04m-Dot Clear View II Touchscreen
  • Full HD 1080p Video Recording at 30 fps
  • 9-Point AF and Hybrid CMOS AF II
  • Native ISO 12800
  • 4 fps Shooting for 28 JPEG, 7 Raw Files
  • 63-Zone Dual-Layer Metering System
  • Scene Intelligent Auto Mode
  • EF-S 18-55mm f/3.5-5.6 IS STM Lens


Parents’ Choice

Many of the features of the SL1 make it pretty clear who Canon’s target customer is. The “Special Scenes Mode” gives users a simple way to adjust the settings based on three common shoots: Kids, Food, and Candlelight. These modes are preset to capture the scene in just the right way, giving newbie photographers a chance to use the camera right out of the box.

Even the auto settings (without those specific shooting modes) produce nice shots, though of course they can be improved with manual settings once learned. The entire setup is user-friendly and intuitive. That makes this camera a super attractive pick for busy parents who want to take the camera out and use it – and figure out the additional features when time permits.

Creative Shooting

Those same presets and modes that make the SL1 attractive to parents also beckon other would-be shutterbugs with filters and effects. A few of the included filters are Art Bold, Water Painting, Miniature, and Soft Focus. There’s even a Miniature Effect for movies, making this a fun camera for some creative shooting.

Shooters can use those effects in Effect Shot Mode, and the SL1 will capture the image with the effect and without. And, until you figure out aperture and other settings, you can use Background Simulation to automatically blur or sharpen your backgrounds.

Design

One of the biggest appeals of the Rebel SL1 for many shoppers is its size. It is compact and lightweight, making it a great choice for users of all ages and abilities. It also functions well as an entry level Canon because you can add lenses that will work with different models (as long as you stick with the crop sensor, otherwise you might need an adaptor). The popular EF 50 mm f/1.8, for example, is an affordable add on lens that gives you beautiful portrait shots.

The interface is extremely functional, too, again making it a great option for first time DSLR users of any age or ability. The touchscreen works great and gives you direct access to all the settings you’ll need, without getting too technical. Playback is a breeze and works even in bright light.

Bottom Line

The Canon EOS Rebel SL1 will soon be replaced by the SL2, which should have some new bells and whistles. But, at a stellar price, the SL1 is worth picking up right now. Parents, budding creatives, and hobbyists will love the usability and the features, as well as the affordable lenses and intuitive interface.


DSLR Cameras: Nikon D3300 Review

Those looking to move beyond smartphone photography inevitably start considering digital SLR cameras. Beginners looking into DSLR cameras tend to check out the Big Two first: Nikon and Canon, and for good reason. These brands are well-established leaders in photography, particularly digital, making them a safe choice for new DSLR users. Nikon has a pretty loyal following, and with the perks and ease of use that come standard in their entry-level line-up, it’s fair to say they’ll keep gaining new converts.

We ranked the best DSLR cameras for beginners and Nikon’s D3300 hit the top of our list. With a budget-friendly price and a compact size, the D3300 is an excellent choice for a budding Nikon D3300shutterbug.


Specs

Here are a few key specs of the D3300:

  • 24.2 MP CMOS DX-format sensor
  • 5 frames per second continuous shooting
  • 11 AF points with 3D tracking
  • ISO 100-12800 (expandable to 25600)
  • 3 inch LCD with 921,000 dots
  • Expeed 4 processor
  • 1080/60p HD video
  • 700 shot battery life

Newbies Rejoice

The D3300 continues to be an attractive choice for new photographers for a number of reasons. For newbies, the interface and overall design are pretty intuitive, and the look and feel in general just make it easy to pick it up and start shooting. The auto features produce nice shots, which can get you by until you get the feel for the different settings and features. All of this combined makes for a DSLR that isn’t overly intimidating.

It also makes for an attractive entry-level camera because the capture speed is good for this class of cameras. Many of those considering a move to DSLR are parents – the speed on the D3300 works pretty well for catching shots of those kids who just won’t sit still.

Bells & Whistles

Some of the extra features on the D3300 make it attractive to those target customers, too. The Effects modes, for example, offer some fun options like Super Vivid, Miniature, and Easy Panorama. Again, for beginners, this offers a ton of new potential. Shooting in Effects modes is easy, so it gives new users even more practice with this light-weight, intuitive camera.

The D3300’s video feature is also a nice addition. Video shots look great and even end up being decent in low light. With 1080/60 HD, you’ll get sharp details and vibrant colors, and up to 20 minutes of video capture time.

Consistency

While any of the “best” DSLRs are going to produce consistent shot quality, the D3300 is good for beginners because of the consistency not just in shooting, but in use.  Nikon’s technology is known for shooting quality at high ISOs, and the D3300 has a decent autofocus for being an entry-level camera. What this means for beginners is that you’ll see a lot of good practice shots even as you’re figuring out what all the terms mean and what the settings will do.

Nikon’s cameras offer consistency across models, which makes for a relatively simple transition when upgrading to a higher model. Nikon has fairly good consistency with lens investments, too, so additional lenses or other accessories you purchase for the D3300 should carry forward (of course, always check with the manufacturer to be sure).

Not Just for Newbies

Many photographers also keep the D3300 around even when they upgrade, or even purchase a D3300 as a backup. With great quality and plenty of features, professionals find the D3300 to be a nice addition to their lineup. Plus, the lighter weight and user-friendly body design provide a nice break from the much heavier higher-end models.

There’s a lot to love about the D3300, and at the price point and given its lightweight feel, it will likely be a backup camera pros will actually use.

Bottom Line

For individuals looking to make the move to DSLR, the Nikon D3300 is an excellent choice. It’s affordable, produces high-quality shots, and can shoot right out of the box.


Canon EOS 5DS Review

The Canon EOS 5DS nabbed one of our top “Best Overall” slots thanks to its superior high resolution offering – in fact, it offers the highest resolution of any full-frame camera. It’s that fantastic resolution that makes the 5DS so highly regarded in the lineup of DSLR cameras.

The Canon EOS 5DS comes in two versions: The 5DS and the 5DS R. The only difference between the two models is the R version includes an optical self-canceling filter.Canon EOS 5DS

Specs

Here are some of the top specs of the Canon EOS 5DS:

  • 50.6 megapixels CMOS sensor
  • 5 fps continuous shooting
  • ISO 100-6400
  • 1080/30p video
  • 61-point AF module with input from 150k pixel metering sensor
  • Dual Digic 6 processors
  • 3.0″ 1.04M-dot LCD
  • CF & SD slots (UHS-I compatible)
  • M-Raw and S-Raw formats
  • 30MP APS-H crop and 19.6MP APS-C crop modes
  • USB 3.0 interface

Max Resolution

The format, function, and design of the 5DS clearly illustrate the intended photographers for this model. This camera is best for landscape, architecture, and portrait shooting – shoots where resolution matters, and speed and ISO range matter less.

The overall quality of the images the 5DS produces does not disappoint. Images are rich, sharp, and show detail beautifully. This makes the 5DS an excellent camera for enlargements, gorgeous portraits, and professional prints.

Artistry and Technique

The Canon EOS 5DS is truly a camera for experts. The emphasis is on technique and gear, but the outcome, of course, is stunning. Many creative users and designers, as well as landscape photographers and more, will find the resolution and other perks of this model are well worth the larger file sizes. Still, it lacks the ability to shoot 4K video, which some users have pointed out as being a missed opportunity, especially for users like wedding photographers.

Despite that miss, the overall feel of the 5DS is that it is all business. In addition to functionality and the focus on pixels, the added technology of the shutter delay feature helps to practically eliminate all chances of vibration – critical for shots like long exposure or other instances when even minute details matter.

Advanced Features

Many users are comparing the 5DS to the 5D Mark III, but whichever model you’re comparing it to, you’ll find that Canon definitely focused on updating the technology and features of this, most likely in order to take on medium-format cameras. The 5DS is more cost effective than many of those pricier models, and it’s not just the ridiculous pixels that make it a competitive offering.

One of the coolest new features of the 5DS is the new metering system. Shooting in bright daylight proves to be no problem for this camera. Canon also added time-lapse to the EOS 5DS, making it simple to use in camera. Users will also love the silent shutter. These are just a few of the new and advanced features offered on the 5DS.

Bottom Line

The Canon EOS 5DS isn’t for everyone, but for those who fall into the niche, you’ll be blown away by the resolution. The price is nice for a medium-format camera, especially (yes, we’re going to say it again) given the high resolution that no other camera can match.

Review of Canon EOS 5D Mark IV

Canon’s 5D series is well known and well loved, and the EOS 5D Mark IV adds itself to the lineup of excellent cameras. We think that the only Canon camera better than the Mark IV is the flagship D5. Price-wise, there isn’t much difference between the two. Having said all of that, the 5D Mark IV offers some differences that will appeal to many.

There are plenty of reviews of the 5D Mark IV out there, but we want to cover some of the basic takeaways for this camera to get you started.canon EOS 5D Mark IV

Specs

Without further ado, let’s take a look at some of the most attractive specs of the Mark IV

  • Full-frame CMOS sensor, 30.4MP
  • DCI 4K video capture
  • 61-point AF system with 41 cross-type sensors
  • ISO 100-32000 (expandable to 102400)
  • 7 fps continuous shooting
  • Dual Pixel Raw
  • 150,000-pixel RGB+IR metering sensor
  • 3.2-inch touchscreen

Dual Pixel FTW

There’s a lot of talk about the differences between the Mark III and the Mark IV. There are some design improvements (like better weather sealing) that are worth noting, and several updates that make the Mark IV an upgrade if you’re coming from the Mark III. One of the features we are most excited about on the Mark IV is one you’ll notice no matter which camera precedes this one: the advanced AF system.

The 5D Mark IV boasts the Dual Pixel AF technology. The overall autofocus in live view and stills shooting is a huge improvement over previous models and is just an all-around winner for this price point. The Dual Pixel Raw gives options like image micro-adjustment, bokeh shift, and ghosting reduction.

Monitor: Good, but Still Lacking

The LCD monitor offers a beautiful display, full touchscreen interface, and excellent responsiveness. However, as many have noted, it’s unfortunate that Canon did not add tilt screen. The touchscreen works really well, and overall, it’s easy to customize it. But it does still incite confusion, at least in the button customizing, a problem reported with many of Canon’s cameras.

Video Options

Canon made a smart move on the Mark IV and added 4K video. However, as many users have pointed out, it’s rather limited. The setup makes it simple to grab stills with good results. The Dual Pixel autofocus translates fantastically to video, especially subject tracking. With many photographers using video more frequently on their cameras, this is an overall good addition to the Mark IV, but still a bit flawed.

Versus the 5DS

One of the key differences between the 5DS and the Mark IV is that addition of 4K videos. That will likely be a deal breaker for many shoppers. In terms of resolution, the 5DS has the advantage (50.6 compared to the Mark IV’s 30.4). The Mark IV’s big advantage is the fantastic AF, but minute differences in speed, fps, and ISO will more than likely be the tipping factor. Between the two, it really depends on your preference, but you honestly can’t go wrong with either camera in our opinion.

Overall Thoughts

If you’re planning to drop over $3000 on a DSLR camera, you’re obviously going to do a lot more research. However, we think the EOS 5D Mark IV is worth considering. At the price, and given the technology it shares (and often surpasses) in other more expensive cameras, it won’t disappoint. It’s definitely among the best cameras out there for a number of reasons – keep it high on your list.