
Buyers looking to purchase a thermal imaging camera should consider a number of factors before making a final decision. Especially those who are not sure what they should look for, there are a
number of useful tips that can help anyone make the right choice based on his or her individual needs and budget. In general, some of the factors that should go into your camera selection include built-in features, portable vs. fix mounted and whether your selection has the appropriate software needed for an application.
Although many buyers already understand thermal imaging and have an idea of which brand they may prefer, some buyers are completely new to the industry and require additional information to make the best decision possible. As far as brands go, FLIR and Fluke are the most well-known and reliable options. Each has a vast selection of cameras from which to choose.
Best Thermal Camera for Home Inspections
Extech i5 Thermal Imaging Camera
Ideal for facility maintenance and home inspections, the Extech i5 Compact Infrared Thermal Imaging Camera (seen above) is compact and fully automatic. Its ease-of-use makes it a popular choice among buyers with little or no experience using a thermal imaging device. As one of the smallest and lightest thermal cameras on the market, this powerful tool features intuitive one-handed operation. It also includes a high-resolution, 2.8-inch LCD color screen and a rechargeable lithium-ion battery.
The included QuickReport software aids in the sharing and analysis of radiometric images. In fact, each image can be organized and analyzed. The software enables users to drag and drop images, add text comments and add a company logo to inspection reports.
Additional Extech i5 Thermal Imaging Camera Features and Benefits
- Rugged body
- Includes a two-year limited warranty
- Has a storage capacity of up to 5,000 images
- Helps to quickly find problems and evaluate work
Find Problems, Evaluate Work and Schedule Repairs
Home inspectors can use the Extech i5 Thermal Imaging Camera to see things that are not readily visible to the naked eye. The camera can detect and reveal minor temperature variations that may signal moisture problems and electrical failures. In addition, the Extech i5 weighs a mere 12 ounces and easily fits in a tool kit, pocket or belt.
Best Thermal Cameras for Fire Fighters
As a firefighter, safety is key when performing essential job functions. That is why it is important for firefighters to utilize high-quality thermal imaging devices that are specifically designed for the unique working conditions of firefighting crews.
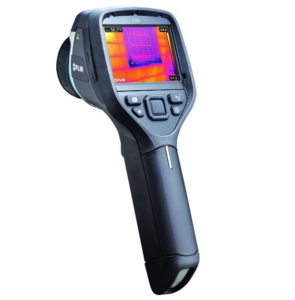
FLIR K2 TIC with MSX
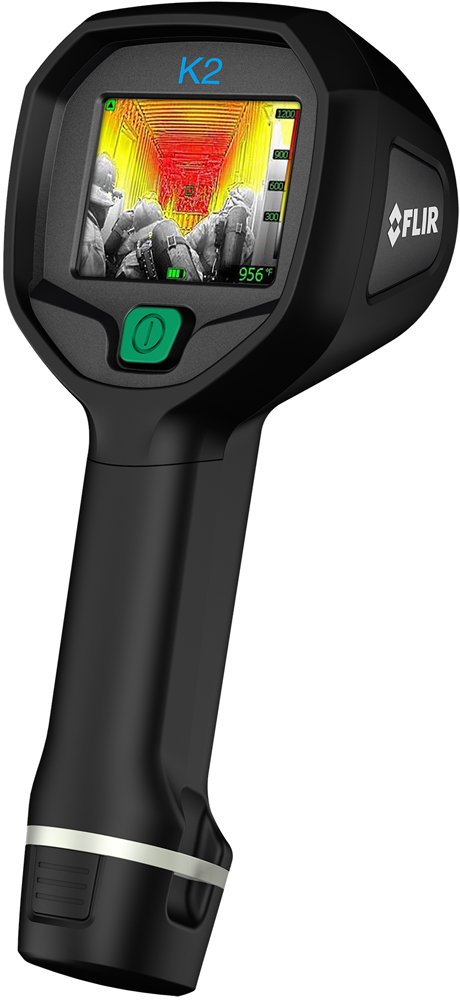
The FLIR K2 TIC with MSX is a high-quality thermal imaging camera designed for ease-of-use and affordability for firefighting crews. This camera possesses all the ruggedness, capability and reliability every firefighter needs to stay safe on the job.
FLIR K2 Thermal Imaging Camera Features
- Uses FLIR’s patented MSX technology
- Compact and easy to attach to turnouts
- Includes a bright LCD and intuitive interface
- Can be used for multiple firefighting applications
- Equipped with seven different thermal imaging modes
- Engineered to survive tough conditions, including withstanding a 2-meter drop onto concrete
FLIR K33 & K53
The FLIR K-series is easier-to-use and more affordable than many other cameras of its kind. Without sacrificing reliability, clarity or performance, both the K33 and K53 include FLIR’s FSX™ Flexible Scene Enhancement. In addition to the camera’s ability to intensify structural and textural details in thermal images, these cameras help improve awareness in a given situation to provide firefighters with an increased sense of safety and confidence while on the job.
As the camera of choice for buyers looking for high image quality without all the extras, the K33 and K53 models both power on ready to go. Not only can this save time on the job, but also firefighters can focus on their immediate challenges rather than wasting energy setting up his or her thermal imaging device.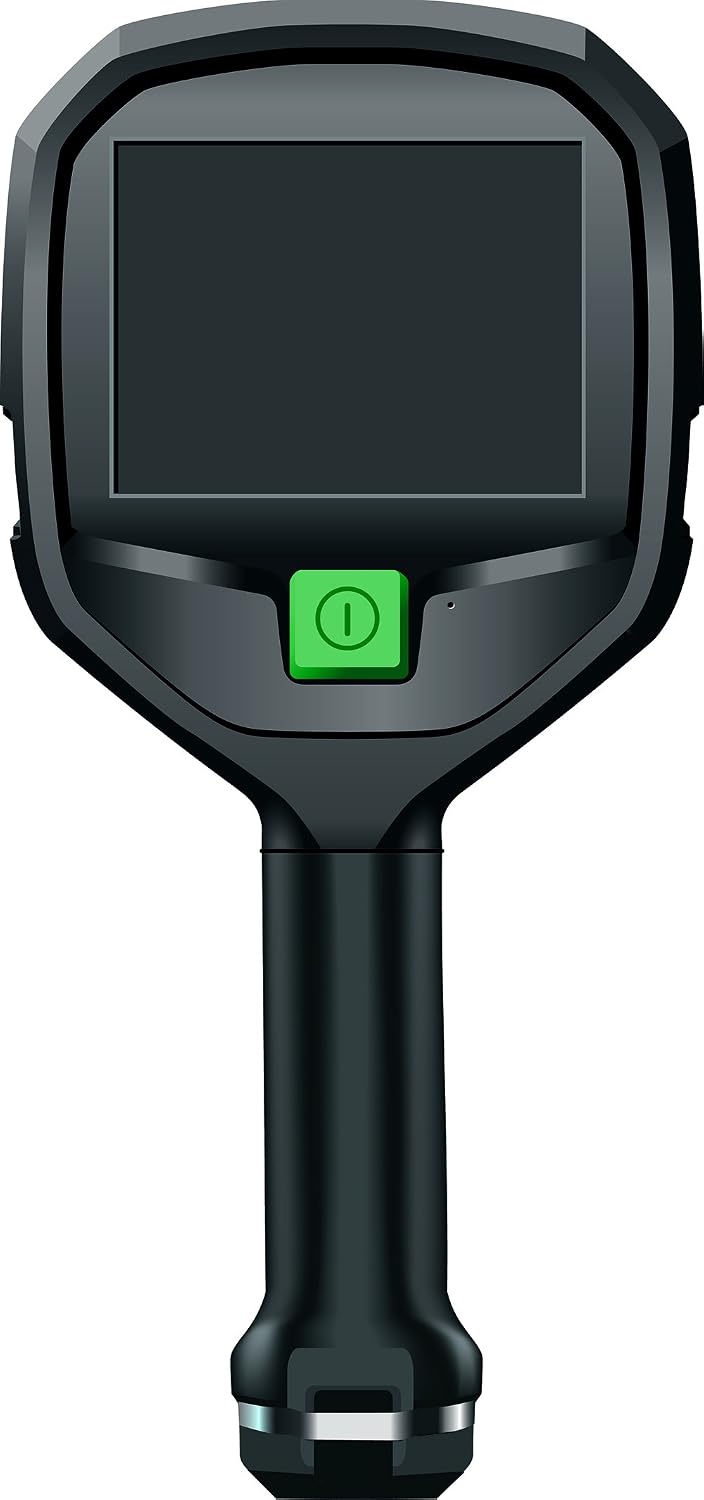
FLIR K33 & K53 Features
- Includes a two-bay charging station
- Both cameras include FSX Flexible Scene Enhancement in real-time
- Equipped with one on/off button starts the camera in TI-Basic mode
- Freezes an image on the K33 or captures stills and video on the K53 with the easy pull of a trigger
- Designed for high resolution that includes the following:
- The K33 resolution of 240 x 180 matches the resolution of the K45 cameras
- The K53 resolution of 320 x 240 is equal to the image quality of the K55 and K65
cameras
Additional FLIR K33 & K53 Features and Benefits
- Comes with multiple color palettes
- Equipped with automatic heat detection capability
- Allows for regional adjustments that include units, date and time formats
Best Thermal Cameras for Electrical Inspections
Electrical contractors understand the importance of having the tools required to get the job done right. As a leading brand, FLIR offers a wide range of thermal imaging solutions designed to help contractors complete their work safely and efficiently. Not only can these cameras help detect problems, but they can also help electrical professionals prevent outages and shutdowns.
Accurate Temperature Measurements
In addition to revealing the specific location of heat issues, thermal imaging devices provide an accurate way to measure temperatures without requiring the contractor to touch the source of the problem. Not only does that help create a safer working environment, but it also makes the process easier and less stressful for every worker on the job.
FLIR’s selection of lightweight handheld infrared cameras comes in a variety of shapes and sizes. While some can fit easily in a tool belt, others are full-featured, high-resolution options that can help any electrical contractor gain an edge in the industry.
FLIR TG165 Spot Thermal Camera
With a spot ratio of 24 to 1, the FLIR TG165 Spot Thermal Camera can help electrical professionals discover temperature problems often missed by standard radiometers.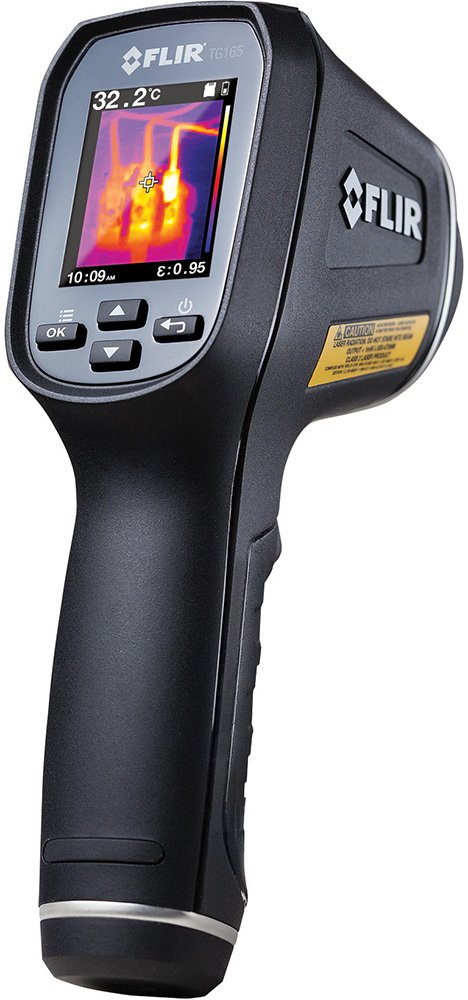
FLIR TG165 Spot Thermal Camera Features
- Simple to operate
- Fits every budget
- Rugged and reliable
- Targets the right spot
- Great for HVAC inspections
- Has a spot ratio of 24 to 1
- Can withstand a 2-meter drop
- Includes intuitive menu icons
- Equipped with dual laser pointers
- Proven to have true thermal detection
- Made with a portable, ergonomic design
- Comes with a tripod mount and lanyard connection
- Created by the world leader in thermal technology
- Stores images and data on a removable micro SD card
- Equipped with FLIR’s exclusive Lepton® micro thermal camera
- Has a convenient pull trigger that activates lasers and freezes images
- Includes a mini USB port for charging the battery and downloading images
FLIR TG165 Spot Thermal Camera Benefits
- Detects mechanical overheating
- Designed with rugged durability
- Aids with predictive maintenance
- Measures temperature more accurately
- Helps workers stay safer and more aware
- Assists with detecting refrigeration issues
- Helps the contractor see heat issues clearly
- Allows the contractor to troubleshoot quickly
- Allows for the documentation of work performed with images
- Perfect for finding hot fuses and troubleshooting electrical issues
- Includes a two-year product warranty with a ten-year thermal imaging detector
warranty when registered within 60 days of purchase
FLIR TG167 Spot Thermal Camera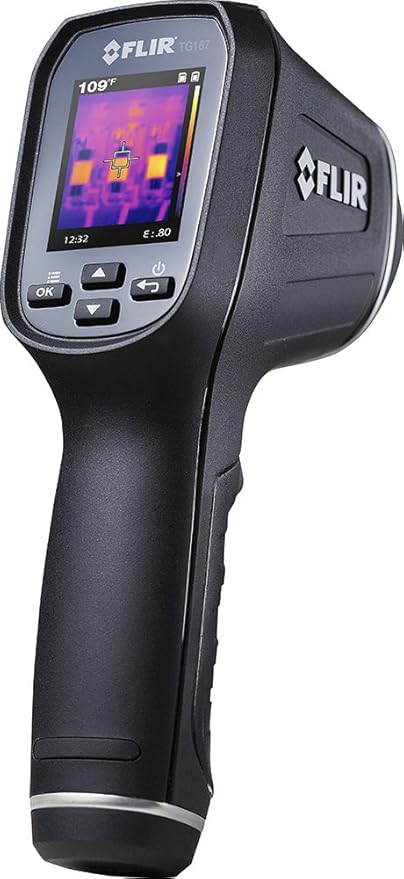
The FLIR TG167 Spot Thermal Camera closes the gap between a single spot infrared thermometer and FLIR’s other thermal camera options. With the FLIR TG167, electrical contractors can see the heat easily, which means they will know where to measure it.
TG167 Spot Thermal Camera Features
- Grab and go simplicity
- Has a 24:1 spot size ratio
- Stores images and downloads data
- Designed for the harshest environments
- Includes FLIR’s exclusive 2-10 warranty
- Designed for indoor electrical inspection
- Instantly shows what is hot and where to aim
- Includes FLIR’s Innovative Lepton® IR Imaging Engine
- Equipped with FLIR’s exclusive Lepton® micro thermal sensor
FLIR TG167 Spot Thermal Camera Benefits
- Rugged and reliable
- Eliminates blind guesswork
- Great for electrical troubleshooting
- Built to withstand a two-meter drop
- Compact for easy storage in a tool bag
- Reveals the heat for accurate measuring
- Easily saves images and data for documentation
- Intuitive to operate with no special training required
- Downloads images fast over USB or from removable micro SD
- Enables a contractor to fire it up and get to work in seconds
- Perfect for showing customers images and including in reports
- Provides quality image detail on even small connectors and wires
- Helps contractors easily find unseen hot and cold spots in electrical cabinets or switch boxes
Best Thermal Cameras for Leak Detection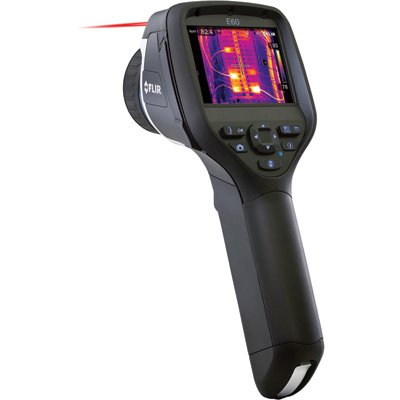
FLIR E-Series and E-Series bx
Now, with MSX, FLIR’s advanced thermal imaging camera performance continues to get better with each new development. Not only can the FLIR E-Series and E-Series bx cameras enable efficient troubleshooting, but they also help leak detection professionals create detailed reports easily and share images faster.
FLIR E-Series and E-Series bx Features
- Includes a WI-FI app
- Includes optional lenses
- Has an auto screen orientation
- Includes FLIR Tools mobile app
- Can add more measurement tools
- Includes simple touchscreen tools
- Can add up to three moveable spots
- Connects to smartphones and tablets
- Can help expedite critical decisions
- Includes MSX thermal image enhancement
- Allows live streaming of thermal video
- Capable of importing radiometric JPEG’s
- Has a dark precision touchscreen interface
- Enables one to adjust contrast and color easily
- Includes optional optics and full focus control
- Equipped with FLIR E-Series Infrared Camera WI-Fi
- Equipped to email findings directly from the field
- Easily helps contractors package images in reports
- Allows co-workers to watch along as leak detection occurs
- Lets you switch between portrait and landscape view without affecting the upright
position of the temperature measurement overlays
Additional FLIR E-Series and E-Series bx Features and Benefits of E40, E40bx, E50, E50bx, E60 & E60bx
- Provides extra visible detail for MSX enhancement
- Equipped with LED lamp and laser pointer for lighting dark settings and marking locations in photos
- Higher thermal sensitivity at <0.045°C allows for easy detection of subtler temperature patterns
- Higher temperature range (up to 650°C or 1,202°F) enables the accurate measurement of hotter-running equipment
- Bluetooth communication sends data from MeterLink-enabled clamp and moisture meters to the camera, embedding it into thermal images
Black & Decker TLD100 Leak Detector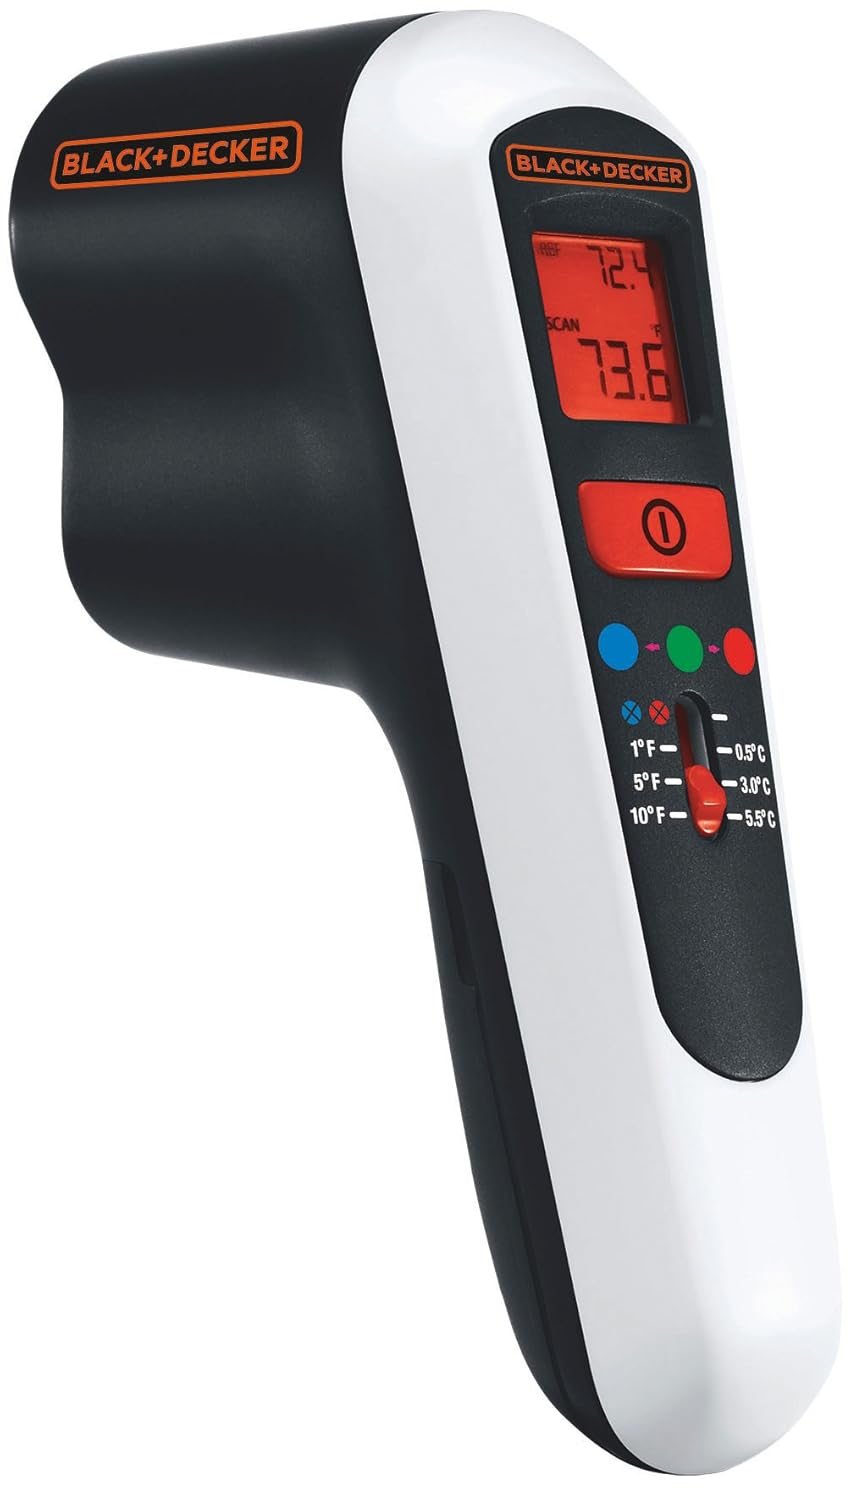
Although most people do not realize it, the average house has a significant amount of leakage. In fact, although heating and cooling accounts for approximately 50-percent of most people’s energy usage, their leaks and drafts can significantly increase the amount they spend on heating and cooling. That is why it is important to find a high-quality thermal leak detector like the Black & Decker TLD100.
In addition to the detector’s ability to find leaks along walls, duct work and molding, it can also provide intuitive feedback to the user when it comes to finding the right location to place insulation or caulk for best results. With this device, anyone can increase the efficiency of their home’s insulation.
Black & Decker TLD100 Thermal Leak Detector Features
- Equipped with a red light to indicate warmer spots
- Equipped with a blue light to indicate cooler spots
- LCD screen displays temperatures in either Fahrenheit or Celsius on the LCD screen
- Designed to select multiple temperature tolerances, including one, five and ten degrees
Black & Decker TLD100 Thermal Leak Detector Benefits
- Helps identify problem areas
- Can be used to diagnose engine misfires
- Aids in checking for leaks around windows and doors
- Can be used to check refrigerator and freezer settings
- Helps uncover hidden leaks caused by insufficient insulation
- Equipped with an easy-to-read color coding system and screen
- Identifies weak spots that often lead to high heating and cooling costs
Best Budget Thermal Cameras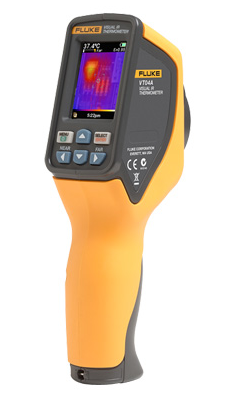
Fluke Visual Hand-Held
Created with solid technology, the Fluke Visual Hand-Held Infrared Thermometer & Imaging Camera is a quality thermal imaging thermometer and camera designed to meet a wide range of needs. Not only is this camera affordable, but it is also versatile, easy to use and made to last.
Fluke Visual Hand-Held Infrared Thermometer & Imaging Camera Features
- Includes SD card memory
- Able to scan between -10˚ and 250˚ Celcius
- Equipped with a wide range of temperature detection
- Great for the purposes of leak detection and inspection
- Includes a degree of precision that is within several degrees in either direction
Fluke Visual Hand-Held Infrared Thermometer & Imaging Camera Benefits
- Designed with adjustable emissivity
- More accurate than a standard temperature gun
- Enables blending from full visual to full thermal
- Blends real-world imaging with the thermal detection unit
- One of the most affordable thermal imaging thermometer camera combinations on the market
Thermal Imaging Takes on a Whole New Market
Once only used by professionals needing to detect temperature, thermal imaging is beginning to take on a whole new life. In fact, although smart phones do not currently come equipped with built-in infrared cameras, anyone can purchase an infrared camera add on for their own mobile device.
Thermal Imaging Devices for Smart Phones
In today’s society, most people carry their phones with them at all times. It’s no wonder that more people are finding beneficial uses for thermal imaging capabilities on their android devices.
FLIR ONE Thermal Imager for Android
A lightweight accessory designed to transform an android device into a powerful infrared camera, the FLIR ONE Thermal Imager for Android displays live thermal infrared images by using the FLIR ONE app. With the app, temperature variances can be measured, captured and shared as thermal images and videos.
FLIR ONE Thermal Imager for Android Features
- Comes with a protective case
- Features automatic shuttering
- Has its own internal battery
- Equipped with a built-in battery
- Possesses patented MSX Technology
- Includes a power/status indicator
- Includes Lepton thermal camera module
- Non-contact spot temperature measurement
- Operating temperature: 32°F to 95°F (0°C to 35°C)
- Scene temperature range: -4°F to 248°F (-20° to 120°C)
- Weighs 2.75-ounces with dimensions of 2.8 x 1 x 0.7-inches
- Comes equipped with a micro-USB connector for Android phones
FLIR ONE App Features
- Includes a thermal time-lapse
- Has the ability to take thermal panoramas
FLIR ONE Thermal Imager for Android Benefits
- Easy to carry
- Lightweight and compact
- Offers superior image quality
- Conserves its own battery life
- Designed to be sleek and practical
- Automatically switches to low-power mode when inactive
- Lets the user know when its fully charged or running low
- Technology that allows for no reduction in handset battery life
How They Work
When using a thermal imaging camera, the image produced is frequently called a thermogram. It is analyzed through a process called thermography. As sophisticated devices that process the captured image and display it on a screen, thermal imaging camera images can be used for a number of things. They can assist in the immediate diagnosis of a potential problem, or they can be processed through specialized software for further evaluation. Instead of providing a number for the temperature, thermal imaging cameras give you a picture that actually shows the temperature differences in an area.
What Is Thermal Imaging?
A method of improving the visibility of objects in a dark environment by detecting the objects’ infrared radiation to create an image is commonly known as thermal imaging. In addition to its ability to work in environments without any ambient light, thermal imaging can penetrate through things like fog and smoke. Most often, thermal images are gray scale in nature. However, some thermal cameras do add color to images for easy identification of objects at various temperatures. In gray scale, white objects are hot while black objects are cold. The amount of gray indicates variations between cold and hot temperatures.
Also known as, a thermographic camera or an infrared camera, this type of device is similar to a traditional camera except that thermal cameras operate in wavelengths as long as 14,000 nm rather than the 400 -700-nanometer range of typical visible light cameras.
For most people, getting the best value for the money spent is a top priority. However, depending on an individual’s specific needs and expectations, there are a number of things to look for during the search for the right camera. Some of those factors may include deciding between qualitative and quantitative cameras, deciding on specific built-in features needed for an application and whether the preferred choice is portable or fix mounted.
Qualitative vs. Quantitative
Depending on the specific application, buyers should decide which type of camera best suits his or her needs. The following is an explanation of the differences between the two:
Qualitative Measurement: Obtaining and interpreting thermal images based on thermal contrast. This helps determine the specific location of temperature variations as well as what the temperature difference is between the main target and the surrounding areas.
Quantitative Measurement: Determines the correct temperature readings of thermal images. Especially when needing to know the exact temperature of a target to determine whether it will fall in or out, the quantitative measurement is quite useful.
Built-In Features
An important factor to consider when choosing a thermal imaging camera is whether the camera has the specific built-in features needed for the particular application. The following are only a few of the many features to look for:
- Built-in alarm
- Messaging function
- Image masking function
- Digital inputs and outputs
Portable, Fix Mounted or Pan and Tilt
With a wide range of choices, thermal imaging cameras can be portable, fix mounted or pan and tilt. The good news is, with a clear understanding of the differences of each, the selection process is often simplified.
Portable Thermal Imager
Ideal for applications like research, electrical, mechanical, firefighting, building inspections, energy audits and process control, portable handheld thermal imaging cameras are typically lightweight and easy to use. Buyers should take note of the design and weight of their desired camera during the selection process. In some cases, buyers should also consider environmental protections as well as durability.
Regardless of the portable camera’s designated application, buyers should ask themselves the following questions:
- Will the camera be used for an extended period?
- What size lens is required for the specific application?
- Should the camera come with specific voice annotation capabilities?
- Does the camera battery need to hold a charge for a specific period?
Fix Mounted & Pan and Tilt
When buying a fix mounted or pan and tilt thermal imaging camera, there are a number of factors to consider as well. Buyers should ask themselves the following:
- Should the camera remain fixed at all times?
- Does the camera need to have the ability to pan and tilt?
- Will the camera be exposed to outdoor environmental elements?
Look For High Resolution Options
When setting out to purchase a thermal imaging camera, it is important for buyers to understand that the majority of these cameras have fewer pixels than most visible-light cameras. For this reason, buyers should select a camera with the highest resolution and image quality possible. Understandably, smaller budgets may limit the choices for some buyers, but each buyer should still focus his or her attention on high-resolution options that fit within their own unique budget. This is important because, in thermal imaging, the higher the resolution and image quality, the more accurate the results for showing fine details.
Thermal Imaging Cameras Make Life Easier
Whether you’re a professional looking to enhance your work performance or a home owner hoping to detect problems in your own house, finding a reliable, high-quality thermal imaging camera is a key component to getting the accurate temperature measurements you deserve. Clear images can not only make filing reports easier, but they can also help you see potential problems right away.
Buyer Considerations Review
As a buyer, it is best to seek help from a knowledgeable professional if you are not sure which camera may be the right fit for your specific need and budget. However, a few things are certain; high-quality cameras will last longer and provide clearer and more accurate images. Buyers looking to purchase a thermal imaging camera should consider a wide range of factors before making their final decision. Anyone that is not sure what they should look for can benefit from the detailed information included for each camera discussed in this review. When following these tips, anyone can make the right choice based on his or her individual needs.
New to Thermal Imaging? There’s no need to worry. Although some thermal imaging camera buyers are savvy in the industry and possess a clear understanding of thermal imaging and all that it entails, many people find it useful to conduct significant research to ensure they will make an informed decision.
Keeping Workers Safe
Whether a worker is a firefighter, electrical contractor, home inspector or leak detector, there is a lot to learn about each thermal imaging device and how it can bring the most benefits to a work place. With a well-designed thermal imaging camera, firefighters can remain safe and more confident in their job, electrical contractors can rest assured that they will not have to touch hot wires and home inspectors can relax in knowing that they got the job done as thoroughly and completely as possible.
Regardless of the specific thermal imaging camera you choose, you can experience the many benefits associated with each brand and design. You may prefer a fully equipped multi-use infrared device or a compact, but powerful camera. Either way, the main point is to purchase a thermal imaging camera that is sure to give you the most benefits for your money. Taking the first step toward getting that high-quality thermal imaging camera is easy when you understand how these cameras work, and how each one could benefit you.